Indie Film Sound Guide

🎤 FOOTSTEP SOUND PACK | 🎬 NOW ON SALE! 75% OFF!

Our FOOTSTEP SOUND PACK is now on sale!

The Film Look FOOTSTEP SOUND PACK features over 200 sounds, on 9 surfaces, in 6 types of footwear, giving you a plethora of available sound types to choose from when mixing the sound for your film.

All sound effects have been recorded in a low noise environment giving you a clean, loud sound for every single footstep. They have also been recorded as dry as possible, meaning there is no reverb baked into the sound so you can add reverb in the mix to replicate the scene on screen perfectly.

These sounds have been exclusively recorded as “singles”, meaning each step is completely individual so you can cut in and match up the steps without having to worry about creating more space between the sounds.

Every single set of footwear of every single surface has multiple performance types: light, standard, heavy, heel-to-toe, shuffles, and jumps. These have been created so you can match the performance of the actors on screen.

Is your character walking? Standard is all you will need. Are they running? Maybe go for heavy to match the high impact!

As well as creating this pack, we have also create a short series of videos showing you how we setup and recorded the footsteps, so if you want to create your own library of footsteps, go ahead!

The first video in the series shows you how to setup a DIY Foley Pit: a small pit for dumping your surface materials so you can record in messy stuff in a clean way!


1 Tip for Syncing Your Footsteps FASTER

Syncing footsteps can be a pain. Let’s be honest, they aren’t the most exciting part of sound editing, but you can’t deny how vital they are to an immerse film.

Let me show you a quick trick which will help get YOUR footstep sounds in the right place much quicker. Welcome to The Film Look.

I’m going to be using Adobe Audition today but this trick can be achieved in any sound editing application which uses markers.

Foosteps Sync.jpg

I’ve imported a shot from one of our films BACKSTAGE, and I want to begin by adding some footsteps because the production audio is noisy and unclear, have a listen…

I’ve also imported some footstep sound effects from our FOOTSTEP SOUND PACK. Here I have “Sneakers on Pavement” which should work well with our character walking in an exterior car park.

The shot I’m working with today actually has decent scratch audio to aid syncing footsteps. But let's pretend we don’t have that luxury. I’ll go ahead and delete it. What do we do now?

This is where markers can come in handy.

Foosteps Sync1.jpg

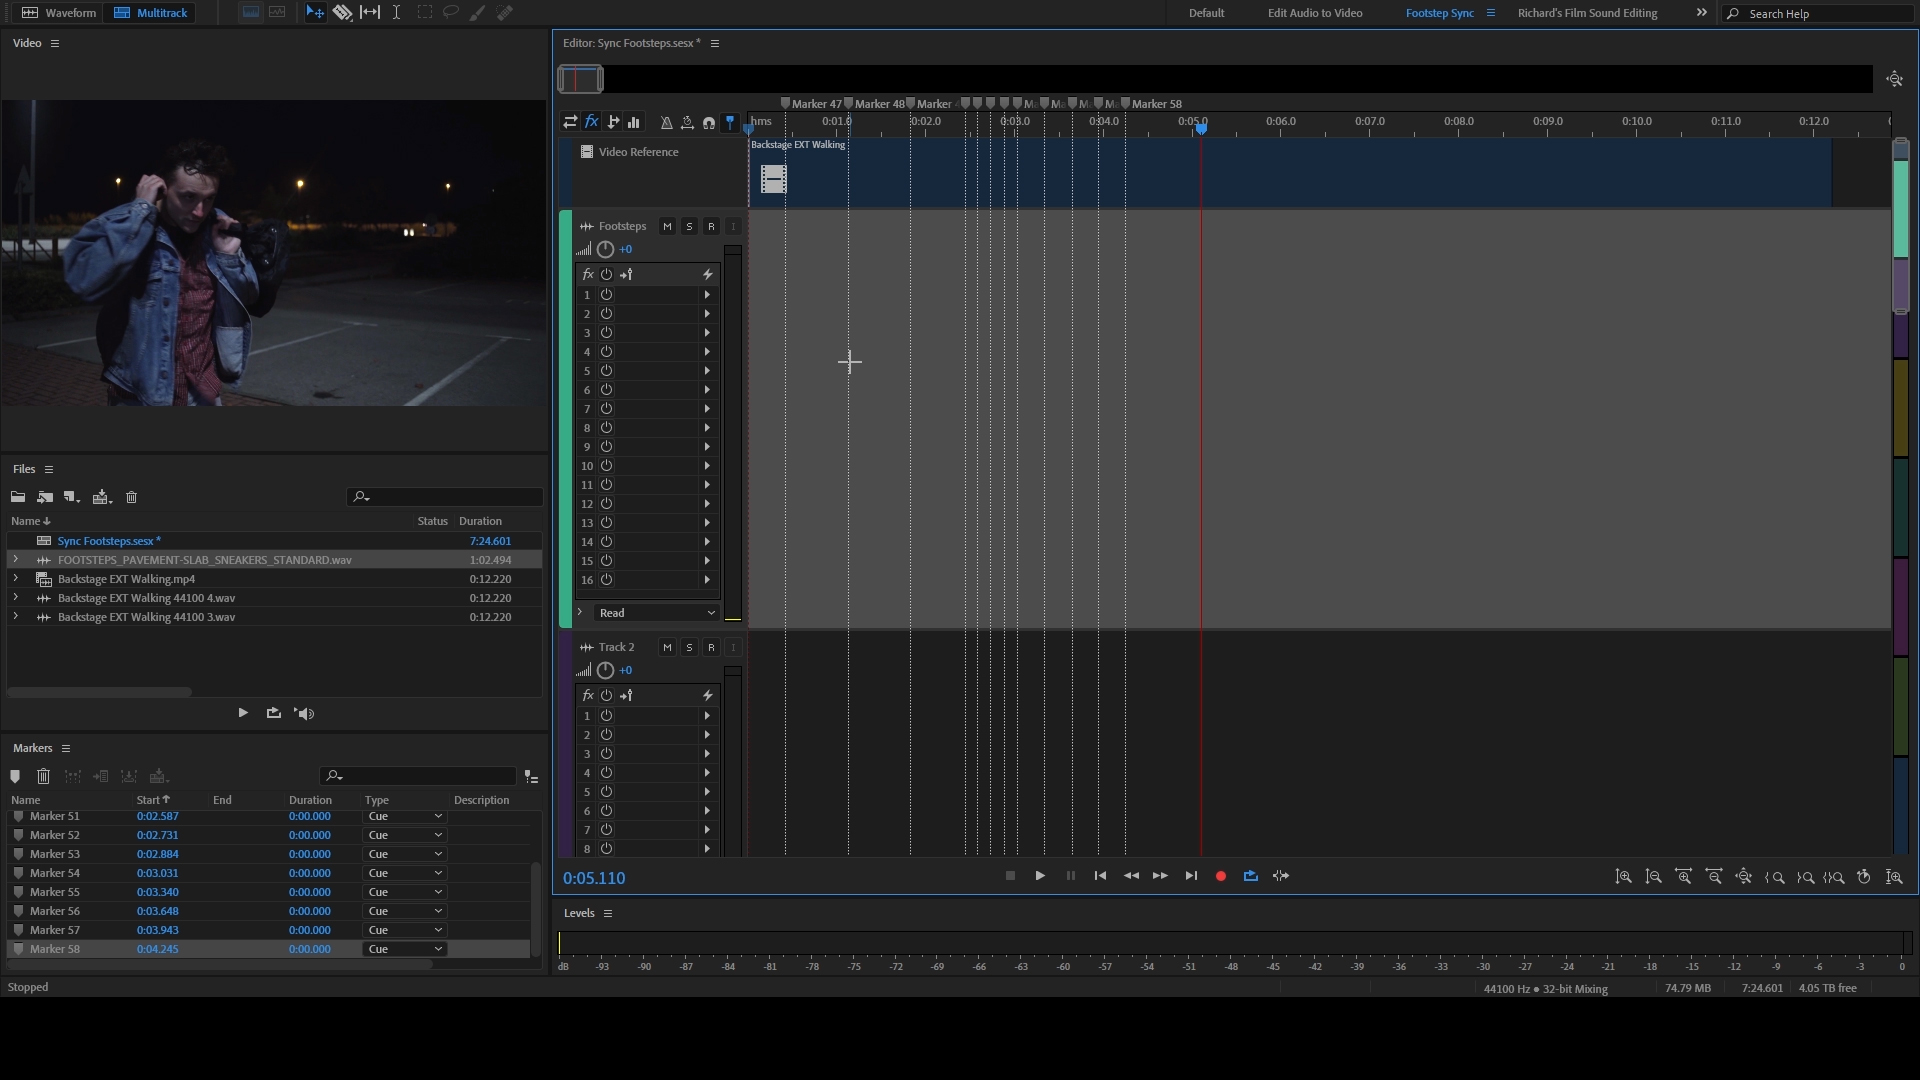
In audition you can place a marker on the timeline using the M key. We can use markers as a guide for cutting and placing in our footsteps.

Foosteps-Sync.gif

If you notice someone walking or running, they tend to keep a steady pace if they are moving for more than a second or two. We can study their pace, find their rhythm, and literally tap out the markers along with their stride.

Foosteps-Sync1.gif

I like to tap out the footsteps on my desk while watching the clip. I’ll do this a few times until I can roughly predict the rhythm. Then, once I’m ready, I hit the M key and add markers to the pace of the character on screen.

Foosteps-Sync2.gif

Once we have some markers on the timeline, we can zoom in and do some fine tuning. Most of the markers should be in-sync, but we can always go frame by frame and adjust any markers which are obviously too early or too late.

Foosteps-Sync3.gif

A footstep sound effect is made up of two major parts - attack and decay. The attack is the actual step sound itself and the decay is the tail end which fades out.

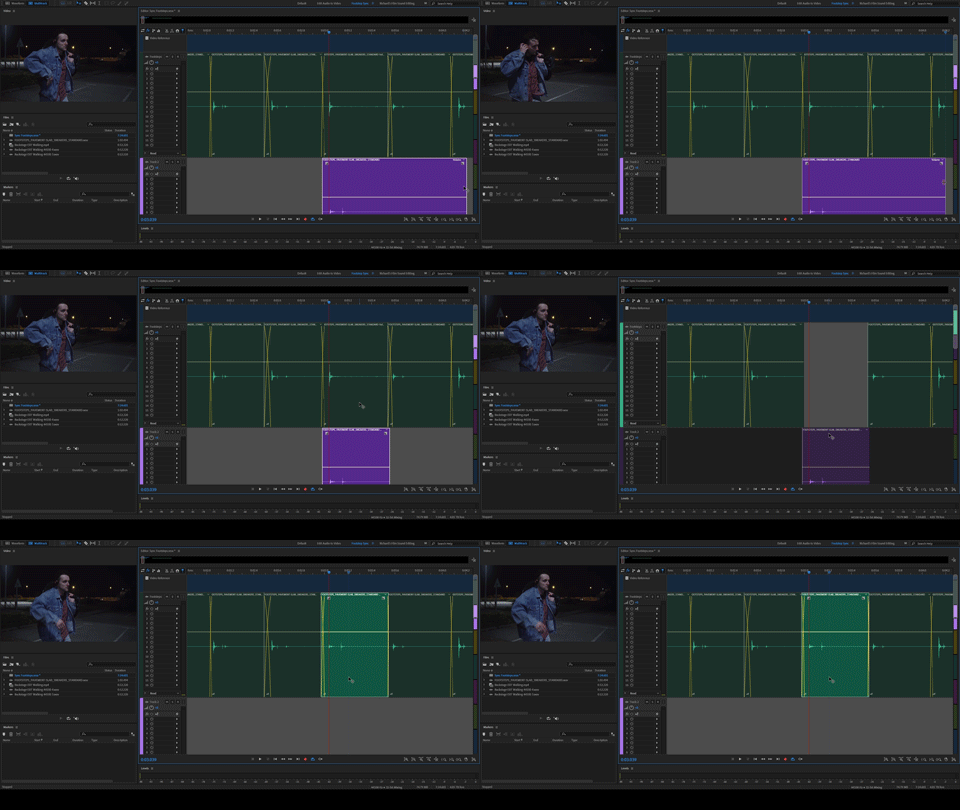
With all the markers set to the rhythm of the footsteps, we can grab our footstep sounds, trim them down, and place the attack right on the marker.

Trim the decay of each sound before it hits the next marker and then go ahead and place in the next footstep sound. Do this for all of your footstep sounds on each marker.

As you place in the sounds, make sure to extend the left side of the sound effect, known as the pre-attack, and cross-fade it into the decay of the previous sound. This will smooth over each sound effect and prevent any hard stops.

Next is fine tuning the sync; this is done mostly by your eyes and your ears. We have placed in our ground work using the markers, so we can delete these as they are no longer needed. Now it's just a case of watching the shot, listening to the footsteps, and looking out for any late or early steps.

This will take some tinkering, but if you do happen to have a scratch track from the video file with the original production audio, you can always listen to the take and try to match them.

If you can see the character’s feet, find the moment they make contact with the ground, and try to match each footstep sound to the image.

But, I find this doesn’t always work. Sometimes it’s better to just watch the edit and follow along. You’ll probably notice when a footstep is too early or too late.

Foosteps-Sync4.gif

You also might notice some footstep sounds are too strong or weak sounding for the step in the image. This is a simple fix. Just look for a step which has a stronger or weaker attack sound and replace the ill-fitting step.

Obviously right now the footsteps themselves don’t sound very realistic. They are very tappy. You can add a bit more grit to a footstep by adding a very subtle shuffle sound underneath.

Our FOOTSTEP SOUND PACK includes shuffle sounds on every surface using most footwear. Links in the description.

Foosteps Sync2.jpg

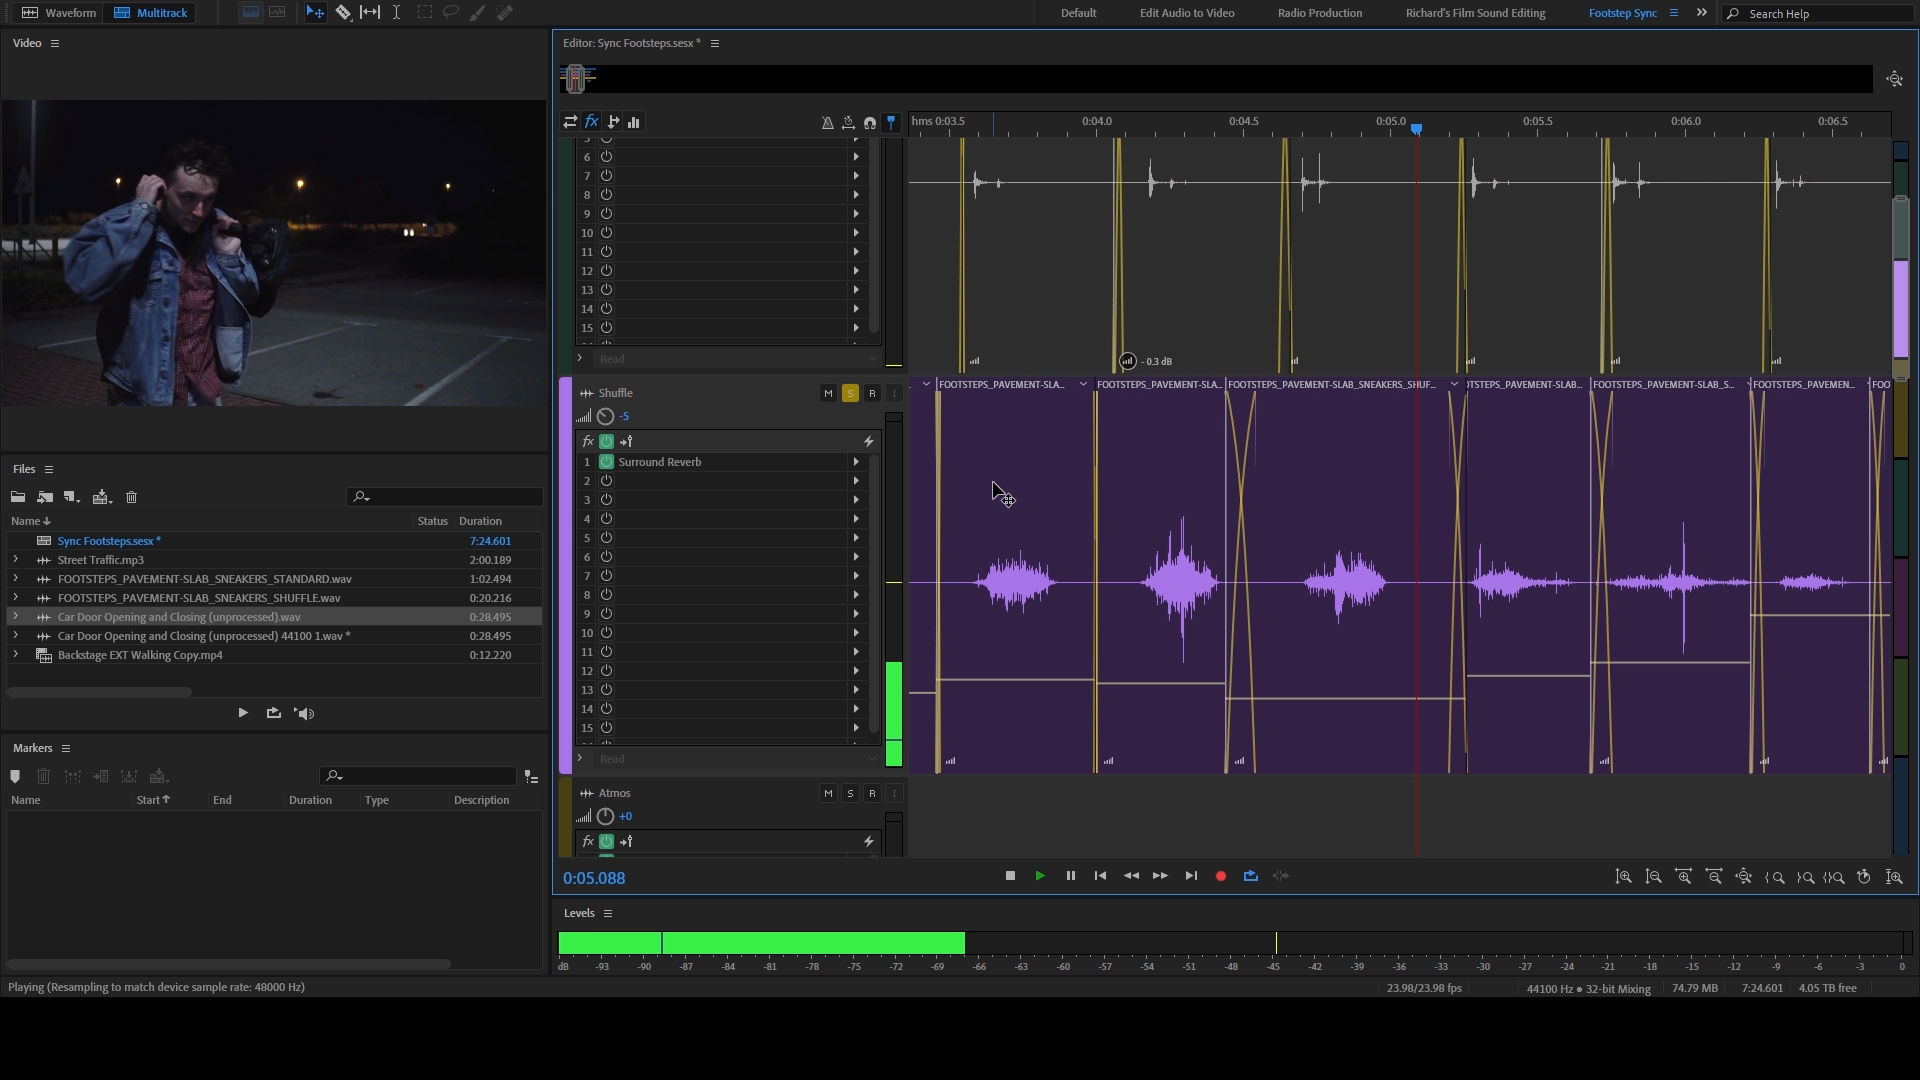
Here you can see I have essentially layered the shuffles under the footsteps. This will stop the footsteps from sounding so tippy tappy and will give us a sense of rubble or grit on the ground in the car park.

To quickly finish off the scene here, I have added a touch of reverb to the footsteps, added some street noise, a car door sound, and mixed it together.

Let me know if you found this video helpful in the comments below. I will be producing more episodes like this one in the future, so get subscribed if you haven’t already. And remember to achieve it one shot at a time.


🚀 https://www.thefilmlook.com/store - Step up your sound game with our FOOTSTEPS SOUND PACK. It features 200+ sounds, 9 surfaces, and 6 types of footwear, perfect for your next film project.

🎬 In case you missed it

How to Build a DIY Foley Pit: https://youtu.be/zO2hx7iToNY

$600 Mic vs $60 Mic: https://youtu.be/2VK6lYkK2AM

How to Mix Sound for a Short Film: https://youtu.be/7x5SnoftgUw

How to Record BETTER Footstep Sound Effects: https://youtu.be/vQ8bnF-OWSA

🎧 Listen to our Podcast!

iTunes: https://goo.gl/hikhGF

Android: https://goo.gl/fmsp4s

📞 The Socials

Website: http://thefilmlook.com

Twitter: https://twitter.com/TheFilmLook

Facebook: https://www.facebook.com/TheFilmLook

Instagram: https://www.instagram.com/thefilmlook


DISCLAIMERS:

Some of these links are affiliate links, if you purchase gear via these links The Film Look will receive a small commission, but there will be no additional cost to you. Thank you!

5 Tips to STEP UP your Foley Game!

Foley is the dark horse of filmmaking. It turns your film from “pretty good” to “polished”.

After creating foley for the last 5 films on this channel, I’ve learned a few tricks which will help YOU record some great foley for your films. Welcome to The Film Look.

DIY-Foley-Pit2.gif

Number one: footsteps are never alone.

If you’ve done any foley for your film, I imagine you’ve recorded or edited some footstep sounds. Footsteps are the most obvious run-of-the-mill sound effects to add into your scene, and usually I will tackle these first, but they always sound better when they are layered with other foley.

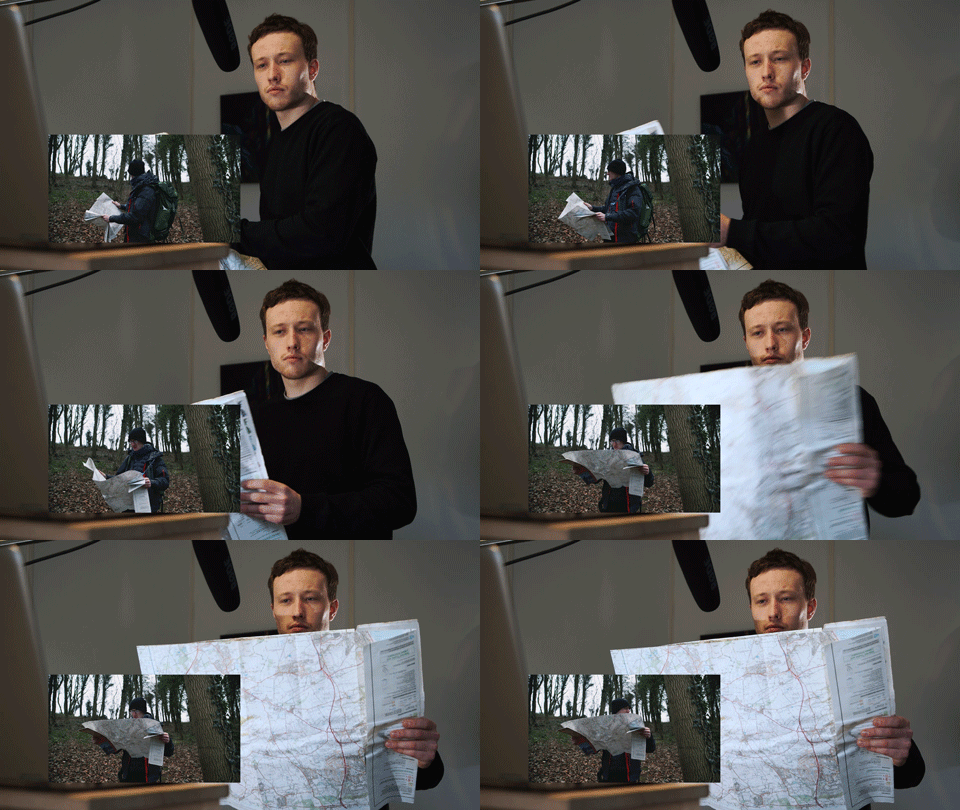
What I like to do is breakdown the possible sound elements associated with each character in the scene. Let's take this example called “Lost in the Forest” which we filmed for this foley series!

The character produces sounds from his footsteps, his coat, his backpack, and his map. These are all moving as he walks and they will produce their own sound effects, so if we record each of them and layer them into the scene, it turns it from this into this.

Recording-Foosteps2.gif

Which brings me onto Number two: how to record clothing foley!

When I first started recording foley, I used to wear the clothing and try to move around and mimic the character on screen. This doesn’t produce a clear enough sound to layer in with everything else. I found you need to exaggerate the noise to be effective.

5-Tips-to-STEP-UP-your-Foley-Game!1.gif

So take off the coat and bunch it up into a loose ball in front of the mic. Instead of mimicking the actual steps, just mimic the swing and movement of the character.

5-Tips-to-STEP-UP-your-Foley-Game!.gif

The clothing will produce some unique sounds depending on how you handle it, so experiment and try to find something which fits the scene.

Number three: accurate handling!

The next thing we need to record is the paper map. A prop like this can produce a million and one different sounds just by the way it's being handled. A map being crushed sounds very different to a map being folded, so this is where accurate mimicking comes in!

5-Tips-to-STEP-UP-your-Foley-Game!3.gif

If the character has the map out on display and is climbing down the hill, mimic that movement as close as you can by opening up the map and lightly bounce it up and down. If the character holds the map out and swings it, do the same thing. Don’t record generic foley; it never sounds good! Get particular and mimic the actions as accurately as possible.

5-Tips-to-STEP-UP-your-Foley-Game!4.gif

Number four: beefing up the props!

With something like a backpack, it would be easy enough to grab an empty rucksack and shake it around in time with the character on screen. This may sound okay, but it doesn’t sound at all interesting.

5-Tips-to-STEP-UP-your-Foley-Game!5.gif

Instead, you can beef up the sound of the prop by adding weight. This will help create a great sound when it swings around because of things like velocity and inertia.

That’s right - science is audible!

5-Tips-to-STEP-UP-your-Foley-Game!6.gif

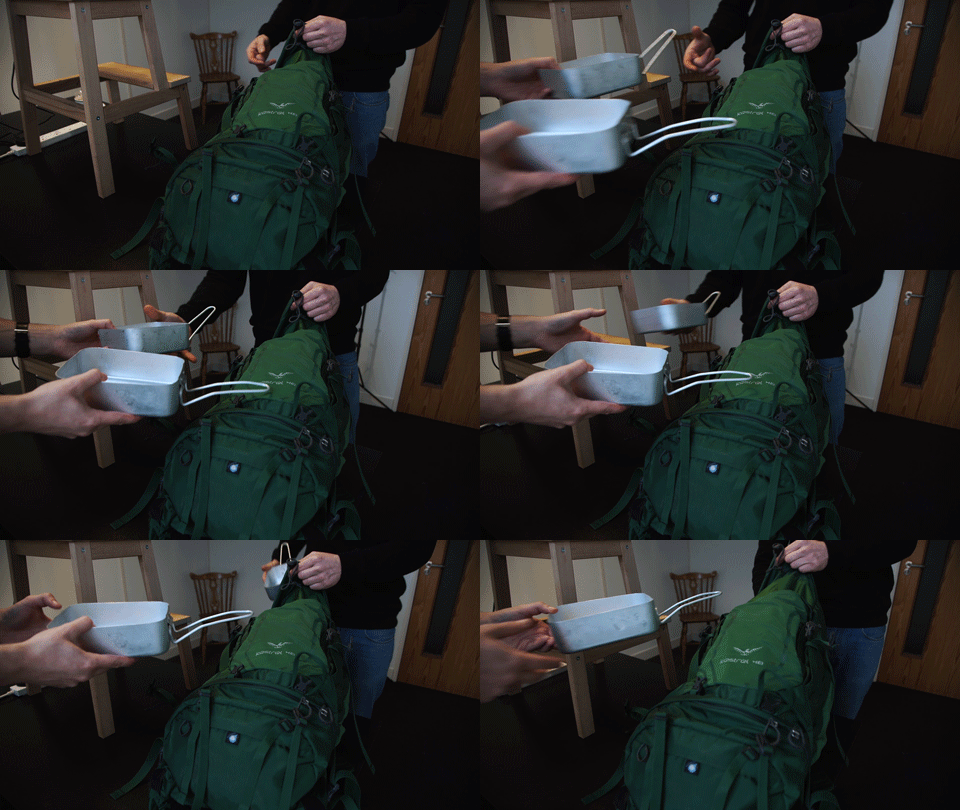
Then, add some items inside it. For rucksack sounds, I like to take a set off mess tins and place them at the top of the pack. They will rattle around and add some extra dynamic kinetic audio.

And if the straps are producing an annoying flappy sound when you record, just tuck them in! Sound design is your choice, so if you find the sound can be annoying, chances are the audience will find it annoying too.

5-Tips-to-STEP-UP-your-Foley-Game!7.gif

Number five: environmental interaction

If your character interacts with the environment, nine times out of ten it will produce a sound, so don’t ignore these!

5-Tips-to-STEP-UP-your-Foley-Game!8.gif

In the scene “Lost in the forest” you can clearly see our character causing a bunch of dry leaves to roll down the hill as he steps down. Yes, we have footstep sounds, but the sound of leaves falling down a hill will produce something very different. So grab some dead leaves, dry them out, and record brushing and moving them with your hand. This subtle sound effects will really help sell the effect that the audio is real.

Number six (bonus): Don’t forget your atmos!

The final element to add into a scene to help ground in reality and trick the audience into believing these sounds were recorded on the day is the ambient noise from the location. If it’s inside you can use room tone, and if it’s outside, you’ll need some atmos.

5-Tips-to-STEP-UP-your-Foley-Game!9.gif

For the “Lost in the Forest” scene we recorded atmos at the location but it sounded horrible. That horrible droning wind is actually the sound of the cars on the motorway over a mile away. So instead, I found a track from https://freesound.org/people/bajko/

Adding atmos into the scene will help smooth over the otherwise moments of silence between sound effects.


🚀 https://www.thefilmlook.com/store - Step up your sound game with our FOOTSTEPS SOUND PACK. It features 200+ sounds, 9 surfaces, and 6 types of footwear, perfect for your next film project.

🎬 In case you missed it

How to Build a DIY Foley Pit: https://youtu.be/zO2hx7iToNY

$600 Mic vs $60 Mic: https://youtu.be/2VK6lYkK2AM

How to Mix Sound for a Short Film: https://youtu.be/7x5SnoftgUw

How to Record BETTER Footstep Sound Effects: https://youtu.be/vQ8bnF-OWSA

🎥 This episode's kit/gear/equipment:

US links:

The Sound Effects Bible: https://amzn.to/2sSWEUy

UK links:

The Sound Effects Bible: https://amzn.to/2DD9ZXc


DISCLAIMERS:

Some of these links are affiliate links, if you purchase gear via these links The Film Look will receive a small commission, but there will be no additional cost to you. Thank you!

How to Record BETTER Footstep Sound Effects

Last week we showed YOU how to setup a DIY Foley Pit for recording footsteps at home or in a small studio. This week we are showing you how to record them. Everything from microphone placement to mimicking the image for a perfect sync.

I suppose you can call this episode a step by step guide. Let’s record some footsteps! Welcome to The Film Look.

This episode was inspired by The Sound Effects Bible by Ric Viers. We aren’t being paid to talk about the book, we just think its a great resource for those who want to step up up their sound game.

US link: The Sound Effects Bible: https://amzn.to/2sSWEUyUK link: The Sound Effects Bible: https://amzn.to/2DD9ZXc

US link: The Sound Effects Bible: https://amzn.to/2sSWEUy

UK link: The Sound Effects Bible: https://amzn.to/2DD9ZXc

So before we hit record there are a few things we need to do in order to prepare for recording footstep Foley.

The first thing we need to do is identify the sound source and its properties by looking at the edit.

Recording-Foosteps2.gif

The scene we are referencing is this short sequence we filmed in a forest. By studying the scene, you can see that we need the following:

  • Packed earth for the foundation of the pit

  • Crunchy dried leaves and twigs to cover the packed earth

  • And a pair of walking boots to stomp in

To simulate the packed earth, we bought a bag of top soil and patted it down until it was nice and compact. Then we grabbed a bunch of dried leaves from the location and sprinkled them on top. Then we matched the footwear, selecting a pair of walking boots to record in.

Recording-Foosteps3.gif

Now we’ve built up the surface and chosen matching footwear, we can think about sound-proofing our clothing so we only record the sound of footsteps.

Recording-Foosteps4.gif

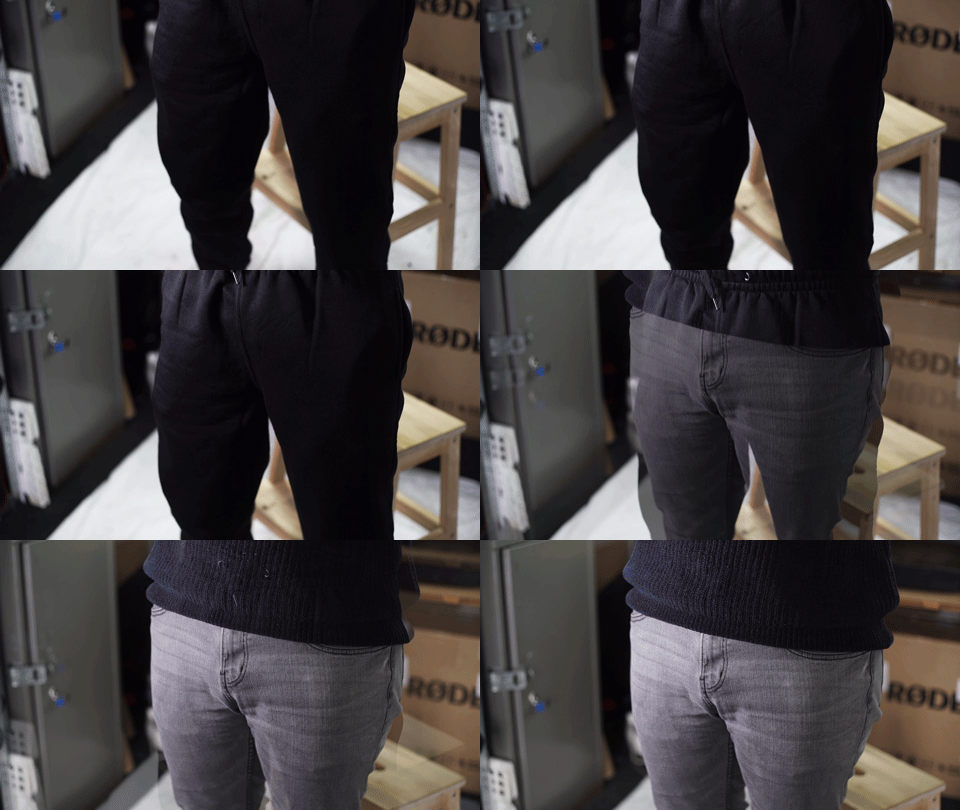
Quiet clothing is a must when you record foley. Sweatpants are the preferred bottoms, but you can also wear jeans as long as they don’t rub or make noise when you move around. As for your top; cotton t-shirts, wool sweaters, but nothing too loose as it might flap around and make a noise.

Recording-Foosteps5.gif

Avoid anything made of vinyl, polyester, or nylon, as they tend to make crispy, rubbing sounds when you move. Strictly no jewellery, and if you have any zips or laces, get them taped down!

Recording-Foosteps6.gif

And if your trousers rub against the ankle on a pair of boots, tuck them in or roll them up to minimise unwanted rubbing noise.

Recording-Foosteps7.gif

Also, don’t turn up to a foley session hungry (or too full). Your stomach grumbles will be picked up by the microphone, and if you’ve eaten too much, you might...you know...fart.

Recording-Foosteps8.gif

Next we have the position of the microphone. This is an important one, because if its too far away you may lose a lot of detail in the recording and pick up the acoustics of the room. The same goes if the microphone is too close; you risk kicking the mic during a recording, and you may end up capturing more toe than heel or even excess bass during a footstep impact.

The ideal position we’ve found for the microphone is in front of your feet, in the middle between each foot, around 1-2 feet away and 1-2 feet off the floor. This will give you a nice loud recording of the relatively quiet footsteps.

How you mount the microphone is also important. If you are recording in a bedroom or small studio like we are, it’s likely you are standing on some form of wooden floorboard. Because floorboards are a little bit bouncy and hollow underneath, they can produce rumble.

We have the microphone on a mic stand supported with a shock mount. This will greatly reduce the rumble effect and give you a cleaner recording.

Recording-Foosteps9.gif

In the last episode we also spoke about padding under the foley pit. We use a stack of EVA foam jigsaw panels to pad out the floor underneath the tray. They are firm but bouncy so they soften a hard step just enough to prevent unwanted shock, rumble, and noise.

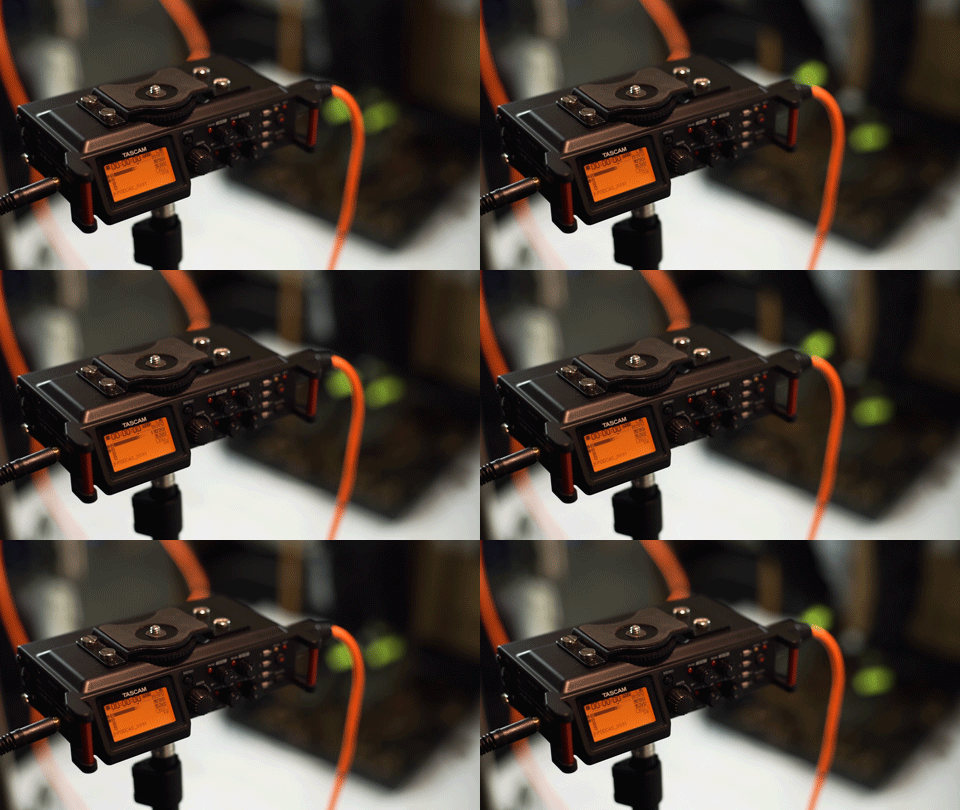
Next up we have levels. Get your microphone in position and try walking on the spot. Set your levels so each step hits around -6dB, also known as recording warm. -6dB will give you a little bit of wiggle room in case a step is louder than usual. It’s loud, it’s clean, and it’s safe.

Recording-Foosteps10.gif

Once you are ready to record, make a note of the following:

  • Your footwear

  • The surface

  • And the project name

When you hit record, you will want to very clearly state each of these. For example, “Walking boots on packed earth with dry leaves. Footstep Foley for project: LOST IN THE FOREST”.

Like using a clapperboard for syncing production audio to the film, this is called “Slating the clip”.

Recording-Foosteps11.gif

With video, you have the use of thumbnails and can jog through a clip to see what it is. With audio, you don’t have the luxury of a thumbnail and scanning doesn’t really work, so instead you must preface each clip with clearly state information so you can organise your clips with ease.

After listening to a hundred recordings, you will be happy you didn’t mumble or waste time at the start of the clip.

Now it's time to hit record and mimic the image. For project specific foley, you will want to set up a copy of the edit playing back in front of you. We like to have the edit looping on a laptop.

Recording-Foosteps12.gif

You can begin the foley session by mimicking the entire scene, I call these “Run-Throughs”. Run through’s will get you warmed up, it will help you practice mimicking the pace of the subject and match the strength of the impact.

With headphones on, you will also be able to hear if you need to adjust the way you step to create the right sound.

I tend to record 5 takes of run through’s for each character in each scene on every surface, trying my best to match their footsteps.

Next are “singles”. Now you’ve warmed up, it’s time to record a lot more footsteps. Only this time you won’t be mimicking the subject in the scene.

Recording singles is easy. You take a single step then wait for the sound to decay into near silence. Then you take another step. And another...and another hundred until you are completely bored of the sound.

Recording-Foosteps13.gif

Then change how you step. Step harder, step lighter, step with a slight shuffle, go heel to toe, stomp, jump! With each version of these footsteps, try to record at least 60 seconds before changing your stepping method, and try to separate the sound out so you can cut around the silence later on.

By this time, you will have burned off your dinner, so you won’t regret the meal you wolfed down in order to stop your stomach from grumbling!

You will notice that the way you step will drastically change the way a step sounds. When you start mixing, you may notice a footstep doesn’t sound quite right in the scene. Maybe it’s too hard or too quick or needs a shuffle.

This is why you record a ton of singles. You can think of these like footstep b-roll: emergency footsteps which can replace anomalies in the mix, and can be added to your sound library for future projects.

There are three main parts which will determine the way a footstep sounds: the surface you stand on, the type of footwear you choose, and the way you perform a step. Everything else is formatting, etiquette, and quality assurance.


🚀 https://www.thefilmlook.com/store - Step up your sound game with our FOOTSTEPS SOUND PACK. It features 200+ sounds, 9 surfaces, and 6 types of footwear, perfect for your next film project.

🎬 In case you missed it

How to Build a DIY Foley Pit: https://youtu.be/zO2hx7iToNY

$600 Mic vs $60 Mic: https://youtu.be/2VK6lYkK2AM

How to Mix Sound for a Short Film: https://youtu.be/7x5SnoftgUw

🎥 This episode's kit/gear/equipment:

US links:

The Sound Effects Bible: https://amzn.to/2sSWEUy

UK links:

The Sound Effects Bible: https://amzn.to/2DD9ZXc


DISCLAIMERS:

Some of these links are affiliate links, if you purchase gear via these links The Film Look will receive a small commission, but there will be no additional cost to you. Thank you!

How to Build a DIY Foley Pit

Today we’ll show YOU our DIY foley pit for recording footstep sound effects. This is something that requires no big tools or heavy building experience, all the parts can be purchased online or found around the house, and can be assembled in less than 30 minutes.

DIY-Foley-Pit.gif

Let’s setup a DIY foley pit! Welcome to the film look.

With every film project we’ve made, we’ve always recorded footsteps on location. After the shooting has wrapped, we head back to the location on another day with a copy of the edit, setup the microphone, watch the scene, and mimic the movement of the actors.

DIY-Foley-Pit2.gif

But this doesn’t always work. A noisy environment isn’t the ideal location for recording footsteps, and if your shooting location is busy, loud, or now inaccessible, this is where a foley recording studio setup comes in.

So we thought it was time to build a foley pit!

Because we have such a small studio, we needed the foley pit to be cheap, easy to clean, and quick to assemble and disassemble. And because we know a lot of you guys are young filmmakers, we wanted to make something which didn’t require any heavy tools or building experience so you can set one up at home too.

DIY-Foley-Pit3.gif

The first thing you need is a quiet room. A clothing closet, a bedroom, or a small room with a carpeted floor will work best. Carpets are important because they absorb sound, and we want the footstep recordings to sound as dry as possible; we don’t want any excess echo or reverb in the audio because we may want to add some in to match the scene later.

You can find out which room will work best by standing in the centre and clapping. You’ll notice a small room with carpets and furniture will absorb more sound than a big staircase exit.

We will be using our studio which thankfully has carpeted floors.

DIY-Foley-Pit4.gif

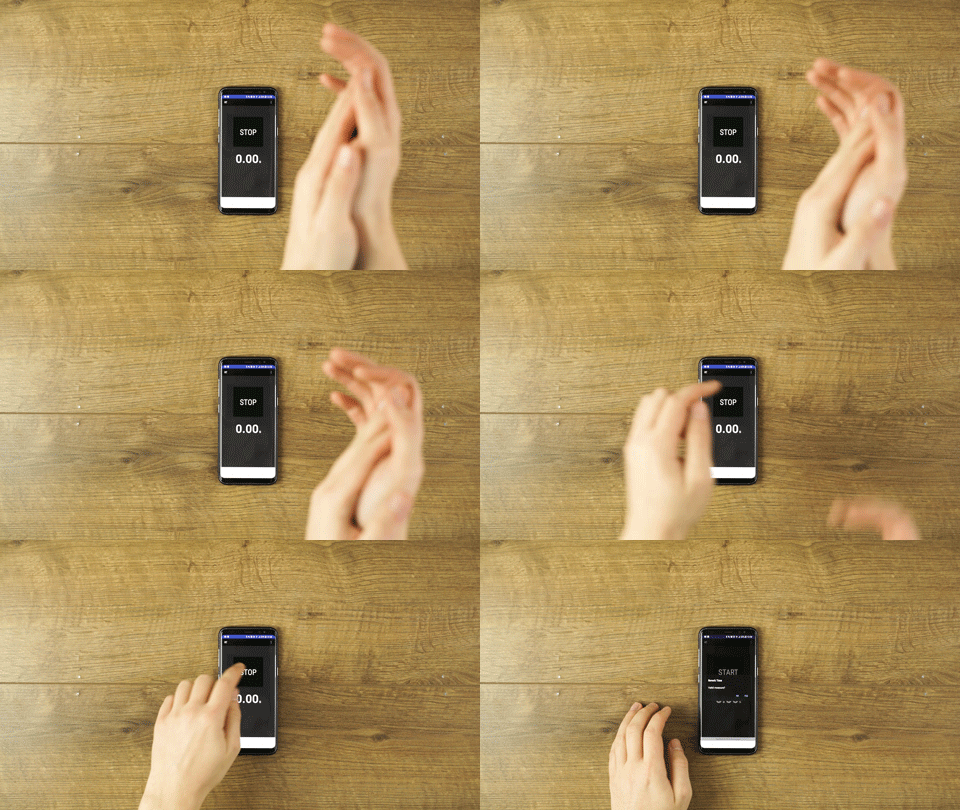
There are a few free mobile apps which help you get an idea of how much echo a room produces. I have this one downloaded called RT by AppAcoustic. You simply place the phone on the ground, hit start, give a strong clap, wait a moment, then hit stop. The readings aren’t 100% accurate but are certainly a starting point.

So try out a bunch of rooms in your house and see which one will give you the best results! Just look for room acoustic apps on your app store.

Next thing we can do is acoustically treat the room. This sounds fancy, but it doesn’t have to be. The first thing you can do is switch off any electronic devices. TVs, computers, speakers; basically anything which might hum or buzz. Then find a load of curtains, duvets, blankets, towels, even couch cushions, and find a way to hang them up in the room, covering your walls, doors, and windows.

DIY-Foley-Pit5.gif

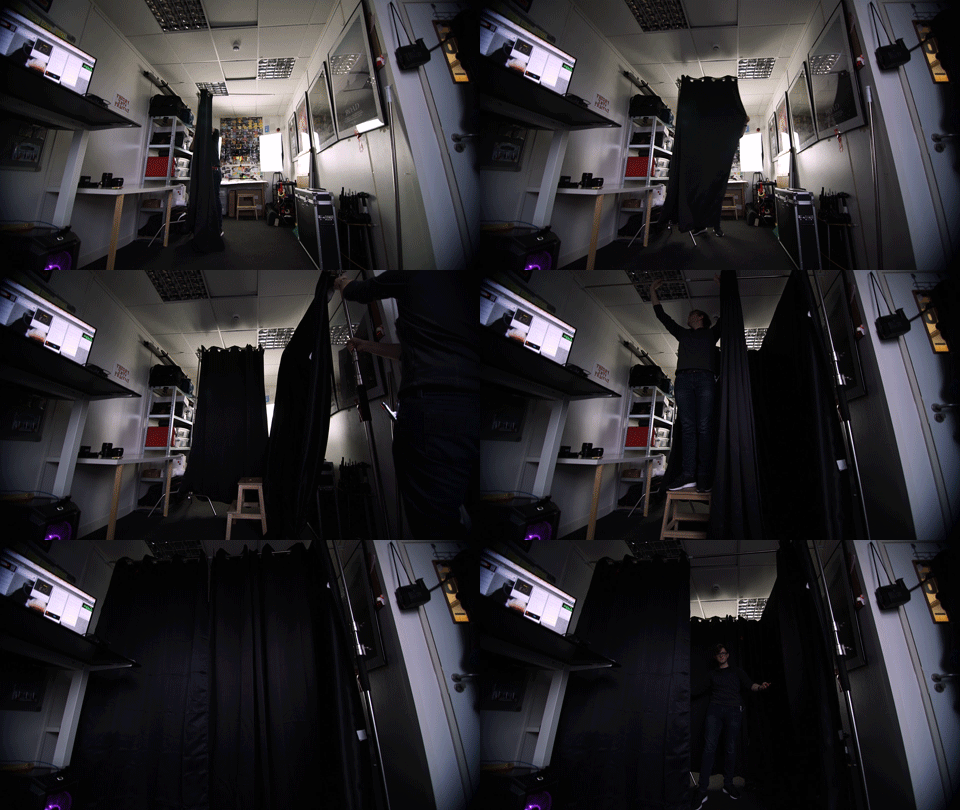
We have a bunch of black out curtains which did the job, so we made a blanket fort with the help of some C-stands and some clips.

Basically, anything with a flat surface will reflect sound, and that’s what we want to avoid, so make sure you cover any flat smooth surface with some rugs, blankets, or even a pile of clothes.

DIY-Foley-Pit6.gif

In order to see what I’m about to do next, I’m gonna take the blanket fort back down for the rest of the episode. Just try to imagine it's still up.

DIY-Foley-Pit7.gif

So, the pit itself. We can start with a gardening tray. This one is 60x60cm so its large enough for footsteps, it has a short 7cm lip which means it won’t cause any reverb (preventing the sound you’d get if you stuck your head in a bucket), but is high enough to contain messy materials, and it is made out of tough plastic so it's waterproof, lightweight, and easy to clean!

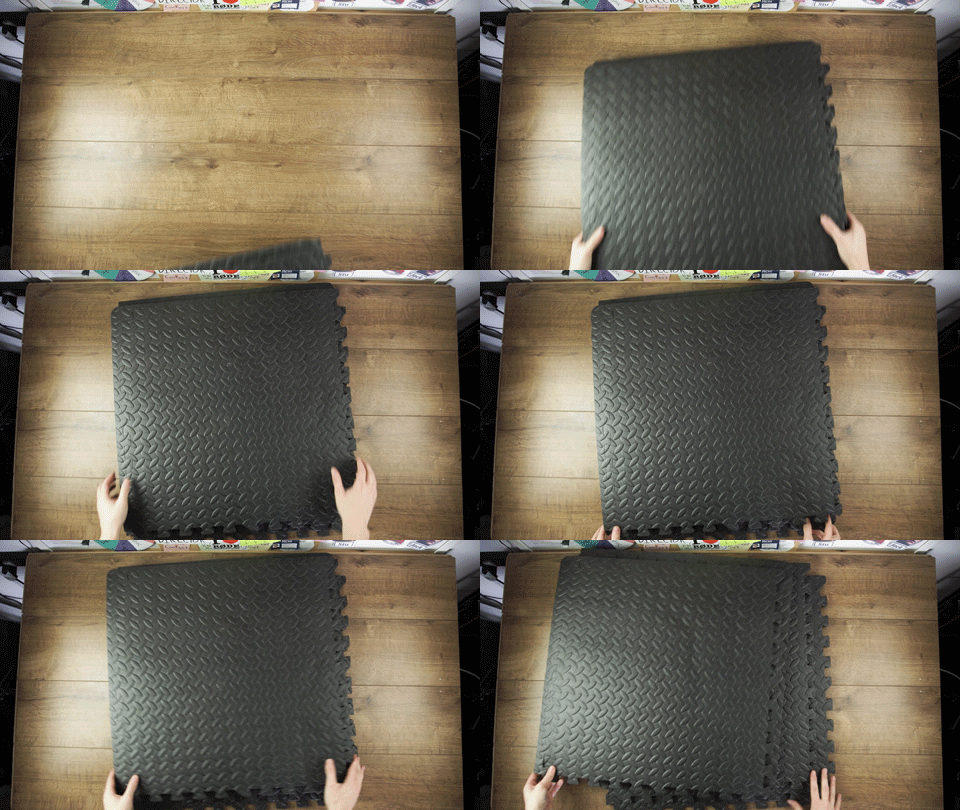
If you are recording upstairs on wooden floorboards like we are, you will want to cushion underneath the tray to prevent any excess rumble during recording. We picked up a pack of these EVA foam jigsaw panels to pad out the floor underneath the tray. They are firm but bouncy so they soften a hard step just enough to prevent a Godzilla-sounding footstep.

DIY-Foley-Pit8.gif

We recorded some samples based on a scene we shot in a forest. This is how it sounds.

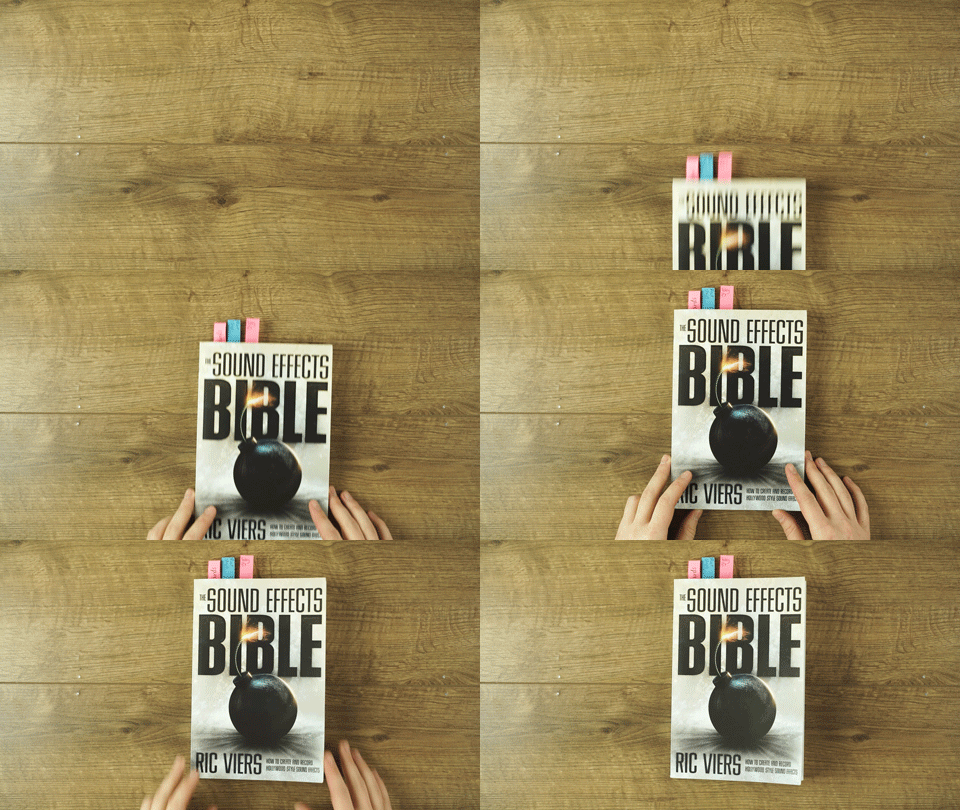
A lot of ideas for this video came from The Sound Effects Bible by Ric Viers. We aren’t being paid to talk about the book, but think its a wicked resource for budding sound artists who want to set up their game. There’s an affiliate link in the description if you want to buy the book and help out the channel.

DIY-Foley-Pit9.gif

A setup like this can also be used for recording other foley work such as clothing movement and prop handling, which we will be talking about next week! So if you are looking for more sound advice, hit subscribe, hit the bell, and remember to achieve it one shot at a time.


🚀 https://www.thefilmlook.com/store - Step up your sound game with our FOOTSTEPS SOUND PACK. It features 200+ sounds, 9 surfaces, and 6 types of footwear, perfect for your next film project.

🎥 This episode's kit/gear/equipment:

US links

Gardening Tray: https://amzn.to/2SXPSIt

EVA Foam Mats: https://amzn.to/2MALywk

The Sound Effects Bible: https://amzn.to/2sSWEUy

UK links

Gardening Tray: https://amzn.to/2QT0eY1

EVA Foam Mats: https://amzn.to/2Sa9pbr

The Sound Effects Bible: https://amzn.to/2DD9ZXc


DISCLAIMERS:

Some of these links are affiliate links, if you purchase gear via these links The Film Look will receive a small commission, but there will be no additional cost to you. Thank you!

FOOTSTEPS SOUND PACK is here!

Need footsteps for your next film project? Look no further!

The Film Look FOOTSTEP SOUND PACK features over 200 sounds, on 9 surfaces, in 6 types of footwear, giving you a plethora of available sound types to choose from when mixing the sound for your film.

All sound effects have been recorded in a low noise environment giving you a clean, loud sound for every single footstep. They have also been recorded as dry as possible, meaning there is no reverb baked into the sound so you can add reverb in the mix to replicate the scene on screen perfectly.

These sounds have been exclusively recorded as “singles”, meaning each step is completely individual so you can cut in and match up the steps without having to worry about creating more space between the sounds.

Every single set of footwear of every single surface has multiple performance types: light, standard, heavy, heel-to-toe, shuffles, and jumps. These have been created so you can match the performance of the actors on screen.

Is your character walking? Standard is all you will need. Are they running? Maybe go for heavy to match the high impact!

As well as creating this pack, we have also create a short series of videos showing you how we setup and recorded the footsteps, so if you want to create your own library of footsteps, go ahead!

The first video in the series shows you how to setup a DIY Foley Pit: a small pit for dumping your surface materials so you can record in messy stuff in a clean way!


Turn ANY song into Horror Music

Today we are showing YOU how to transform a song into a nightmare using some basic plugins you can find in your editor or digital audio workstation, perfect for your upcoming horror film.

In our short film The Asylum Groove we wanted to emphasise a disturbing scene by slowly manipulating the music from a lovable and heartfelt song into something twisted and disturbing to give the impression our character is slowly realising he is trapped in a nightmare.

We did this with some default plugins found in Adobe Audition. The plugins we used can also be found in Premiere and other editors, or even free DAWs like Audacity. So if you don’t have access to purchased products, you can still achieve this effect.

The trick to making this technique work is juxtaposition, which is essentially a fancy word for something with heavy contrast. The heavy contrast for this technique is picking a song which you’d not recognise as being scary, spooky, or horror-like, which means when we manipulate it, it will amplify the juxtaposition and we will be left with something very disturbing to add to the freaky images on screen.

Juxtaposition is the reason why Tiptoe Through The Tulips sounded so scary in the horror film Insidious.

The nightmare scene in The Asylum Groove also includes some sound design elements to help emphasise the disturbing scenario even further. We have a video all about sound design elements and how to use them.

Okay, that’s enough card dumping, let’s get started. I downloaded a song from premiumbeat called Devoted To You. It’s cheerful and positive.

EQ

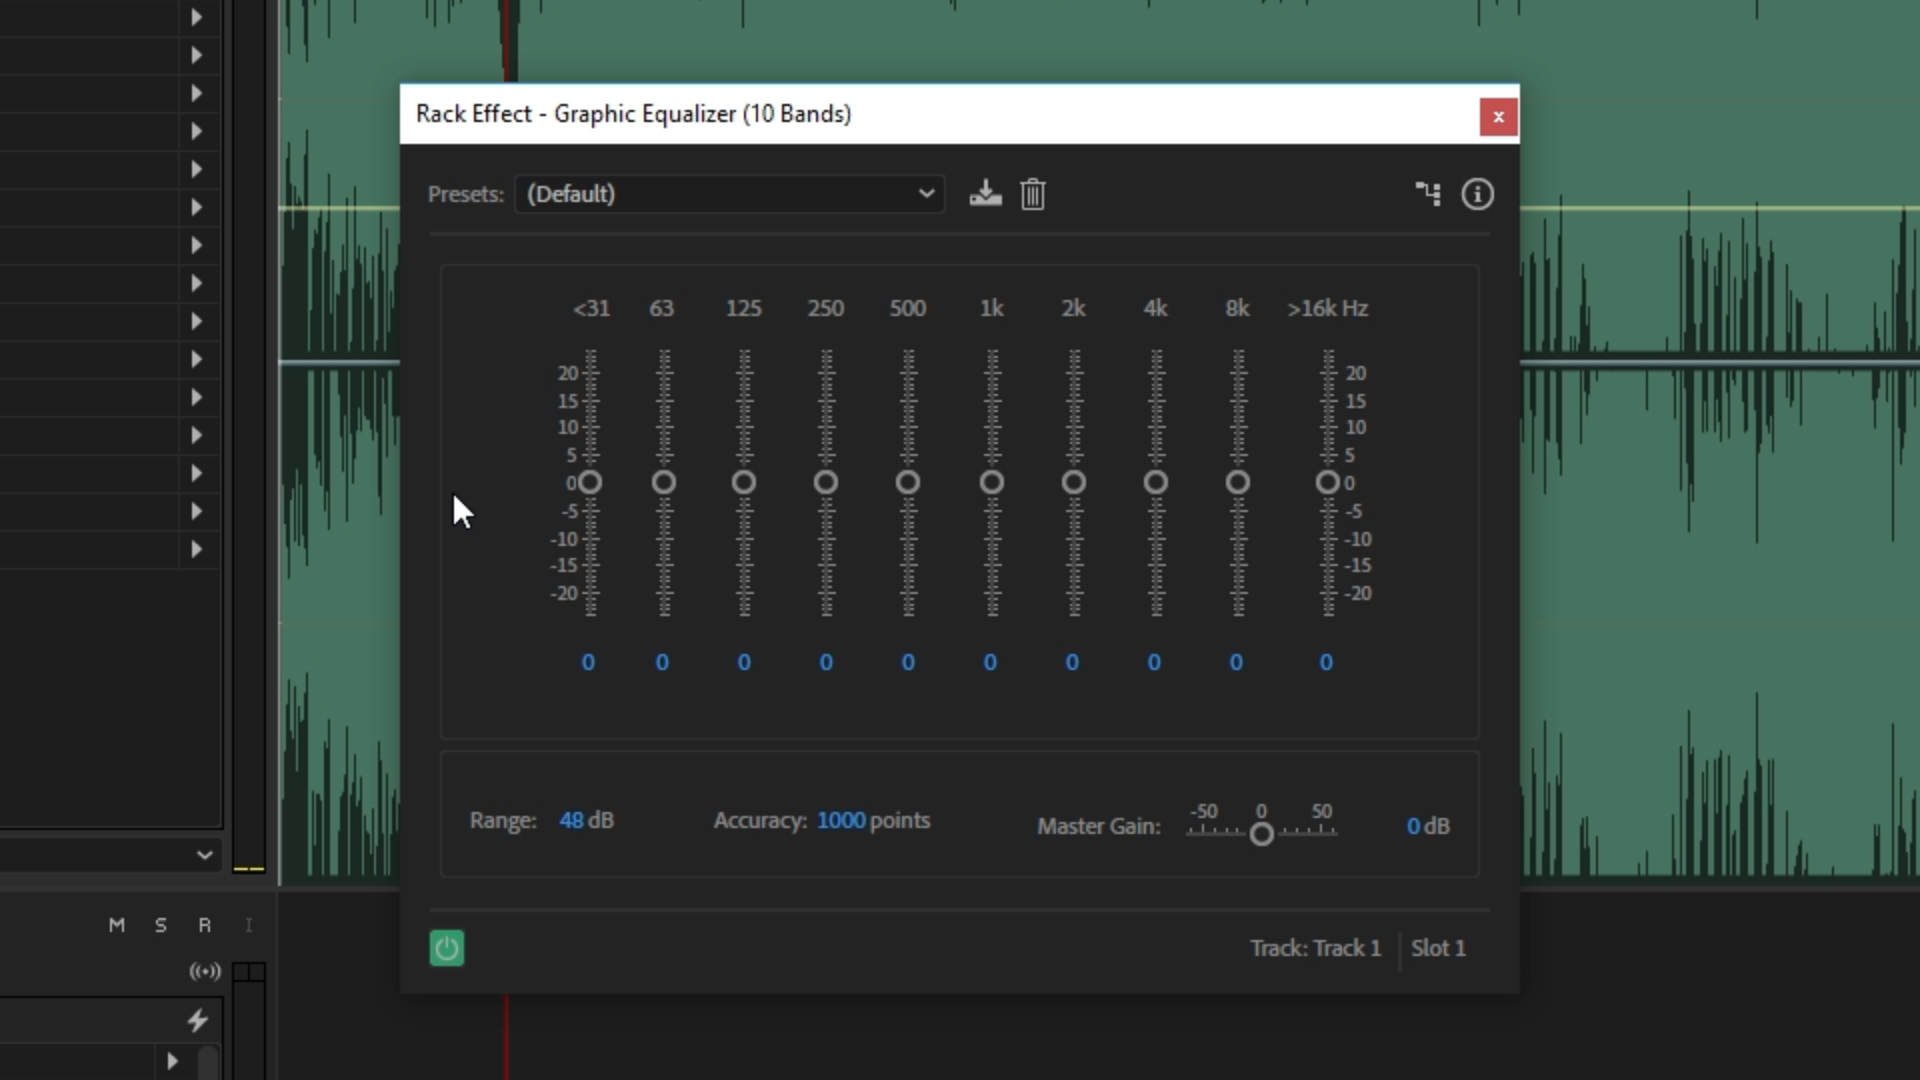
The first thing we want to do is play with the EQ and reduce the full-of-life sound into something small and tinny. We can do that by selecting an EQ plugin. I’m in Audition, but this will work in pretty much any editor or DAW. I’m going to usce a 10 band Graphic Equalizer; this is one of the easier EQ plugins to wrap your head around but also gives some flexibility.

Episode.00_02_20_11.Still003.jpg

Right now the EQ is in a straight line. This means the frequency bands are all even. To make this song sound tinny and reduce its fidelity down to something more sinister, we want to create a ramp going up hill to the right.

Reducing the bands on the left will cut the bass from the song, and increasing the bands on the right will amplify the treble, giving us a very low fidelity song which sounds like its coming from a old, cheap speaker.

Episode.00_02_36_16.Still004.jpg

Sometimes when you do this, you might notice it will clip the audio. If this happens you will find a master gain fader somewhere in the plugin which you can adjust to stop it from peaking.

Obviously, this is all to taste, so adjust what you think works for your film.

Reverb

The next thing we want to do is add some reverb into the mix. There are a ton of different reverb plugins and settings, so I would suggest picking something straight forward like convolution reverb and trying out the different presets until you find something you like.

Episode.00_04_07_01.Still005.jpg

The purpose of this plugin is to give the impression that the room is bigger. More reverb basically means more space for sound to bounce around an enclosed space, so by adding reverb onto the song we are trying to make the character seem smaller in the scene by increasing the size of the room. This is psychological emphasis.

Pitch Shifter

Next up we have pitch shifting, which is the first plugin which REALLY gives the song a eerie and uncomfortable feeling, contributing to the nightmare effect.

With this plugin, you want it to be subtle. If you go too far in either direction, you get chipmunks or a bad darth vader impression, so be sensitive with this one.

Episode.00_04_49_18.Still006.jpg

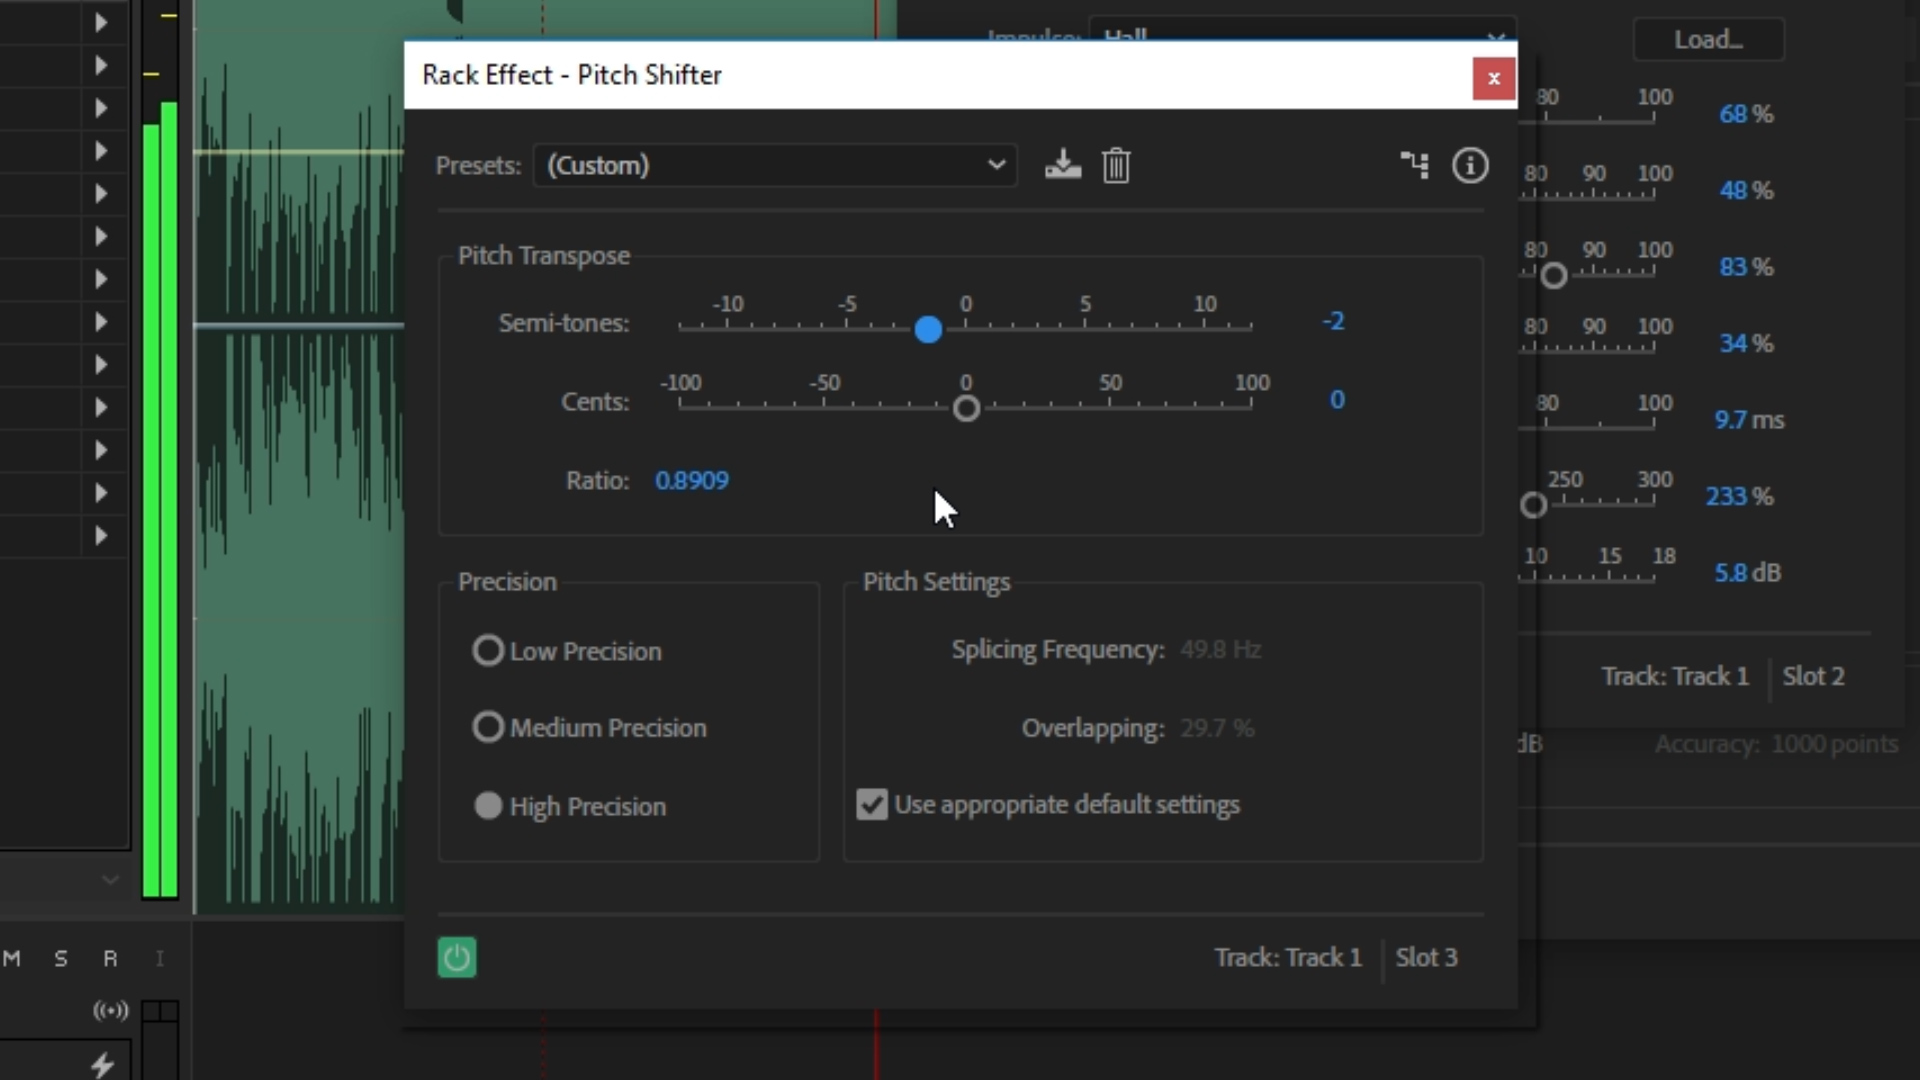
With the pitch shifter, we will decrease it two semitones. This will make the song change in key and will start to sound a little weird. Coupled with a slow fade-in with this plugin, it should provide us with a really strange final effect.

Echo

Next up we have echo. This is very similar to reverb, but instead of simulating a change in the size of the room, we are creating feedback which echoes more clearly.

The idea behind this plugin is to generating a disturbing, paranoid voice in the back of the character’s head, as the vocals repeat over and over from the echo.

Episode.00_05_23_03.Still007.jpg

Play around with the echo presets until you find something which has tight echo with a quick decay. You don’t want to pick something which lingers too long or has an extended delay.

A delay plugin will give similar results.

Chorus/Flanger

Last but not least, we have chorus and flanger. This effect is basically to create the most weird sounding, alien abduction simulating, vocally destroying sound effect.

Episode.00_06_38_07.Still008.jpg

This effect will add some paranoid static to the mix and will throw the sound from right to left and back again. We can go aggressive with this one. We want to hear it slowly destroy the song.

Crossfading

Once you have your song completely messed up and sounding really sinister, we can fade in the effects. To keep it simple, I’m just going to duplicate the track and crossfade between the clean song and the crazy-weird one.

Episode.00_06_56_11.Still009.jpg

You will want to choose the best time to cross between the realms. And you might want to consider fading in each effect separately.

Extras

To sell the effect even further, I added a few sound design elements along with some foley art and the dialogue in the scene. And wouldn’t you know, we have a video about foley art!


This video was Sponsored By

🎵 http://bit.ly/tflpb-devotedtoyou - Click here to download this episode's track. Check out Premiumbeat.com to discover a huge range of exclusive royalty free music!


DISCLAIMERS:

Some of these links are affiliate links, if you purchase gear via these links The Film Look will receive a small commission, but there will be no additional cost to you. Thank you!

24 Filmmaking Tips

With every film, we’ve always learned something new and when we made our short film The Asylum Groove this was definitely true.

In this video, we are going to share 24 filmmaking tips, tricks, or hacks which can help you, make your short film.

Let’s get straight into it.

1 - Use your character's costume to help tell the audience about their backstory. For example, clothes that don’t fit shows they can't afford new clothes and may have been handed down to them.

2 - The same goes for clothes that are unironed, this shows the character does not take much pride in what they are wearing.

2.gif

3 - Or it helps to show a turning point when your character has stopped caring about what they look like for whatever reason.

4 - Create a mood board from past films to help with how you would like your film to look. This will give you a direction to work towards when it comes to creating your film.

5 - It will also help others to see what you are trying to achieve.

6 - Don’t just use reference images from films, look at other pieces of art. Google Images can be your best friend.

7 - A good prop can introduce who a character is without any words of dialogue being spoken. If someone flashes a police badge we know straight away they are police.

7.gif

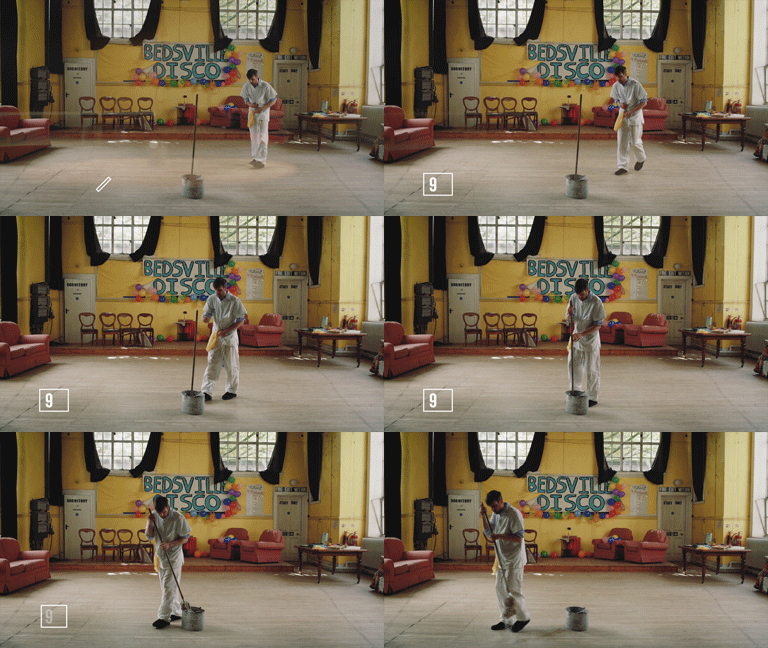
8 - The version of a prop you use is also important. A plastic mop and bucket are a lot more modern than a wooden mop and metal bucket. A vinyl record can also help to set the film in a particular era or shows your character is a little old school.

9 - Build your story around a pre-existing location you already have access to. This will give your set a bespoke feel with a lot less work.

9.gif

10 - The right crew is more important than the camera, chose that first.

11 - When casting an actor, let them read the whole script. Don’t be too precious about other people reading it; it might convince a great actor to accept the role.

12 - If your script doesn’t include many lines of dialogue, ask your auditionees to read a monologue which they think suits the role instead.

13 - Then once they have performed it, direct them to act the same monologue but with a new character motivation. If they can take the redirection now, it is a good indication that they can mold to your vision on set.

14 - If you have many different actors coming in to read for the same role, ask them to read from one particular scene. This will allow you to see many different versions of the same character.

15 - Record auditions so you can review them side by side later on.

16 - Use these DIY T-Brackets as t-marks so your actor knows where they need to hit their mark.

16.gif

17 - Gaff tape the DIY T-Brackets so they can easily be seen.

18 - Don’t underestimate rehearsals. The more time you spend with your actors, the more they will understand what you require from them before the shoot day.

19 - In fact, spend time talking to your crew before the shoot so everyone is working from the same plan.

20 - Create key phrases for each character’s emotional beats throughout the script and add them to the storyboards. This will help you give quick directions when on set.

21- When you need an authentic shock from your actor, pop a balloon next to them.

21.gif

22 - Use a door wedge to help level out your camera when it’s on uneven ground.

23 - Add tape your lens so you can set the focus marks you need to hit.

24 - When working with other filmmakers, find out which areas they are most passionate about, and take advantage of their skills.

If you want more filmmaking tip and tricks, check out our 100 filmmaking tips in 10 minutes video here.


This video was Sponsored By

🚀 http://bit.ly/rs-aspect - Give your video a clean look with Aspect by RocketStock. It features over 200 logo reveals, intros, lower thirds, overlays, icons, and transitions.

🎵 http://bit.ly/track-hot-fusion - Click here to download this episode's track. Check out Premiumbeat.com to discover a huge range of exclusive royalty free music!


DISCLAIMERS:

Some of these links are affiliate links, if you purchase gear via these links The Film Look will receive a small commission, but there will be no additional cost to you. Thank you!

Short Film Post-Production Workflow | Part 2

A well-planned post-production workflow, even as a zero budget filmmaker, will save you a lot of time and prevent any hiccups during editing, sound design, VFX, and colour grading.

Once you have a picture lock, it’s time to share the edit and work on sound, music, VFX, and colour grading; and for some, this can be done all at the same time by a team of collaborators.

Editing-Workflow-Part-16.gif

Last time, we spoke about organise and sync, first picture assembly, initial feedback, re-edits & picture lock.

So now you’ve made the decision to lock the edit. You are happy with the cut, and any other edits will be strictly for emergency changes. You’ve already gauged feedback from other filmmakers, you’ve made those changes, and now it’s time to move on.

This is where we can branch out. If you, alone, are the sound, VFX, music, and colour grading department, then you can follow these steps in a linear fashion. But if you are a team, it’s time to divide and conquer these tasks.

First, let’s talk a bit about VFX.

Editing-Workflow-Part-2.gif

This is the only department which may need access to footage BEFORE the picture lock. The visual effects in the film will influence the sound design, music, and colour grading. So if it is at all possible, visual effects should be the first to get their hands on the edit.

If you already know which VFX need to be added to certain shots, the visual effects department can begin working during the editing process, but please be aware that some shots might be cut. So this is a balance between getting in there early and not wasting time on shots that won’t make the final cut.

Next we got sound design.

Editing-Workflow-Part-21.gif

With an export of the edit, the sound department can start to work on Foley Art. Foley can be a long process as it includes re-recording all the run of the mill sounds in sync with the edit, and experimenting with sound effects libraries.

We’ve covered foley in a bunch of episodes in the past. There’s a card in the corner and a playlist in the description if you want to learn more.

In the meantime, a colourist can be working on the colour grade.

Editing-Workflow-Part-22.gif

Just as sound design only needs the edit for sync points, colour grading doesn’t affect the sound in any way as it’s all visual, so these two can be easily worked on at the same time and brought together in the end.

Then you’ve got music.

Editing-Workflow-Part-24.gif

A locked-picture will give the composer the exact timing to create and tweak the music throughout the film. Having the edit in front of them while they compose will also give them inspiration in the images.

There might be something in a scene which they want to harness and use as a musical device, so giving a composer the edit will let them work their magic to its full potential.

Visual Effects make this process of divide and conquer a little more complicated.

VFX is the only department that will cause the other departments further changes. If you are working on your own, I would suggest working on the visual effects before sound, colour grading, or music.

Editing-Workflow-Part-27.gif

Once the VFX have been produced, extra sound effects will be added to the sound design, gunshots and explosions and spaceships for example. The colour grade might need tweaking once the VFX have been applied also.

Basically, every department will produce a another draft of their work with the final VFX in mind.

Once all the departments are finished, it’s time to put everything back together. This brings us to quality control.

Editing-Workflow-Part-28.gif

Device testing and volume referencing are key contributors to a great looking and great sounding film. We’ve covered these topics in another video if you want to check it out. There’s a card in the corner and a link in the description.

Once you feel you’ve done everything you can with the film, it’s time for one last feedback stage: the 99% feedback stage.

Don’t say you are finished just yet! You might jynx it. Show the film to as many of your filmmaker friends as possible, or least the ones who give great critical feedback. You’ve already asked them but there might be something which they point out which nobody has before, so it’s worth doing one last check.

Make any last minute tweaks if the feedback requires it, then hit EXPORT. After this comes the hard part: convincing people to watch your movie!


This video was Sponsored By

🎵 http://bit.ly/tflpb-paranormalsynths - Click here to download this episode's track. Check out Premiumbeat.com to discover a huge range of exclusive royalty free music!


DISCLAIMERS:

Some of these links are affiliate links, if you purchase gear via these links The Film Look will receive a small commission, but there will be no additional cost to you. Thank you!

Short Film Post-Production Workflow | Part 1

Editing is a particularly interesting process. After long days of shooting, you are finally placing down the building blocks for your film, and you can begin to see how it all flows.

But with a lot of things to complete including the picture lock, sound edit, music, and colour grading, it can sometimes feel like a mammoth task, especially when working with a lot of footage and sometimes with multiple post-production collaborators.

Editing-Workflow-Part-1.gif

So today we are going to share with YOU some tricks WE’VE learned along the way which will help give you a smooth workflow and divide and conquer your post-production elements.

Everyone’s post-production workflow is a little bit different. Today we are going to share ours, but we’d also love to know your post-production workflows. If you have any useful advice, drop them in the comments below!

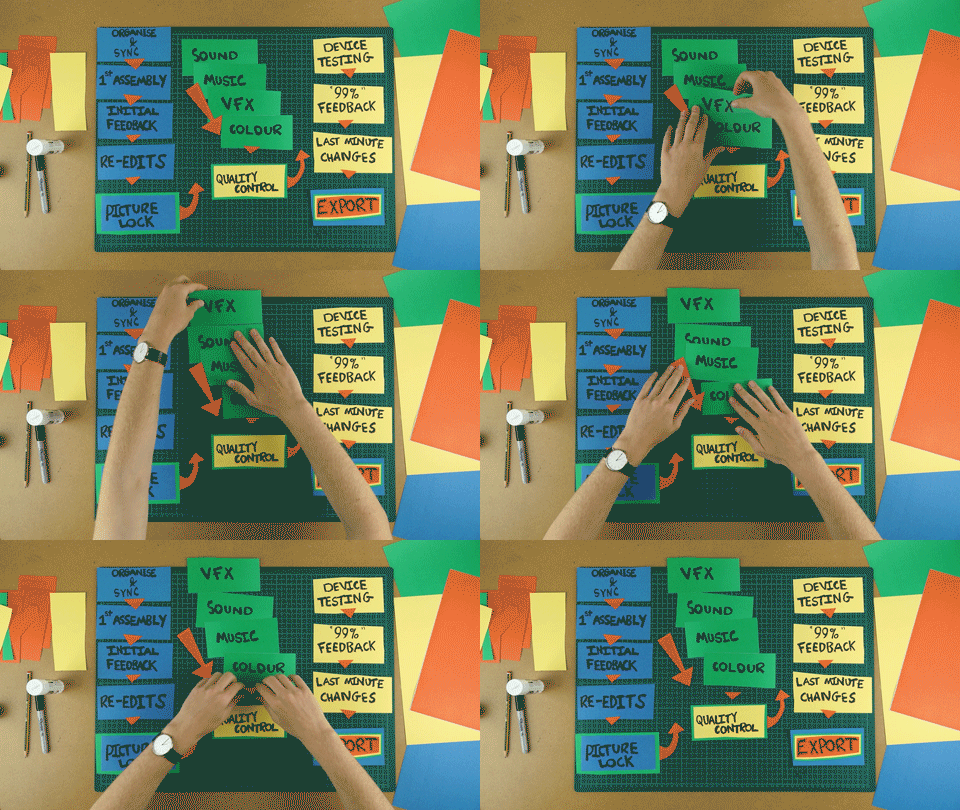
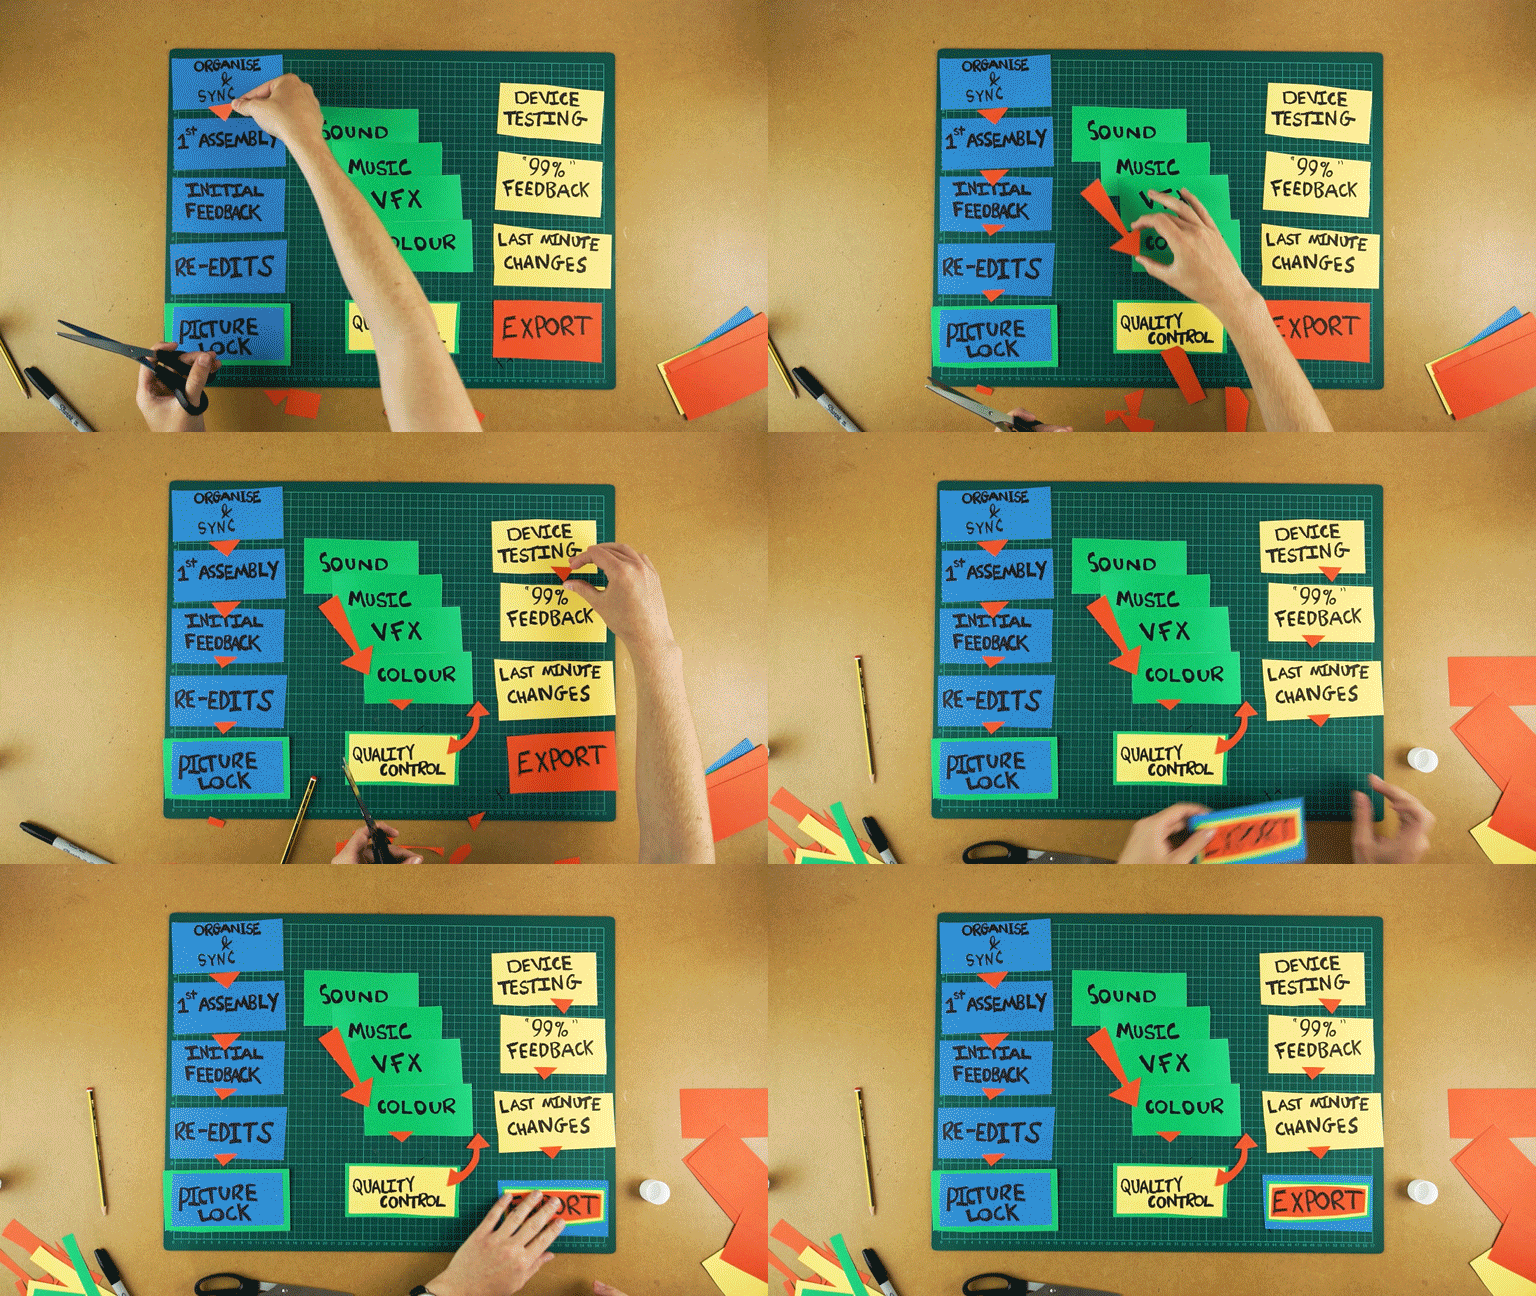
First things first, let's map out the whole post-production process:

Editing-Workflow-Part-12.gif

We’ll be covering organise and sync, first picture assembly, initial feedback, re-edits & picture lock, sound, music, VFX, colour, quality control, device testing, a 99% feedback stage, last minute changes, and EXPORT.

Editing-Workflow-Part-13.gif

You can see that this isn’t a linear process - as it is stackable in places. This is to accommodate multiple artists working at the same time. But we will get into that once we reach these stages.

Let's get the boring one out of the way: organise and sync

Have you ever been working on a film, then suddenly you are greeted with a message telling you it can’t find a bunch of footage?

Or, did you think that because it's only a short film you don’t need to put anything in folders, to then discover you regret the complex mess you’ve now made?

Getting organised before you edit will prevent any of these headaches from happening.

We’ve covered organise and sync in a previous episode.

One more thing we’d like to add to organise and sync is labelling usable takes.

On our recent short film The Asylum Groove, the 2nd AC Mr. Adam Opie, took note of every take from the shoot and noted down bad takes, good takes, and great takes, including if there were any particular things to look out for.

During organise and sync, we followed Adam’s notes and labelled each take using different colours. Red being unusable, orange as emergency spares, blue as good takes, and green as the best takes.

Next up we have the first picture assembly.

If post-production was compared to building a house, this would be laying the bricks. The first assembly is there to build a foundation on the timeline.

Take your footage, cut yourself an edit, and get it to a watchable standard, but don't start working on colour grading or VFX yet, as you may end up working on shots which will be cut short or cut all together during the next editing stage.

You CAN spend as long as you need on the first assembly, but just remember that the next stage is FEEDBACK, so don’t worry about working on frame to frame details just yet, and be open to your peers’ interpretations and opinions on the cut.

If you are looking for creative advice on editing check out the channel THIS GUY EDITS. He’s got plenty of educational and entertaining videos all about how powerful editing choices can be for your films.

If there was one mistake made by some of us zero budget filmmakers, it’s not letting people see the edit before upload!

This is the next crucial stage in post-production, initial feedback.

During the editing process for a short film, there may be some things which you don’t notice, and when you are looking at the footage for a long time, you start to become “edit-blind”. You start to anticipate the cuts and the edit no longer feeds you new information which means you are no longer watching the film from an audience perspective.

Find your filmmaker friends, buy them a coffee, sit them down, and ask them to review your edit.

Find a mix between people who know the story, such as the crew who helped work on the film, but also find some filmmakers who know very little about the project so they can give you a accurate first impression of the film.

And if you need to, ask your family to watch it. But just make sure they understand that this ISN’T the finished product, and ask them specific questions to gauge their feedback as they might not know what to say until you ask them.

Next up we have re-edits.

The first thing you should do once you have a list of feedback is step away from the edit. Step away for a few days and come back with fresh eyes and a fresh perspective.

When you come back, watch the current draft of the film and make notes. Then compare these notes to the feedback you were given and start to work on the next draft of the edit.

A lot of the time, you’ll be given technical feedback: “This could be cut shorter”, “This shot was jarring” “The montage was a little too quick.”. This is feedback you can use to help give the audience a better viewing experience.

You might also get feedback from a storytelling perspective. “I didn’t understand why this character did this”, “the character's motivations are unclear”, “why was he mopping?”. This is feedback which is harder to fix in the edit, but if you have enough coverage, you might be able to solve it by extending the length of a shot or placing that insert back in.

If you can’t solve it in the edit, and it’s a MASSIVE detriment to the film, please consider shooting some pickups and retakes.

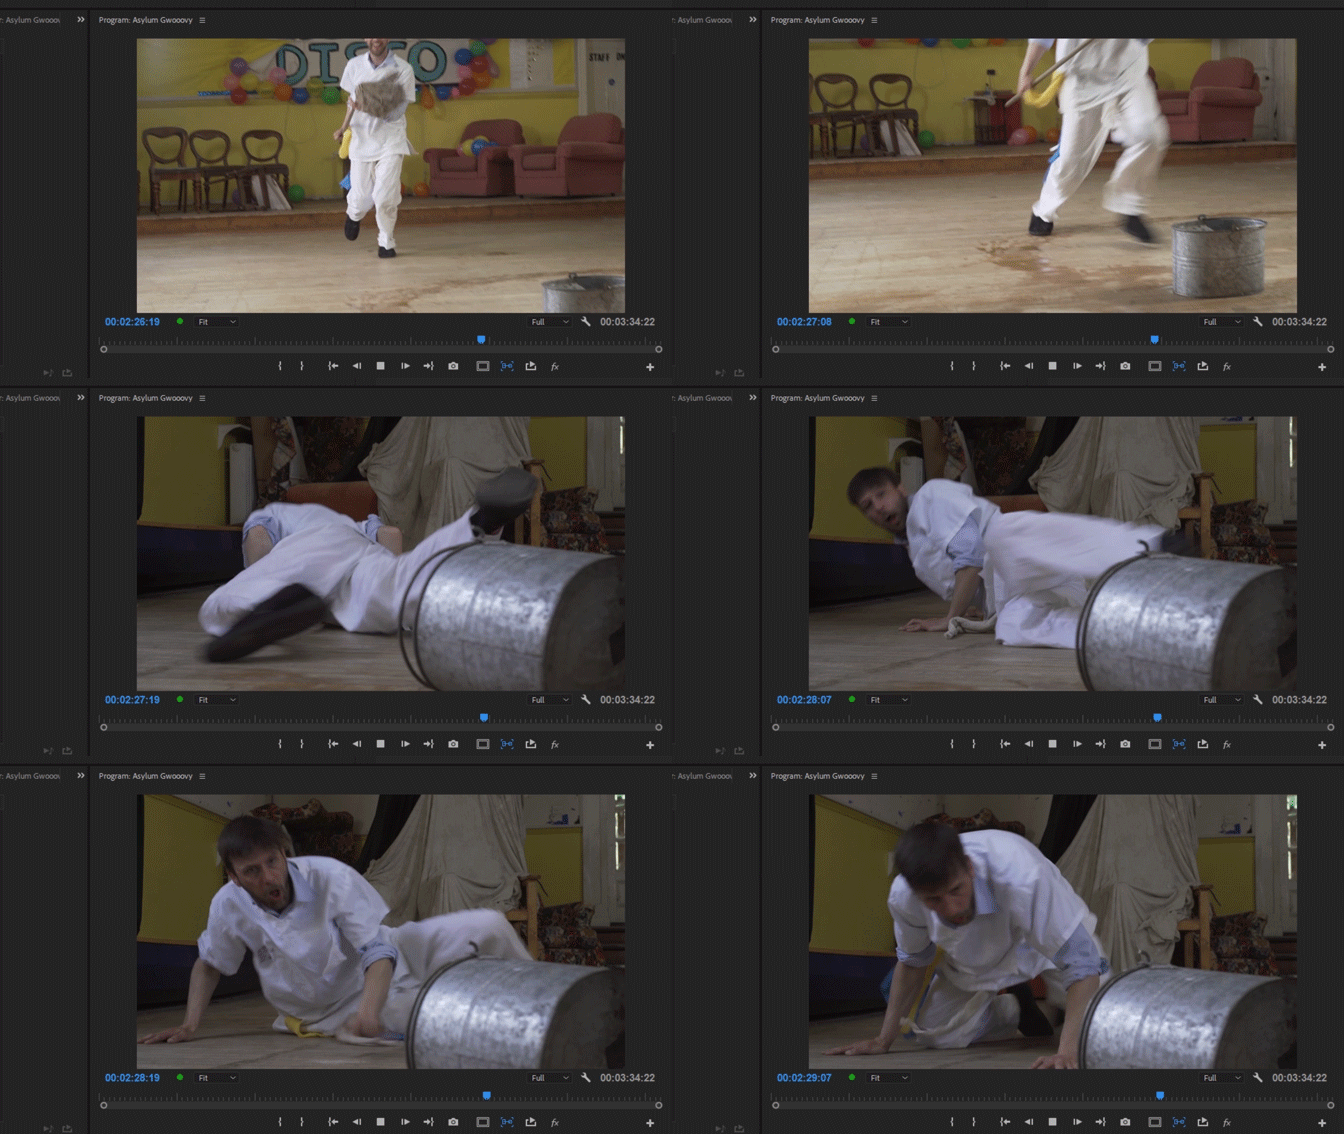
We actually had this issue with our short The Asylum Groove. There’s a moment when the character trips over a bucket and hits the floor. We had coverage of the fall but no takes where we see our Actor Chris actually make contact with the ground, which made the edit very jarring.

Editing-Workflow-Part-15.gif

So we scheduled a day to return to the location and shoot it. Without it, it just looked weird, so shooting those pickups were worth the extra time and effort.

The feedback you get will be VERY subjective: sometimes it's invaluable, sometimes it is just a matter of different taste. But this is your film, and it’s your decision. If you wholeheartedly believe the cut works the way it is, then keep it. But, if multiple people point out the same thing, consider changing it up.

This leads us to the picture lock.

Editing-Workflow-Part-16.gif

At some point, you have to make the decision that you can’t do any more to the edit! A picture lock is a promise NOT to change the edit. This is so departments such as sound design, music, VFX, and colour grading can begin to work.

I say “departments”. I imagine most of you, and us included, are just a bunch of people trying to make cool films. But officially, these are “departments”, so let’s stick with that.

All of these departments will need a finished picture to work with. And by “locking” the picture, it means each department is working from the same source, which means when they are finished, they can simply plonk their work into the edit.


This video was Sponsored By

🎵 http://bit.ly/tflpb-paranormalsynths - Click here to download this episode's track. Check out Premiumbeat.com to discover a huge range of exclusive royalty free music!


DISCLAIMERS:

Some of these links are affiliate links, if you purchase gear via these links The Film Look will receive a small commission, but there will be no additional cost to you. Thank you!

Add Impact to your Edit with Sound Design

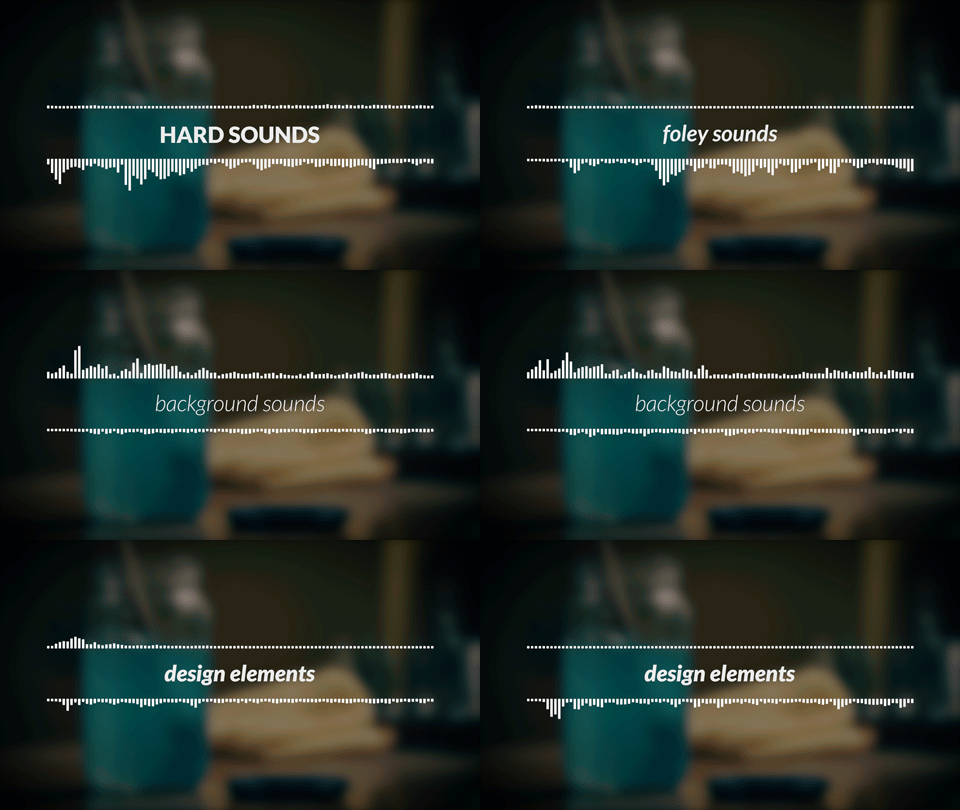
“Sound effect” is a broad term. You’ve got hard sounds like gunshots, foley sounds like footsteps and clothing, and background sounds like wind and city streets.

And finally we have sound design elements. These are sounds that tend to be used to aid the edit and give plot points added drama.

Sound-Design-to-Aid-the-Edit-2.gif

Today we are showing you how using sound design elements can give your film extra impact and a smooth but pacey edit. 

We’ll be using our film The Asylum Groove as a reference, so if you haven’t seen it yet, there will be a card in the corner and a link in the description.

In this scene, our character Sam is about to pour water over his head which causes him to wake up from his daydream and suddenly slip into a nightmare.

Sound-Design-to-Aid-the-Edit-21.gif

In its current state, the scene feels lacklustre. This moment is supposed to aggressively transport our character from his happy place to a dark place and invoke a strange mix of false realities, so we can start to layer up some sounds which will get us there.

Firstly, let's grab a punchy sound, and add it onto the cut mark.

Sound-Design-to-Aid-the-Edit-22.gif

If we place this on the cut mark, it should give us that instant BANG which we need. 

Sound-Design-to-Aid-the-Edit-24.gif

Okay, this is getting us somewhere! But there are a few missing elements.

At the moment, the sound is sudden, and it almost feels like it's trying to be this cheap jump scare. So we need to include some suspense. We can add a sound element which will hint to the audience that something dark and mysterious is about the happen.

We need to add a crescendo, which is a sound which rises in volume or intensity.

Sound-Design-to-Aid-the-Edit-25.gif

We can create a crescendo from our existing impact sound. If we duplicate the that sound, then reverse it, it transforms from an impact into a slow rising crescendo with a strong punchy tail. 

This is a lot closer to our final desired product. Now all we need to do is find a few more sounds which we can use for layering and add them in. 

To help give the moment even more impact, I have added a few more sounds. Firstly, I layered in a low rumbling impact. This is similar to the first one but has more low end for a crunchy bass tone.

And to compliment the first crescendo, I used a hissing impact sound which I reversed.

And I also added a very short-attacking high frequency sound; a mouth click, recorded in a large room with lots of reverb.

This sound is supposed to represent the exact moment of change for the character. To me, it feels like when a magician snaps their fingers and puts someone under a spell, for our character, he is snapping out of it.

The only thing left is adding the music and manipulating it, and we have the finished scene.

You can find some great sound design elements online: checking out websites like freesound, sonniss, and 99sounds. Look for free samples, get them downloaded, and experiment.

🎹 Sound Design Resources:

https://freesound.org/
http://99sounds.org/
https://sonniss.com/


This video was Sponsored By

🎵 http://bit.ly/tflpb-paranormalsynths - Click here to download this episode's track. Check out Premiumbeat.com to discover a huge range of exclusive royalty free music!


DISCLAIMERS:

Some of these links are affiliate links, if you purchase gear via these links The Film Look will receive a small commission, but there will be no additional cost to you. Thank you!

Enhance Your Dialogue with Sound Design

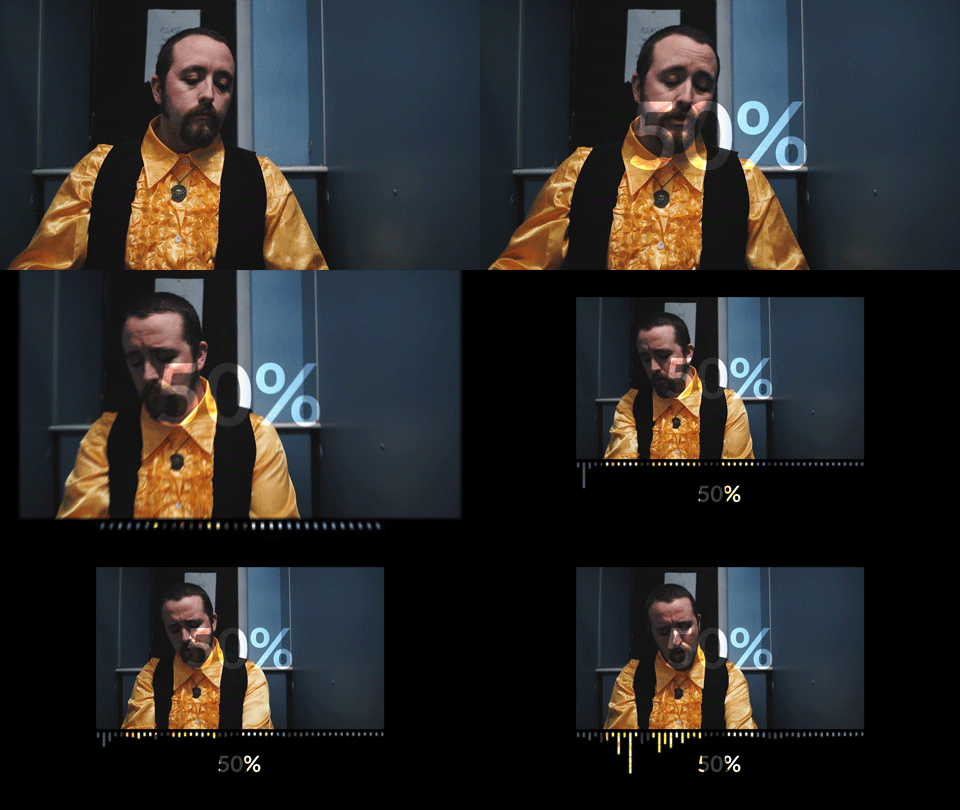
A film is 50% picture and 50% sound. But the sound of your film is not just there to simply compliment the picture. When harnessed correctly, it's a powerful tool to drive the plot and help deliver the story in a really creative way.

Dialogue-Manipulation.gif

Today we are talking about how YOU can use creative sound design with dialogue to make your film more immersive and unique.

Dialogue is self-explanatory. It’s a conversation between two or people, and its sound that delivers that conversation. In film, dialogue should be clear, loud, and audible so the audience can understand what the characters are saying throughout the film.

But this rule doesn’t always have to apply!

A really simple and creative sound design technique is the manipulation of dialogue.

Let’s use one of our films, Backstage, as an example. I’ve altered the scene to help the concept. The Medium is lecturing The Flyswatter but The Flyswatter is so preoccupied that he completely zones out of the scene.

The first thing we can do is muffle the sound of The Medium’s dialogue. We can achieve this with a plugin called a LOW PASS FILTER.

Dialogue-Manipulation1.gif

This plugin cuts the high frequency and leaves only the bass, and can be adjusted for taste. It generates a sound which seems like someone is speaking on the other side of a wall. We can fade in the effect just as The Flyswatter loses eye contact, that is our cue.

A classic sound effect we can add to this shot is a “shell-shocked” buzzing tone. We can add that in and slowly raise the volume to emphasise the moment even further.

Dialogue-Manipulation3.gif

Now we are starting to get in the realm of preoccupation. He isn’t just tuning out of The Medium, but his mind is generating a numb tone.

Lets go one step further and compliment the high-frequency tone with a rumbling cinematic bass.

Dialogue-Manipulation4.gif

And the last thing we can do to help smooth out the cut to the next scene is grabbing a cinematic impact sound effect, reversing it, and placing it at the end of the scene as a crescendo.

Dialogue-Manipulation5.gif

Something as simple as some dialogue manipulation and a little bit of layering is a powerful storytelling tool. We went from the character simply staring off into the distance to BEING inside his mind.

We want the audience to feel what he is experiencing, so by numbing the sound of The Medium and adding some uncomfortably noise, it feels like we are really jumping into his head.

If you are new to sound design, it’s definitely worth checking out our Indie Film Sound Guide to get caught up with all the basics of sound for indie short films.


This video was Sponsored By

🎵 http://bit.ly/tflpb-electrodjango - Click here to download this episode's track. Check out Premiumbeat.com to discover a huge range of exclusive royalty free music!


DISCLAIMERS:

Some of these links are affiliate links, if you purchase gear via these links The Film Look will receive a small commission, but there will be no additional cost to you. Thank you!

Get Cinematic Sound with LAYERING

Foley Art is the process of recording everyday and run of the mill sounds and adding them BACK into the film.

You may think Foley is just recording everything you see in the film and trying to sync it all up. Well...it is, but it CAN be a very creative storytelling tool with a technique called LAYERING.

Foley-Art-&-Layering.gif

Without Foley, a film will feel unnaturally quiet. If there was one element of sound design you NEED in your film, it’s foley. It’s definitely worth the time and effort and will get you closer to achieving the film look.

Foley-Art-&-Layering1.gif

Layering is quite easy if you categorize sounds into different groups:

First of all, you have sounds which are low frequency: bassy, rumbly, dark sounds. Then you have mid-frequency sounds; clear, audible, and comfortable for the most part. And finally you have high-frequency; squeaky, buzzy, and sharp.

The idea of layering is to fill out the soundspace by choosing some high, mid, and low frequency sound effects and place them on top of each other. This will give the sound effect a richer tone and extra punch.

Lets use our film The Asylum Groove as an example:

We have a moment in the film where our character Sam, played by Chris, runs, kicks a bucket, trips over, and hits the ground with a thud.

When we filmed this scene, Chris jumped and landed on a pile of cushions, so we are actually starting from scratch.

Foley-Art-&-Layering2.gif

We are going to scrap all the production audio, other than the grunt from Chris, and build it up from scratch, starting with the impact with the bucket, then the impact with the floor.

The first thing we want to do is add a bassy impact sound.

Foley-Art-&-Layering3.gif

We recorded hitting a cushion with a broom handle in the location. This sound will give the impact some weight and intensity because of the low-frequency thud and the long echoey decay.

Next we need a mid-frequency sound.

Foley-Art-&-Layering4.gif

We recorded myself jumping onto a cushion. Originally I thought this would provide a bassy sound from hitting the cushion but the noise is actually coming from my boots hitting the floorboards.

In sound design there are no mistakes, only new discoveries! And the last thing we need to complement the low and mid frequency sounds is a high-frequency sound!

Foley-Art-&-Layering5.gif

As the bucket is a metal, hollow container, it will provide us with a tinny, high pitched sound effect. So we recorded picking up and handling the bucket.

One sound effect which will really bring the shot home is adding some sound for the post-impact. This will change depending on the shot you are working on, but for this shot, we used a sound of the bucket being kicked and rolling along the floor.  

Foley-Art-&-Layering6.gif

This is very likely the first sound effect you’ll record if you want a “bucket kicking” sound effect. But layering them together definitely gives the impact more cinematic punch! And this is good proof that using the obvious first choice isn’t always the best!

Once we fill in the scene with more sound effects, it really starts to give this shot life. 

With some simple layering, we have given this scene emphasise. It’s an important part of the plot and character development, so giving it some extra OOMPH helps tell a better story.

When layering, try not to add too many sound effects of a similar frequency because you will start to muddy the audio and won’t be able to recognise each sound.

And remember, you don’t ALWAYS have to fill the sound space. Sometimes two or even one sound element will do the trick.

Sound design is all about experimenting, so try things out and see what works.


This video was Sponsored By

🎵 http://bit.ly/tflpb-mrboogeyman - Click here to download this episode's track. Check out Premiumbeat.com to discover a huge range of exclusive royalty free music!


DISCLAIMERS:

Some of these links are affiliate links, if you purchase gear via these links The Film Look will receive a small commission, but there will be no additional cost to you. Thank you!

Behind the Scenes | Indie Film Sound Guide

Now the Indie Film Sound Guide is over we wanted to share our thoughts about what went well, and how we messed up.

The Indie Film Sound Guide is a step by step series teaching you all of the basics to achieve better audio for your films. This includes preparation, recording, and mixing. The guide uses a scene shot specifically for the guide, and follows a proper workflow from start to finish. This is everything you will need to know to start recording great sound for your short film!

Anything we didn't cover? Leave us a comment and we'll create a wrap up episode at the end of the guide, answering any questions we missed!

More tips in the video.

The Indie Film Sound Guide is a step by step series teaching you the basics of recording sound on set.

Episodes released weekly:

Introduction: https://youtu.be/NzmDV5Z9c_o

The Scene: https://youtu.be/dGD8pIOx2ls

Positioning: https://youtu.be/1Ki442J5hUk

Dialogue: https://youtu.be/X8YPFNYgu8s

Minimise Noise: https://youtu.be/e6MEJd_rGvI

Gain & Room Tone: https://youtu.be/U5MJvJ9_guQ

Wild Takes: https://youtu.be/Ci9RIH5d1ew

Organise & Sync: https://youtu.be/ZyVvwsWQIwk

Mixing: https://youtu.be/7x5SnoftgUw


Behind the Scenes  Indie Film Sound Guide.jpg

DISCLAIMERS:

Some of these links are affiliate links, if you purchase gear via these links The Film Look will receive a small commission, but there will be no additional cost to you. Thank you!

Mixing | Episode 8: Indie Film Sound Guide

The Indie Film Sound Guide is a step by step series teaching you all of the basics to achieve better audio for your films. This includes preparation, recording, and mixing. The guide uses a scene shot specifically for the guide, and follows a proper workflow from start to finish. This is everything you will need to know to start recording great sound for your short film!

In this video we talk about what you have to do next once you have finished editing your film and you have a picture lock. This is when you start to make the sound of your film sound just as good as the look of your film. We are by separating each actors dialogue with in Adobe Audition, and set there level between -6dB and -24dB. Adding room tone will help to fill in any silence between dialogue.

Adding foley and sound effects is all done in the mixing process, so once you have re-recorded cups being put down, doors opening and footsteps you can add these into your edit.

Anything we didn't cover? Leave us a comment and we'll create a wrap up episode at the end of the guide, answering any questions we missed!

More tips in the video.

The Indie Film Sound Guide is a step by step series teaching you the basics of recording sound on set.

Episodes released weekly:

Introduction: https://youtu.be/NzmDV5Z9c_o

The Scene: https://youtu.be/dGD8pIOx2ls

Positioning: https://youtu.be/1Ki442J5hUk

Dialogue: https://youtu.be/X8YPFNYgu8s

Minimise Noise: https://youtu.be/e6MEJd_rGvI

Gain & Room Tone: https://youtu.be/U5MJvJ9_guQ

Wild Takes: https://youtu.be/Ci9RIH5d1ew

Organise & Sync: https://youtu.be/ZyVvwsWQIwk

Mixing: https://youtu.be/7x5SnoftgUw


Mixing  Episode 8 Indie Film Sound Guide
Mixing-Indie-Film-Sound-Guide.jpg

DISCLAIMERS:

Some of these links are affiliate links, if you purchase gear via these links The Film Look will receive a small commission, but there will be no additional cost to you. Thank you!

Organise and Sync | Episode 7: Indie Film Sound Guide

The Indie Film Sound Guide is a step by step series teaching you all of the basics to achieve better audio for your films. This includes preparation, recording, and mixing. The guide uses a scene shot specifically for the guide, and follows a proper workflow from start to finish. This is everything you will need to know to start recording great sound for your short film!

So you’ve finished shooting your film. You have a bunch of cards you need to unload onto the computer which contain the picture and sound elements for your movie. But before we start editing the footage and mixing the sound, let’s get all these files into a clear and precise structure, and synchronise the production audio to the shots.

Editing and mixing without a proper folder structure is an absolute nightmare. Files get saved in the wrong place, shots go missing, footage can’t get re-linked, and it just becomes a fighting battle.

It can get even worse if you’re working with multiple post production artists, all sharing the same files and muddling everything up when you bring it all back together.

To help alleviate some of that stress, I’ll show you the folder structure we like to use here at The Film Look, and I’ll also show you a handy application to create the structure in an instant!

Get yourself over to digitalrebellion.com and download their programme called Post Haste. It’s a free desktop app for managing projects, and has some great features.

Post-Haste-Folder-structure

Once you’ve got it downloaded, you’ll see this screen. They already have some awesome templates for a range of creative workflows, but we are going to design one from scratch specifically for organising short films for use with multiple artists, and hopefully prevent any unlinked and dodgy files in the future!

Let’s start off with the film’s root file, where absolutely everything for the film will be located. In order to keep files from going missing you must save everything used for the film inside this folder, even if that means duplicating some assets from graphics libraries, for example.

Keeping it all inside this folder means you can move the hard drive to another computer, open it up, and everything you need is already in the correct place.

Inside here we have project folders where all of the session save files will go. Inside these folders will be one for dragging old versions of save files to keep it tidy.

Next we have a media file. This is where all of the video and audio files will be transferred to, as well as any photos, graphical assets, and music used in the film.

Inside the video folder we have folders separated by each of the shooting dates. Inside the dated folders, transfer everything from each card you have into their own folders. This means copying all of the system files as well as the video and audio files. This is to ensure if anything goes wrong, you have the full image of the SD card if you need to transfer anything back over to the camera. Fingers crossed you never have to do this!

Having dates on the folders means you will know exactly what you shot on that day, and you are able to link the video dated folders with the audio dated folders.

The audio folder is similar to the video folder; everything is firstly dated then the whole card image is copied and pasted into their own audio folder.

Then there is a production documents folder for scripts, storyboards, shot lists and other documents like forms, permits, and contact information documents.

The last main folder in the structure is the export folder. Inside here is a folder for the film and scenes, and another for rendering out VFX sequences.

So now we have a folder structure, let’s make a bin structure inside your editor!

We are using Adobe Premiere for our projects; if you are too, you can find our Premiere Template in the description below. If you’re using something else, follow along and you can create and customise it to suit you!

Organise-and-Sync

First of all we will create a sequences bin; this is where you can save your main timeline, any duplicates if you want to save versions, and maybe even something like a selects sequence.  

Then we have an assets bin, which will hold all of the global music and graphical assets for the film.

Next is a media bin. Inside here will be a bin for the shooting date, inside here will be a bin for the video and audio, and an extra bin called Synced A\V.

When you have your footage imported and inside the correct dated folders, we will start to rename clips, synchronise the video and audio, and place them into the Synced A/V bins.

Go through each video clip and rename them to the mark written on the clapperboard at the start or end of the take. The audio will have an audible take with the same numbers and letters called out.

Some shots may have no audio to sync. And if you have recorded any wild takes, rename these according to the mark you can hear at the start of the take.

To synchronise and merge the audio and video takes, first of all double click on the video file to bring it into the source window. By clicking on the audio icon, it will display the waveform. Scrub along to the audio spike and bring the in-point right up the start of the spike. You can set an in-point by scrubbing to the point and hitting “I” on your keyboard.

Okay, half way there. Find the production audio of the same take, double click on it to bring it into the source window, and set the in-point just like the video file by hitting “I”.

Now that we have the in-points selected on both clips, hold control and click on both the video and audio files. Right click and go to Merge Clips, set the Synchronise Point to In Points, and check the box next to Remove Audio from AV clip. Checking this will get rid of the scratch audio and just use the good production audio. If you want both, uncheck this box.

Then place the newly merged file into the Synced A\V folder. Do this with all of the files, and you will have synchronised audio for your scene.

Now it’s time to edit!


Anything we didn't cover? Leave us a comment and we'll create a wrap up episode at the end of the guide, answering any questions we missed!

More tips in the video.

The Indie Film Sound Guide is a step by step series teaching you the basics of recording sound on set.

Episodes released weekly:

Introduction: https://youtu.be/NzmDV5Z9c_o

The Scene: https://youtu.be/dGD8pIOx2ls

Positioning: https://youtu.be/1Ki442J5hUk

Dialogue: https://youtu.be/X8YPFNYgu8s

Minimise Noise: https://youtu.be/e6MEJd_rGvI

Gain & Room Tone: https://youtu.be/U5MJvJ9_guQ

Wild Takes: https://youtu.be/Ci9RIH5d1ew

Organise & Sync: https://youtu.be/ZyVvwsWQIwk

Mixing: https://youtu.be/7x5SnoftgUw


Organise and Sync

DISCLAIMERS:

Some of these links are affiliate links, if you purchase gear via these links The Film Look will receive a small commission, but there will be no additional cost to you. Thank you!

Foley Art | Episode 6: Indie Film Sound Guide

The Indie Film Sound Guide is a step by step series teaching you all of the basics to achieve better audio for your films. This includes preparation, recording, and mixing. The guide uses a scene shot specifically for the guide, and follows a proper workflow from start to finish. This is everything you will need to know to start recording great sound for your short film!

Foley art is the reproduction of everyday sound effects that we are going to mix back into the film. For the scene we are using, these are things like clothing movement, Frank tapping on the table, coffee cups and saucers clattering, and hats coming on and off.

Without these sound effects, your film will lack a rich cinematic soundscape. It will feel unnaturally quiet and uncomfortable. Foley Art is what separates the men from the boys and women from the girls, and mixing Foley into your film is another step to creating the film look.

If you have been following this guide from the start, you have probably already recorded a bunch of wild takes for your scene. A lot of these will work great. But if there are any which don’t quite sound right, you can always add those elements to the list of sounds you can re-record as Foley.

So how do we go about recording Foley?

Find yourself a quiet room. A small room, preferably with carpets will work best. Hanging up any blankets and clothes to cover up walls will dampen any reverb you might get from the sound bouncing around the room.

Next you’ll need props and materials. In order to record the sound effects, use any objects which will create the noises you need.

With the materials gathered it’s time to imitate the actions in the scene to re-create the sound effects.  As a visual aid, you can export the edit of the scene and put it on a laptop or a phone. Playback the scene and do what the actors do.

Do this with all of the actions you can think of, several times. Like when recording wild takes, mark the track by yelling out what action it is you are re-producing. That way in the mix, you’ll know exactly what the sound is supposed to be.

Get the microphone as close as you can, and try to keep the gain lower than what you set it during the shoot. You will want to record the Foley very clean and with low noise. The sounds may be quieter than dialogue, and it might not hit really loud levels, but don’t worry. Just as long as the recording isn’t noisy and you have the microphone nice and close, this will work just fine.

After recording Foley, you should have everything you need to create a rich cinematic soundscape for your scene. You might have to source some sound effects online, but if you can re-produce them yourself, it’s always the better option.


Anything we didn't cover? Leave us a comment and we'll create a wrap up episode at the end of the guide, answering any questions we missed!

More tips in the video.

The Indie Film Sound Guide is a step by step series teaching you the basics of recording sound on set.

Episodes released weekly:

Introduction: https://youtu.be/NzmDV5Z9c_o

The Scene: https://youtu.be/dGD8pIOx2ls

Positioning: https://youtu.be/1Ki442J5hUk

Dialogue: https://youtu.be/X8YPFNYgu8s

Minimise Noise: https://youtu.be/e6MEJd_rGvI

Gain & Room Tone: https://youtu.be/U5MJvJ9_guQ

Wild Takes: https://youtu.be/Ci9RIH5d1ew

Organise & Sync: https://youtu.be/ZyVvwsWQIwk

Mixing: https://youtu.be/7x5SnoftgUw


Foley Art  Episode 6 Indie Film Sound Guide.jpg
Recording Foley.jpg

DISCLAIMERS:

Some of these links are affiliate links, if you purchase gear via these links The Film Look will receive a small commission, but there will be no additional cost to you. Thank you!

Wild Takes | Episode 5: Indie Film Sound Guide

The Indie Film Sound Guide is a step by step series teaching you all of the basics to achieve better audio for your films. This includes preparation, recording, and mixing. The guide uses a scene shot specifically for the guide, and follows a proper workflow from start to finish. This is everything you will need to know to start recording great sound for your short film!

Let’s talk a bit about recording sound effects for your film. In particular, wild takes!

So far I talked about positioning, getting clean dialog, removing unwanted noises, and where to set your levels. Now comes the next thing on the list: recording wild takes!

Wild takes are the process of recording sound on location without the cameras rolling. This means you can get a lot closer to certain things and record crisp, clear sound effects. We will go through recording sound effects later on in post-production known as Foley Art, but right now, we are going to grab as many sound effects as we can here on set.

There might be some sound effects which are very difficult to re-produce, such as the sound of machinery, locks, doors, and footsteps on particular surfaces.

Grabbing these sounds on location means you won’t have to go trawling the internet for the perfect door latch sound effect!

We will record furniture, clothing, tapping, and cups and glasses later on as they are a lot easier to get right in post, and it will save time on set.

So, record your wild takes at, or lower than, your scene’s gain cap. If the sound you are recording is quiet even at the gain cap, don’t worry! You don’t need to rack your gain right up to record it loud, because it’s likely going to be mixed quietly in the edit anyway.

You will want to record at least five or six takes of each sound effect, all from different angles, positions, distances, and even direct and non-direct recording.

Having more to choose from later on will help a lot when mixing. Something recorded at a different angle can sound quite a bit different, and sometimes it sounds a lot more realistic and cinematic too. So make sure to record a range of each sound effect so you can choose the best later on.

When you start recording, mark the take by clearly stating what action is being performed, and if it’s from a different angle, state that too. In editing, you will be able to listen to the start of the audio and know exactly what it is.

So now you should have: a well-positioned microphone recording clear and loud dialog, you should have eliminated any unwanted noises and sound effects during the dialog takes, a gain cap with room tone, and a library of sound effects to layer into the scene.


Anything we didn't cover? Leave us a comment and we'll create a wrap up episode at the end of the guide, answering any questions we missed!

The Indie Film Sound Guide is a step by step series teaching you the basics of recording sound on set.

Episodes released weekly:

Introduction: https://youtu.be/NzmDV5Z9c_o

The Scene: https://youtu.be/dGD8pIOx2ls

Positioning: https://youtu.be/1Ki442J5hUk

Dialogue: https://youtu.be/X8YPFNYgu8s

Minimise Noise: https://youtu.be/e6MEJd_rGvI

Gain & Room Tone: https://youtu.be/U5MJvJ9_guQ

Wild Takes: https://youtu.be/Ci9RIH5d1ew

Organise & Sync: https://youtu.be/ZyVvwsWQIwk

Mixing: https://youtu.be/7x5SnoftgUw


Wild Takes  Episode 5 Indie Film Sound Guide.jpg
Recording Wild Takes.jpg

DISCLAIMERS:

Some of these links are affiliate links, if you purchase gear via these links The Film Look will receive a small commission, but there will be no additional cost to you. Thank you!

Gain & Room Tone | Episode 4: Indie Film Sound Guide

The Indie Film Sound Guide is a step by step series teaching you all of the basics to achieve better audio for your films. This includes preparation, recording, and mixing. The guide uses a scene shot specifically for the guide, and follows a proper workflow from start to finish. This is everything you will need to know to start recording great sound for your short film!

Most audio devices will have a way of manually choosing how sensitive your microphone is to sound. But where do you set your levels?

So far we have talked about getting in the right position, recording clean dialog takes, and removing any unwanted noises from your scene. If you want to catch up, episodes 1-3 are in the description.

Let’s talk about where you should be setting your sound levels. The loudness of actors and their actions differ from scene to scene, and even take to take. So what I like to do is run through the scene with the director and the actors, sound kit at the ready, and study the sound levels.

Set your levels so you are getting loud and clear dialogue with a little bit of room from the top peak line just encase the sound gets a little louder. If you are risking your sound clipping during the dialog, your gain is probably set just a tad too high.

Once you find a comfortable loud and clear level, you shouldn’t have to adjust the gain above this for the rest of the scene. Make a mental note of the number your audio recorder is reading out – this is your scene’s gain cap. Going above this will only introduce more noise with no real benefit.

If an actor shouts in the scene, such as this example of Stu, your microphone will very likely be overdriven and the audio will distort. This is known as clipping.

Clipping your audio is just as frowned upon as overexposing your footage. You aren’t only recording something that sounds bad, but the information is now destroyed and can’t be recovered. No amount of tweaking will fix the distortion.

The solution to this is to lower the gain until you can record the shouting without it clipping. 

Because you’ve brought the gain down in order not to clip the audio, it will have also lessened the amount of natural noise compared to the other takes which are set higher. So we will need to add that natural noise back in. You can do this using room tone.

Room tone is a recording of up to 2 minutes of nothing but complete room ambience, recorded at your scene’s gain cap.

Room tone is there to fill in any patches of silence when editing dialogue and sound effects. It is also used like a Band-Aid, to cover up any unwanted noises or if the director gives direction mid-take.

A good time to record your room tone is at the start of the shoot, just after you have found a good gain cap.

Recording it before you start rolling picture helps in a few other ways too. Firstly, you won’t forget it as its top of the list. Second, you aren’t making people wait around at the end of the day to capture it. And third, if there are any more unwanted noises you didn’t pick up on, you will likely hear them when you record it.  

So, step four, set your gain cap and don’t go beyond it. Either lower the gain or move your microphone away if it clips. And don’t forget to record room tone!

Anything we didn't cover? Leave us a comment and we'll create a wrap up episode at the end of the guide, answering any questions we missed!

The Indie Film Sound Guide is a step by step series teaching you the basics of recording sound on set.

Episodes released weekly:

Introduction: https://youtu.be/NzmDV5Z9c_o

The Scene: https://youtu.be/dGD8pIOx2ls

Positioning: https://youtu.be/1Ki442J5hUk

Dialogue: https://youtu.be/X8YPFNYgu8s

Minimise Noise: https://youtu.be/e6MEJd_rGvI

Gain & Room Tone: https://youtu.be/U5MJvJ9_guQ

Wild Takes: https://youtu.be/Ci9RIH5d1ew

Organise & Sync: https://youtu.be/ZyVvwsWQIwk

Mixing: https://youtu.be/7x5SnoftgUw


Gain & Room Tone  Episode 4 Indie Film Sound Guide.jpg

DISCLAIMERS:

Some of these links are affiliate links, if you purchase gear via these links The Film Look will receive a small commission, but there will be no additional cost to you. Thank you!

Minimise Noise | Episode 3: Indie Film Sound Guide

The Indie Film Sound Guide is a step by step series teaching you all of the basics to achieve better audio for your films. This includes preparation, recording, and mixing. The guide uses a scene shot specifically for the guide, and follows a proper workflow from start to finish. This is everything you will need to know to start recording great sound for your short film!

As the sound recordist, you have the power of the microphone and headphones. If you can hear any unwanted noise, such as the air conditioning unit, a clock ticking, or a plane flying overhead, you need to speak up and get it shut off. Welcome to episode 3.

So far we have talked about the best position to record and prioritising dialog. Now it’s time to talk about reducing unwanted noises for really clean and crisp audio.

Unwanted noises are a pain to remove in post-production. You want to record in the quietest possible environment, so turn off any whirring computers, buzzing fridges, and silence anything which hums, buzzes, or beeps.

Once this is done, you will have a nice quiet location to record in. But it doesn’t stop there!
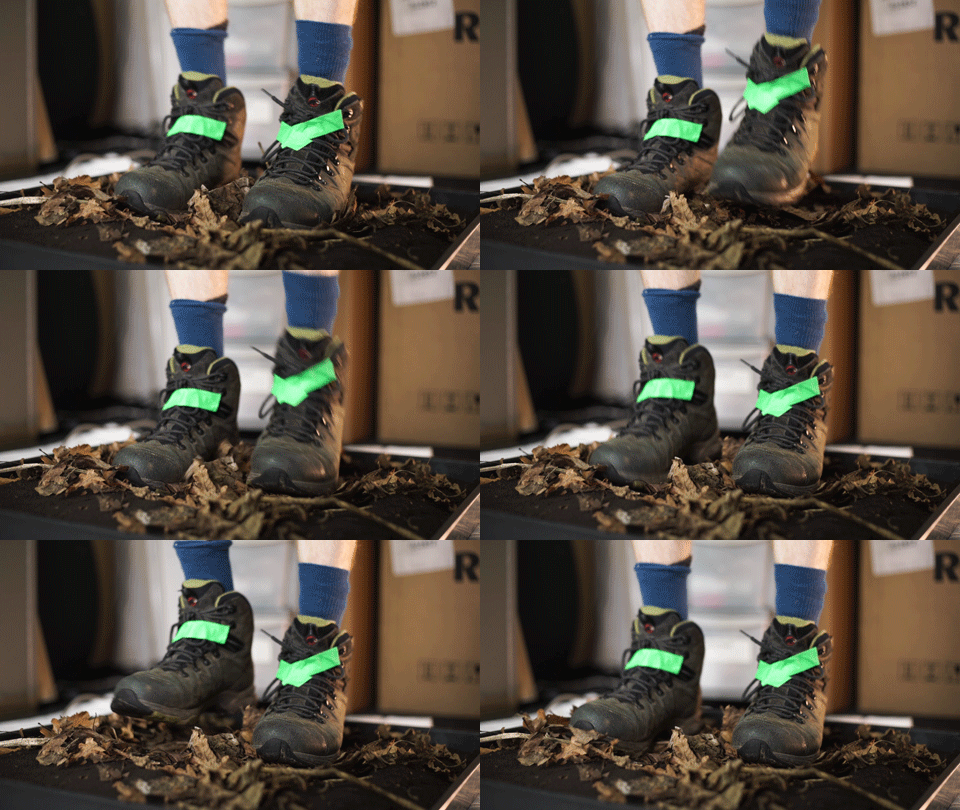
Sometimes in a scene an actor will be performing an action while delivering a line. If the action creates a very loud sound mid-dialog, you’ll want to minimise the loudness of the action as best you can.

Here we have a scene: Stu and Frank are discussing how they are going to dispose of a body, and Stu goes to take a drink. This is where the issue occurs. Stu speaks at the same time he places the cup down onto the saucer.

This means we now have 2 sounds baked into one audio track; the dialog of Stu and the coffee cup sound effect.

There are 2 ways we can deal with this. Firstly, we can change the blocking. If the timing can be changed so Stu delivers the line THEN places it down, problem solved.  But sometimes this slows down the pace of the scene. So instead, we can try to minimise the sound of the cup and saucer colliding.

If the teacup and saucer aren’t in the shot when it is being placed down, you can remove the saucer completely and cushion the contact between the table and the teacup using something like a towel or a sweater. Then it’s a case of recording the sound effect of the cup and saucer and mixing it back into the scene.

It might seem like you are doing twice as much work, but think of it like this:

With all of your sound elements as independent single tracks you are able to alter those sound effects without affecting any of the others. If your sound elements were on a single track grouped together, you won’t be able to change one sound without changing all the others. It’s like trying to unbake a cake.

This goes for dialogue too. In production, try prevent any overlap of dialogue between actors. You can always edit overlap of lines in post-production.

So step three, remove any buzzing and humming from the scene, and limit the loudness of sound effects by dampening or removing them all together.


Anything we didn't cover? Leave us a comment and we'll create a wrap up episode at the end of the guide, answering any questions we missed!

The Indie Film Sound Guide is a step by step series teaching you the basics of recording sound on set.

Episodes released weekly:

Introduction: https://youtu.be/NzmDV5Z9c_o

The Scene: https://youtu.be/dGD8pIOx2ls

Positioning: https://youtu.be/1Ki442J5hUk

Dialogue: https://youtu.be/X8YPFNYgu8s

Minimise Noise: https://youtu.be/e6MEJd_rGvI

Gain & Room Tone: https://youtu.be/U5MJvJ9_guQ

Wild Takes: https://youtu.be/Ci9RIH5d1ew

Organise & Sync: https://youtu.be/ZyVvwsWQIwk

Mixing: https://youtu.be/7x5SnoftgUw


Minimise Noise - Indie Film Sound Guide

DISCLAIMERS:

Some of these links are affiliate links, if you purchase gear via these links The Film Look will receive a small commission, but there will be no additional cost to you. Thank you!