No Lights | Lighting Setup #2

So what happens if you don’t have any lights, but you need to shoot an interview?

Well this is how we did it.

The title of this video lies a little. We did use a light, but it’s one everyone has access to; the sun.

We wanted to utilise the natural light that comes through our 9 foot window in our studio. So we placed our subject to the left hand side of the window and framing the window completely out of shot.

We could have had the window directly behind our subject, but we would have needed to use lights in order not to overexpose the background. We have a video about this set up here.

Key Light

Our key light was the sun. This was our main and only source of light. We shot on an overcast day so the light was already diffused by the clouds, but we pinned a frosted shower curtain against the window to diffuse it even more, giving us a really soft natural light. For reference the window was 2 meters away from our subject.

No-Lights-Lighting-Setup-Key-Light.jpg

Fill Light

To add light to our subjects face we used a silver reflector which was placed just out of frame. We placed it opposite the window so the maximum amount of light would bounce off it and onto our subject face.

Lighting-setup-with-no-lights

Edge Light

Because the sun was our key light, and directly behind our subject, it also acted as an edge light.

No-Lights-Lighting-Setup-Floor-Plan.jpg

Camera

The camera we used was a Sony A7s, 2 meters away from our subject. We used a Jupiter 9 85mm lens set to f4, an ISO of 200, a shutter speed of 1/50, and the white balance was set to daylight.

If you want to learn more about the Jupiter 9 85mm lens, we have a video about it here.

This lens does flare, and the angle we had it on for this setup, it was flaring a lot, taking the contrast away from our subjects face. To get rid of this we set up a small flag on a light stand, to block the light hitting the lens.

The flag we used was nothing expensive. It was just a black piece of card, but it worked great. Hold the card

No-Lights-Lighting-Setup-Flag.jpg

On/Off

Here is what we started with, and what each light modifier is doing.

Lighting-setup-before.jpg
Lighting-setup-after.jpg

This video was Sponsored By

http://bit.ly/synergy-pack - Get professional assets for your video from RocketStock.com. Their "Synergy" video pack is perfect for video editors and animators looking for versatile elements for any type of project. Get this pack now.

http://bit.ly/track-tell-me - Click here to download this episode's track. Check out Premiumbeat.com to discover a huge range of exclusive royalty free music!


DISCLAIMERS:

Some of these links are affiliate links, if you purchase gear via these links The Film Look will receive a small commission, but there will be no additional cost to you. Thank you!
Wireless Shotgun Mic Hack

Today we are going to convert a wired boom mic into a wireless boom mic with a few things you might already have in your kit!

So you may have already seen a really cool video by filmmaker KnopTop on how he converts a Video Mic Pro into a wireless mic by plugging it straight into a lavaliere microphone transmitter which sends the signal to the camera via a paired up receiver. If you haven’t, go check out it, links down below.

Well this idea got us thinking. Can you do this with a bigger microphone, like a one that uses XLR input, and get similar results? Let's do some digging!

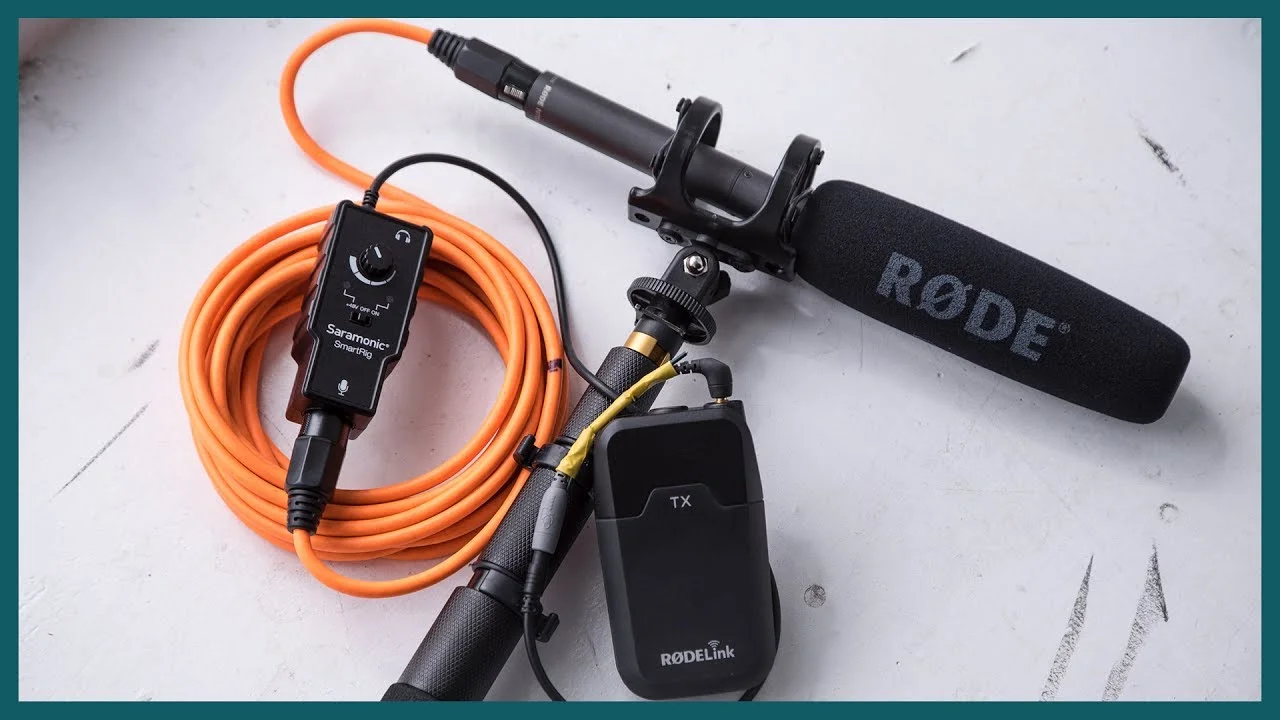
Okay, so to begin with, we have the microphone. This is a Rode NTG2 shotgun mic. Unfortunately, it can’t plug straight into a lavaliere microphone transmitter because it doesn’t have the right connections.

The Rode Lavaliere transmitter I’m have here needs a 3.5mm jack. This is fine if you are plugging in something like a Video Mic Pro because it fits, but something like the NTG2 uses XLR and it also needs a bigger pre-amplification to boost the signal.

Basically, the NTG2 needs more juice than this  VidMic, and this RodeLink can’t give it what it needs.

So this is where the Saramonic SmartRig comes in. This is going to be our bridge between the 2 foreign connections as well as the power boost the microphone needs. It has an XLR socket on one end, a 3.5mm jack on the other, and the 9v battery it uses is enough to power a bigger microphone.

Shotgun-Mic-Hack.jpg

Lets hook it up and get it all working!

So now it goes: Microphone, XLR, SmartRig, Transmitter, Receiver, sound.

He has the Lavaliere Transmitter hooked to his pocket with the smartrig attached. The XLR lead is plugged into this which goes up the boom and to the microphone which is currently being boomed onto me as we speak. It’s all held together with a few clips and carbines for fast assembly and disassembly.

It’s technically not “wireless”. There is still a cable running down the boom pole that goes into the smart rig and transmitter. But we aren’t tethered to the camera, so I can move back a lot further than the length of your average XLR cable.

There are some downsides to this setup. Because of the way it’s configured, it is the camera operator who will be monitoring the audio, and not the sound recording.


This video was Sponsored By

http://bit.ly/corruption-pack - With glitchy overlays, distorted logo reveals and more, RocketStock’s "Corruption" is an ideal way to give your project a dramatic edge.

https://bit.ly/track-blue-lounge - Click here to download this episode's track. Check out Premiumbeat.com to discover a huge range of exclusive royalty free music!


Wireless Shotgun Mic Hack

DISCLAIMERS:

Some of these links are affiliate links, if you purchase gear via these links The Film Look will receive a small commission, but there will be no additional cost to you. Thank you!

Does it matter what you shoot on?

  • “Story is king.”

  • “I don't care what you shot it on if the story sucks.”

  • “A fancy camera doesn't equal a great film.”

  • Cutouts of these quotes are placed onto the oak board

I certainly agree with these statements. But I strongly disagree with the following:

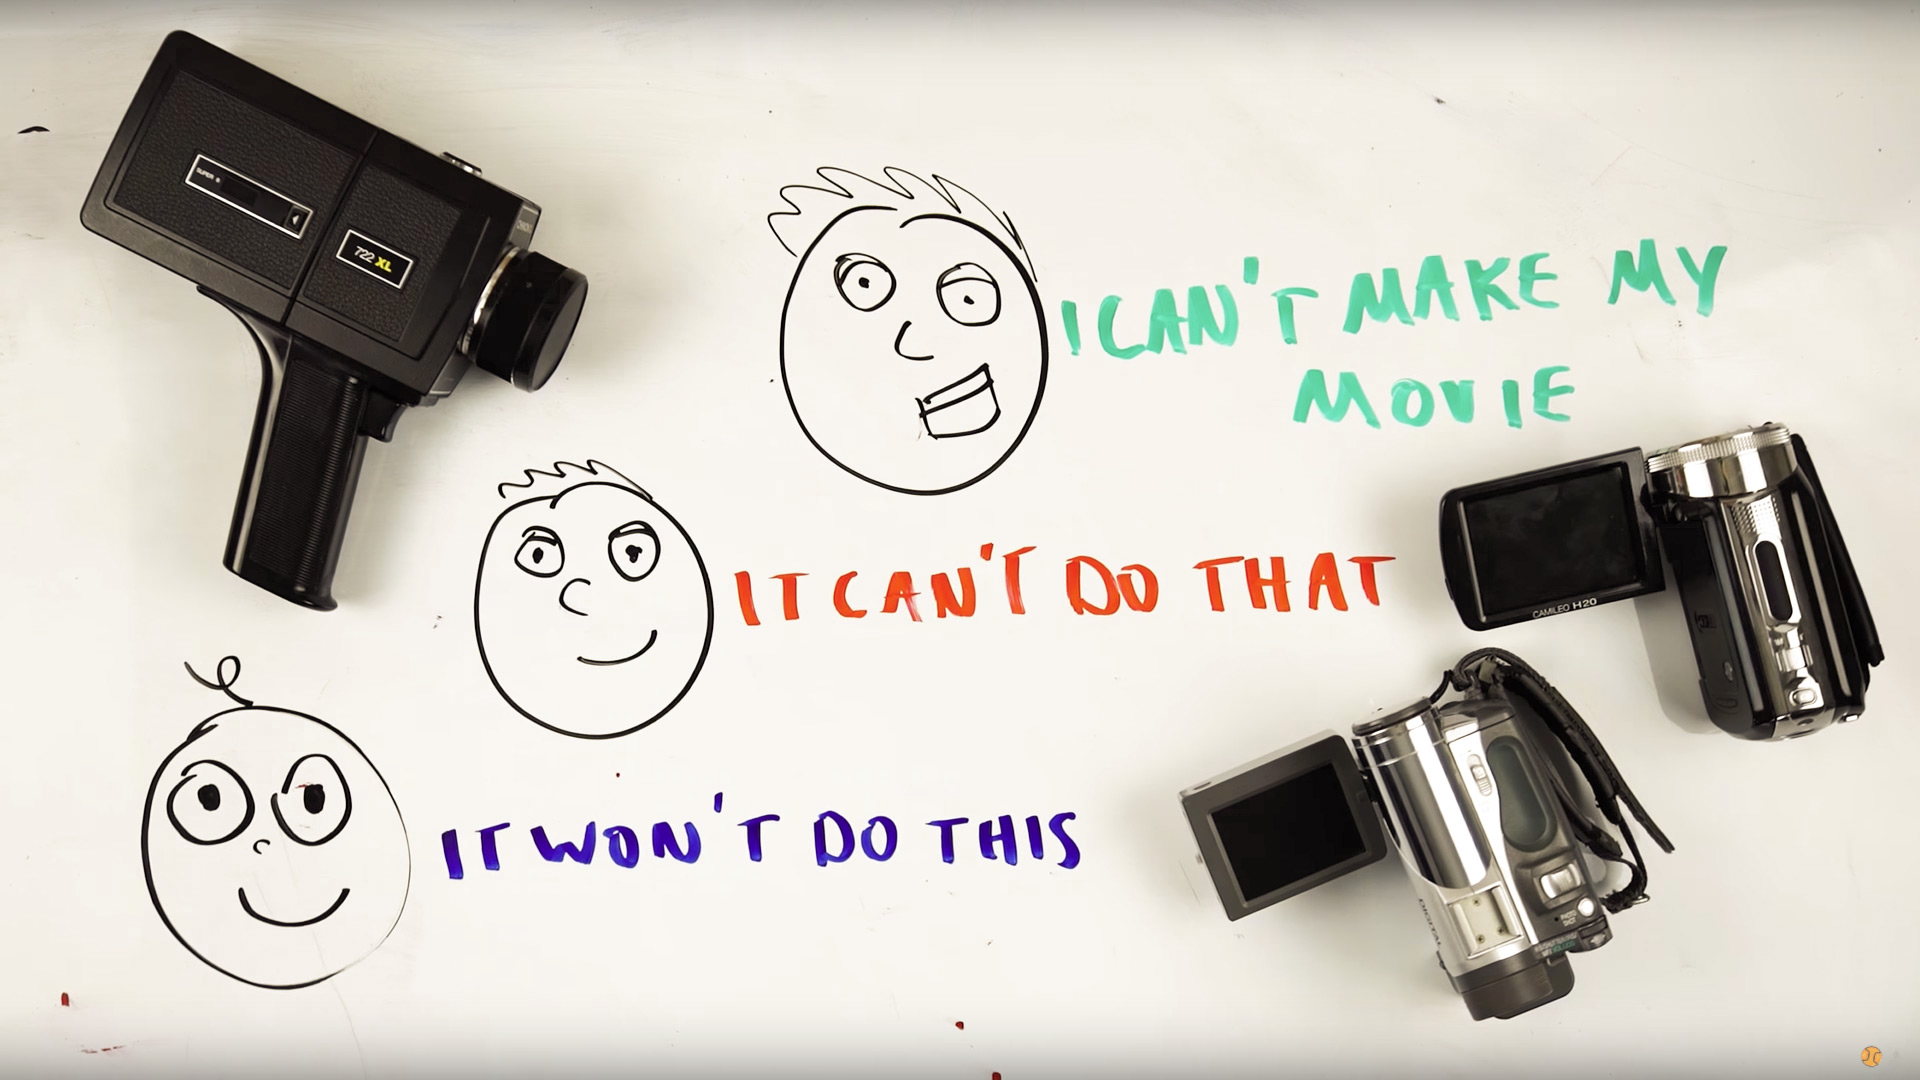
  • “The camera doesn't matter.”

  • “The camera is less than 5% of a movie.”

  • “There is no point in getting a fancy camera, just shoot it on what you have.”

  • “The camera isn’t important.”

Cameras are the film! What you shoot on does matter! Let me explain myself. 

The camera is the most important tool you have to create a film. Without a camera you have radio. Without camera OR sound, you have a book.

A cheap, easy to use camera does 90% of what a more expensive one does. But it has limitations.

As you grow as a filmmaker, you don't want to have to be fighting the camera to make the film you need to make. You want to be able to harness the tools that camera is giving you.

Does-it-matter-what-you-shoot-on.jpg

Our season 3 film "Keep The Change" was shot all at night. We upgraded from a Canon t3i to a Sony a7s so we could harness it's low light capabilities and create the film without having the tug back at the lack of light. Could we have made Keep The Change on a T3i? No. We could have made A VERSION of Keep The Change, but it wouldn't have been the same film.

Does an expert carpenter solely rely on his saw? No, of course not. The saw might be the tool he uses the most, but he also has very specific tools for certain jobs. He doesn't want to be fighting with his tools when he creates a masterpiece, he wants to have the tools he needs on-hand so he can create his masterpiece without compromise.

A hollywood camera is the same thing. It's the saw... but it's also the chisel, and the plane, and the hammer, the square, the vice, and the tape measure, all in one. A hollywood production team use the big beefy expensive cameras because they need the perfect tool for the job. They don't have the time to fight with their tools. They don’t have time for unreliable equipment.

For them, time is money. Every mistake they make increases shooting time. What costs more: getting the $100,000 camera compared to a $1000 camera, or having to pay Robert Downey Jr another $250,000 for an extra day because your shot was out of focus...because you decided to shoot on a Canon 5d Mark 2, you know...because the camera doesn’t matter.

Does-the-camera-I-use-matter

And it works cheaper even shooting with 2 $100,000 cameras! If you can cover two different angles in a scene you have pretty much split the shooting day in half...still cheaper than getting Iron Man back onto the set.

I am comparing extremes here, but it’s still something we can consider. As indie filmmakers we can’t buy a second camera or super expensive camera, but we can make choices to purchase or rent something which will speed up and aid production, and help tell the story which you need to tell.

Now don't get wrong! I loathe the sentence "Oh your film looks awesome, you must have a really good camera!" That's like telling Gordon Ramsey his food tastes great because his oven is expensive!

But as indie and amateur filmmakers, it's our job to know the limitations of the tools we have available, and to utilize them. Challenge yourself, of course! Embrace the flaws, embrace the indie look. Limitation drives creativity. But don't say the camera doesn't matter, because it does. 

It’s all about the right tool for the right job.


This video was Sponsored By

http://bit.ly/track-funk-soul - Thanks to PremiumBeat for providing the music for this week's episode. Check out Premiumbeat.com to discover a huge range of exclusive royalty free music!


Does it matter what you shoot on

DISCLAIMERS:

Some of these links are affiliate links, if you purchase gear via these links The Film Look will receive a small commission, but there will be no additional cost to you. Thank you!

Story in a Can #7 | "Shop Assistant"

In each can there are 20 locations, 20 objects, 20 characters, and 20 scenarios. We pick one from each of the cans and try to come up with a film idea on the spot. Sometimes they are bad, but sometimes we turn the idea into a film.

In Story In a Can #9 Rob and Emily have to make a story about a Character who is a Shop Assistant, a location of a School, an object of a Light Bulb, and a scenario of Shoot Out?

Watch the video to see what story was made.


DISCLAIMERS:

Some of these links are affiliate links, if you purchase gear via these links The Film Look will receive a small commission, but there will be no additional cost to you. Thank you!

Animated Duct Tape Titles

Today we are going to make some animated duct tape titles just like these using a green screen, some duct tape and a pen, and a window. 

We’ve created stuck-on titles in the past for an episode of our Sunday show, The Film Look vlogs; we used them as lower thirds. The setup worked, but we’ve found a much easier and potentially cheaper way to execute this technique.

Previously we had strung up a green screen, lit it, then shot against a mounted plate of glass on an angle to prevent any reflection. It worked well enough, but sourcing a plate of glass this large is time consuming and can be expensive. Then there is the difficult task of mounting it for shooting!

So what is something most people already have access to that will work just the same? How about a window?

Find yourself a window with a view to outside. The trick to a good key from a green screen is to light it as evenly as possible. If you don’t have the right kind of lights, this can be tricky, so putting the green screen outside is the next best thing. Just make sure whatever location you do use, it is getting caught by even sunlight, or in our case, an overcast day.

Green-Screen.jpg

We don't have a collapsible green screen, but we do have these green sheets! So we pinned the sheets to our collapsible backdrop with pegs to remove any creases.

If you have the cash, a proper collapsible green screen is going to help a lot more than our method. We just used what we had access to, to demonstrate the technique.

To avoid any reflections of ourselves and the camera against the glass we took a large piece of cardboard and cut out a hole for the lens. We did this in order to create a consistent reflection which removes background details.

With a studio setup you would have the camera in total darkness to avoid reflection on the glass but since we are shooting during the day inside a house, we found this to be a cheap and effective alternative method that most people can do at home.

Frame up the camera so the green screen covers the whole frame and expose the image of the subject, in this case it's the duct tape titles, and set it a stop under over exposure so you don't blow out the white tape.

Okay, so here’s a rundown of the setup! Green screen outside, pinned out so it doesn’t have creases. The window is in front where we are sticking the duct tape titles, the camera is behind this with a wall of cardboard to create a blank canvas of a reflection.

Green-Screen-Setup.jpg

Now it’s time to hit record and stick them to the window!

We recorded a bunch of titles including monday to sunday, thanks for watching, and subscribe, sticking them on the window and then pulling them off. So now that we have the footage, let's get it on the computer and keyed out!

Duct-Tape-Titles.jpg

Not everyone has the same programmes on their computers, so I won’t get application specific. I’m using after effects, but I do believe you can achieve this in a range of different editing and visual effects applications.

Firstly, apply the key plugin. I’m using KeyLight. Grab the eyedropper tool and click on your green screen. If you have an even screen, so no creases and an even light, it should get rid of 90% of the green on the first click. There are jog bars you can play around with if you need to tune your key in, and use masks to get rid of large portions which are never touched, such as this corner here.   

With a bit of fine tuning and toying with the parametres, this is the final result.

Duct-Tape-Titles1.jpg

This video was Sponsored By

http://bit.ly/stanza-pack - If you're looking for stylish transitions for your video, then check out "Stanza" by RocketStock!

https://bit.ly/track-urbanmyth - Click here to download this episode's track. Check out Premiumbeat.com to discover a huge range of exclusive royalty free music!


Animated Duct Tape Titles

DISCLAIMERS:

Some of these links are affiliate links, if you purchase gear via these links The Film Look will receive a small commission, but there will be no additional cost to you. Thank you!

Low Key | Lighting Setup #1

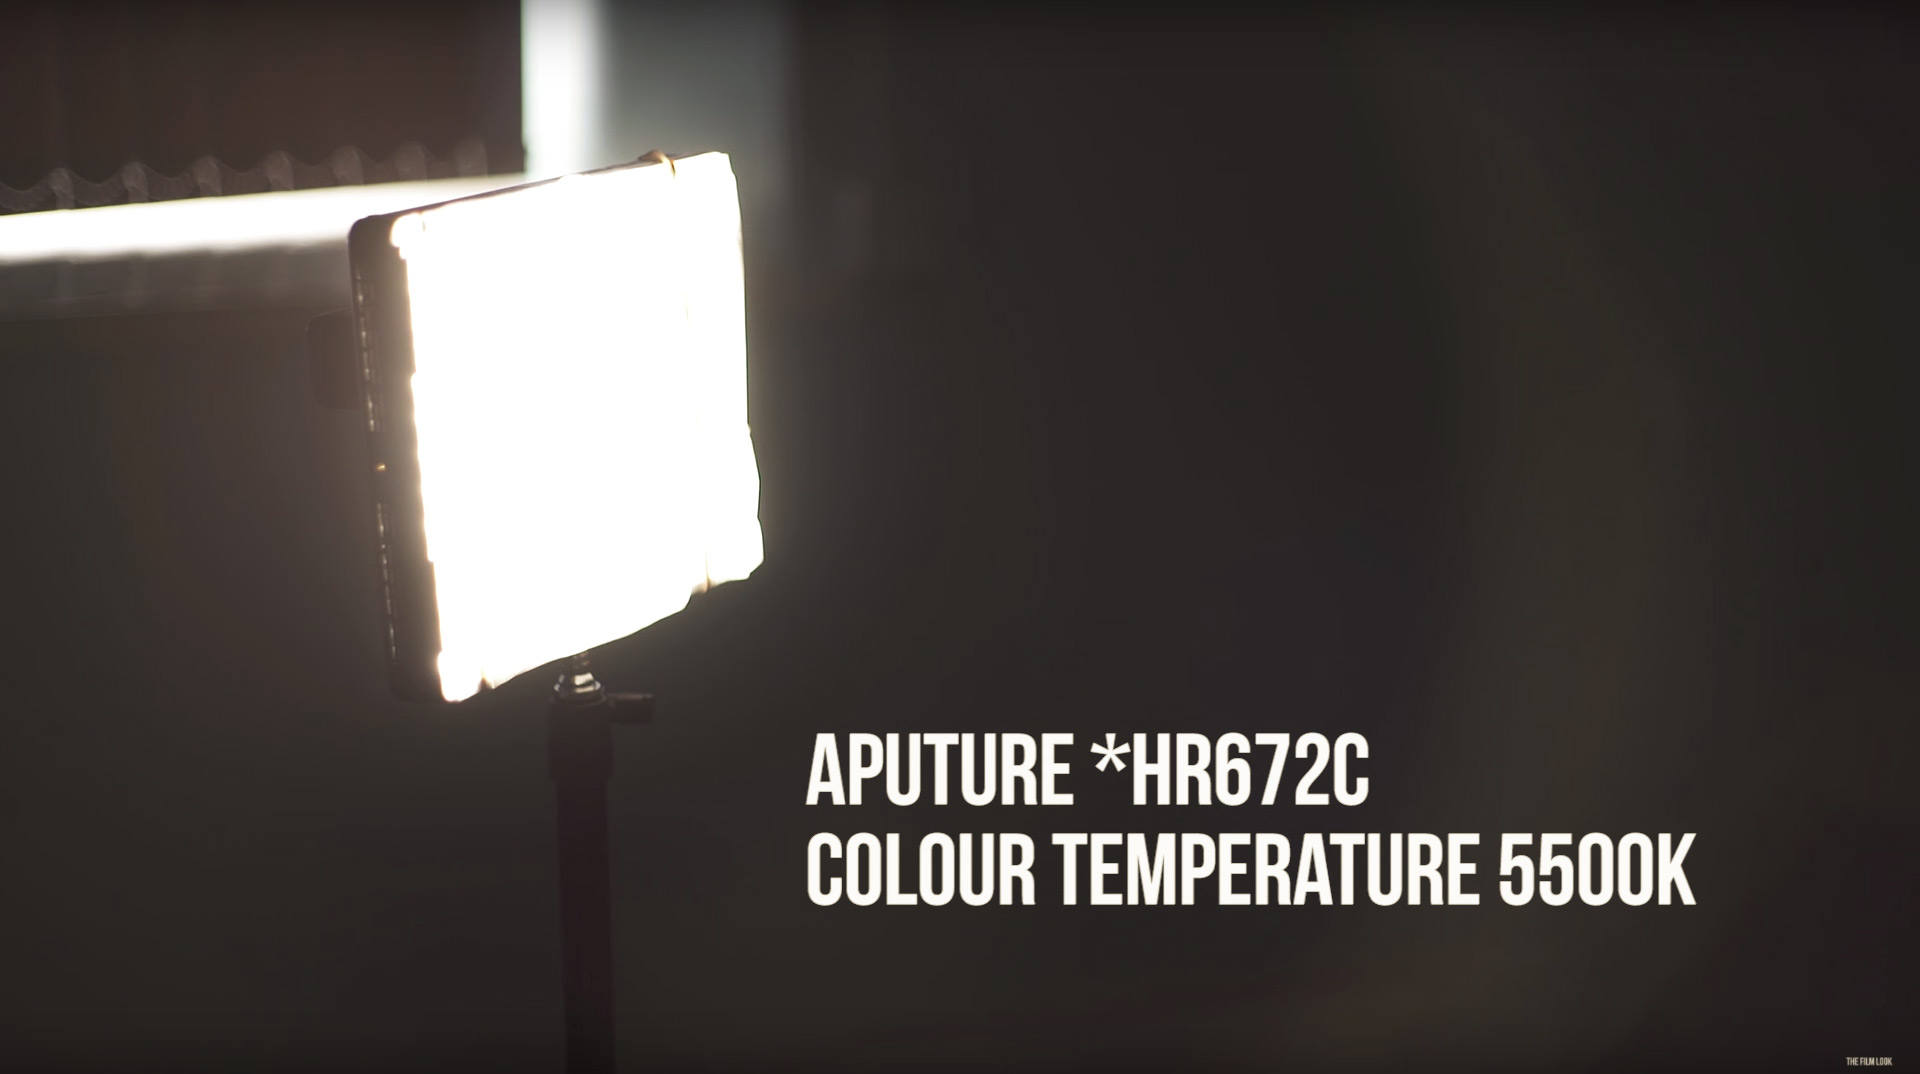
For our India Film Sound Guide we created this interview lighting setup to talk about what went wrong, so we decided to show how me set it up.


This video was Sponsored By

http://bit.ly/illuminate-pack - RocketStock’s light leak pack, "Illuminate", is sure to impress your viewers. Shot using digital cinema cameras in 4K, it’s an unbeatable way to lift your video to new, cinematic heights.

https://bit.ly/track-easy-roller - Click here to download this episode's track. Check out Premiumbeat.com to discover a huge range of exclusive royalty free music!


Low Key  Lighting Setup #1.jpg
Apture-HR672c.jpg

DISCLAIMERS:

Some of these links are affiliate links, if you purchase gear via these links The Film Look will receive a small commission, but there will be no additional cost to you. Thank you!
Store your Light Stands using Bungee Cords

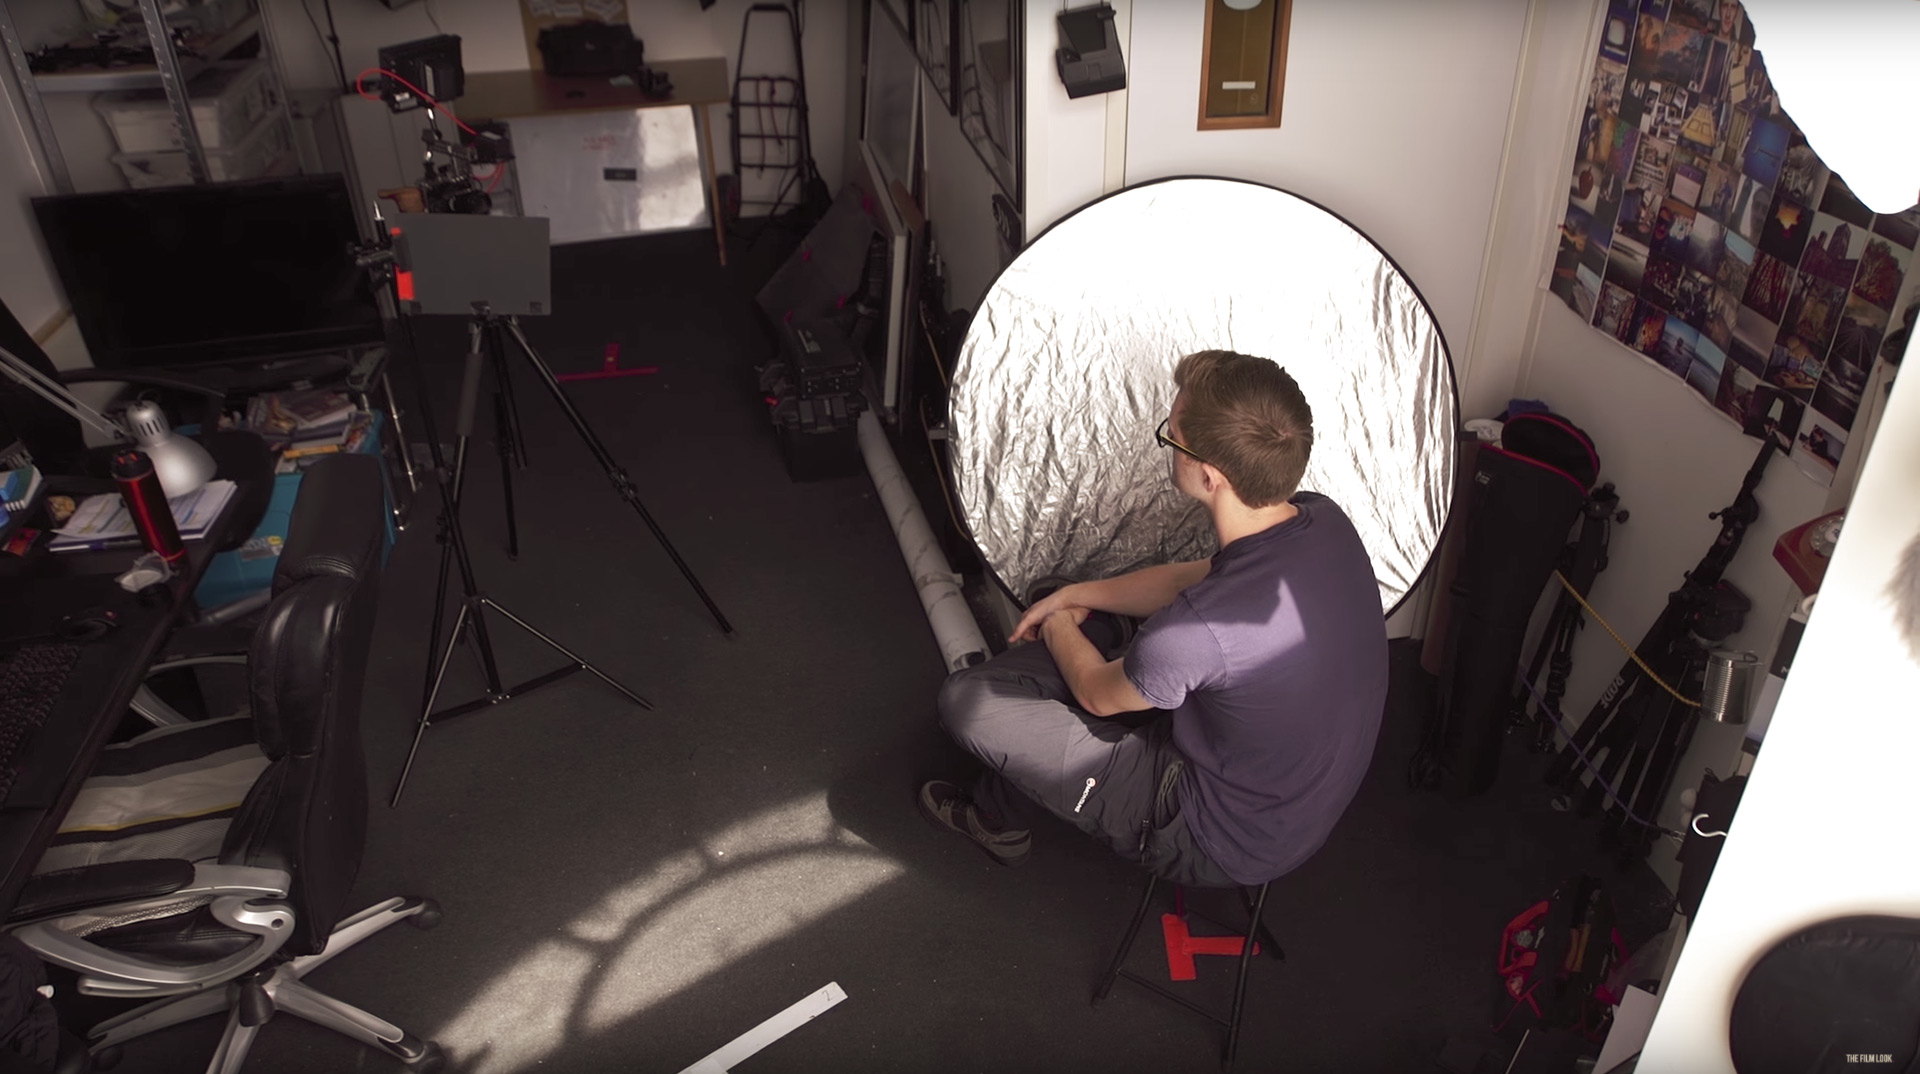
Light stands. We have more than we need, and certainly have more than we can comfortably store in our micro-sized studio.

We needed a way to utilise the space, storing the light stands so they aren't taking up much room while keeping them on-hand and easy to grab.

We came up with a pretty good solution.

As you can see our studio is pretty small. Because of this, we have tried our best to not buy anymore bulky storage shelves like this one here.

The-Film-look-Studio.jpg

Piling up light stands in the corner is messy and they usually fall over. Lining them up against the back wall behind the door does use that space effectively but we would knock over the light stands whenever we opened the door.

So we needed a way to brace them against the door. How about bungie cords? They are strong, elastic, multi-functional, and come in a bunch of colours and sizes.

By drilling in a strong wall plug and screwing in hooks on each side, we can string the bungie cords across the wall and give the light stands a wall support.

Store-your-Light-Stands-using-Bungee-Cords.jpg

The hooks stand no further out of the wall than the light stands so they aren’t intrusive, they are tight enough to hold them in place without them falling over, and elastic enough for easy access to the stands.

We liked this setup so much we added another one on this wall here (ref: on screen). We use it to store mic stands, tripods, gel bags, pretty much anything that is long and thin.

Something like this keeps our micro-studio tidy and just that little bit bigger.


This video was Sponsored By

http://bit.ly/track-funk-fever - Thanks to PremiumBeat for providing the music for this week's episode. Check out Premiumbeat.com to discover a huge range of exclusive royalty free music!


Store your Light Stands using Bungee Cords

DISCLAIMERS:

Some of these links are affiliate links, if you purchase gear via these links The Film Look will receive a small commission, but there will be no additional cost to you. Thank you!

Hand Drawn Animated Lower Thirds

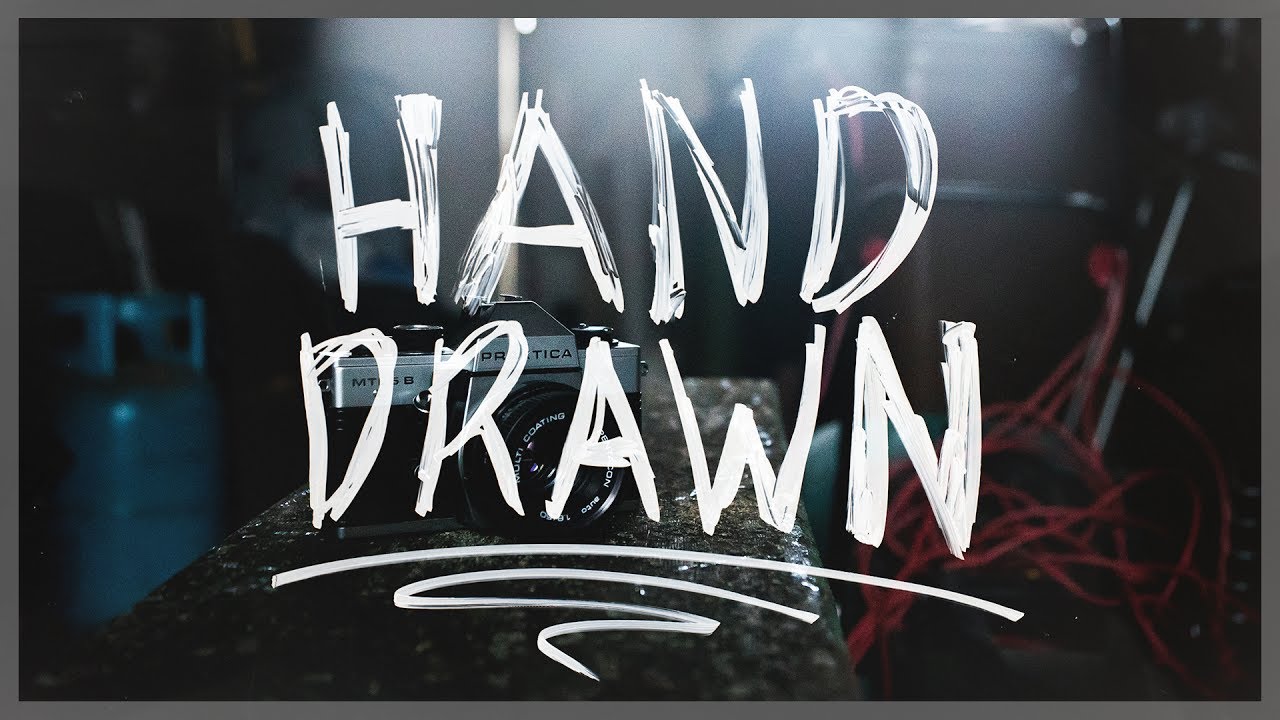
Some lower thirds can be a bit slate. We wanted something a bit different for the vlogs, so I grabbed a whiteboard, a pen, and used a little post-production magic.

Firstly you’ll need a whiteboard. Place it somewhere it is going to get a lot of light, or if you have some lights, blast them at the whiteboard as evenly as you can.

Animated-Lower-Thirds.jpg

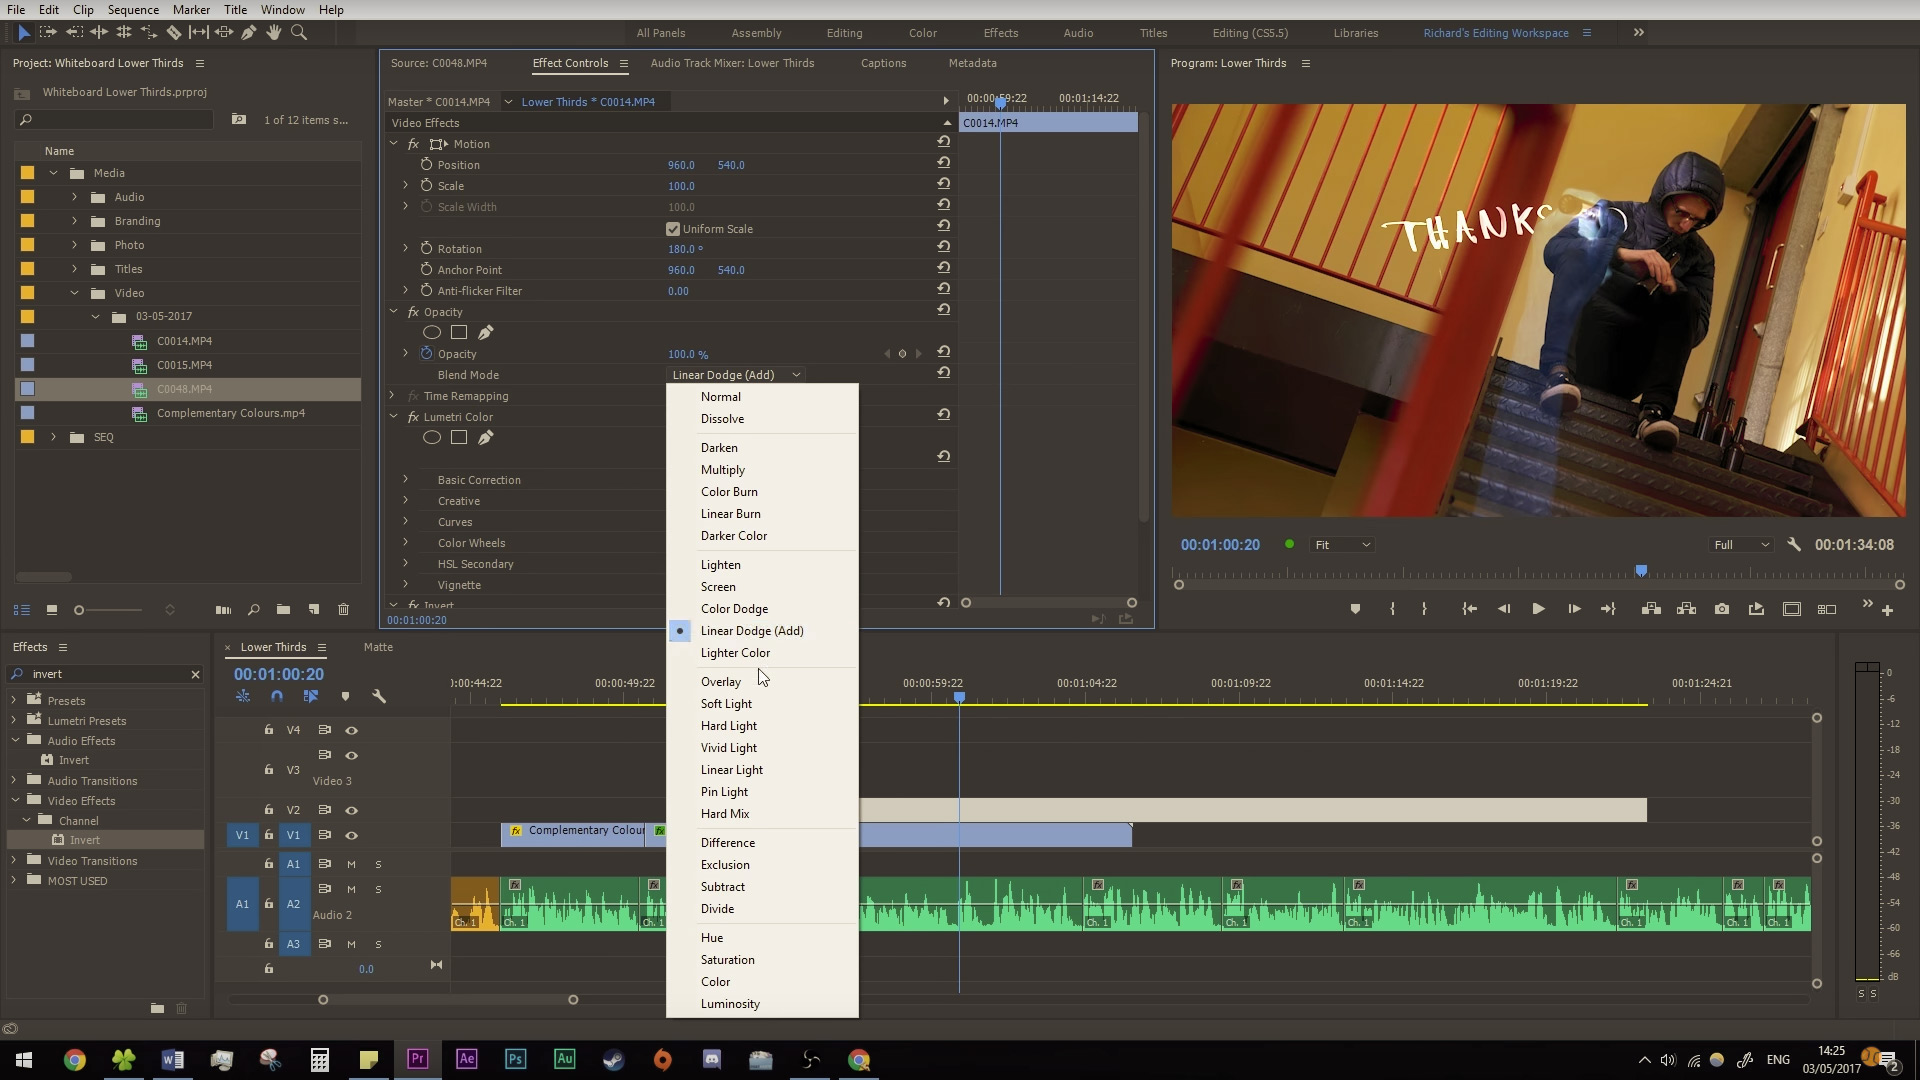
We want to overexpose the image of the whiteboard until it goes completely white. When we invert the footage in post-production it will go completely black which means we can utilise blending modes that turn the black pixels transparent, revealing the layer beneath it whilst retaining the pen strokes.

Because we are inverting the image, you will have to take into account that all of your colours will invert too. A black pen will turn white, a red pen will turn green, etc. etc.

You can find out which colour you will need by searching for complementary colours and finding the inverse.

Then it’s a case of hitting record and drawing out what you need.

In the editor, layer your whiteboard art clip above your footage, invert it, and then change the blending mode to lighten, screen, or colour dodge. Have a play about and find the right blending mode for your project.

Animated-Lower-Thirds-Blend-Mode.jpg

This can be used for lower thirds, title cards, transitions, and loads more. You don’t always have to shoot video – you can even do it with stills if you wanted something static.

There is a link in the description where you can download all of the samples I have made to use in your projects.

Simple stuff really, but if you want something a bit more practical and different, it’s a pretty cool visual element that we certainly going to use in our vlogs and even offer our clients.

You can download these Lower Thirds from our store for free.


This video was Sponsored By

http://bit.ly/synergy-pack - If you need some sweet corporate video elements, check out "Synergy" by Rocket Stock! Head over to RocketStock.com for professional assets for your next video!

http://bit.ly/track-brooklyn-drive - Thanks to PremiumBeat for providing the music for this week's episode. Check out Premiumbeat.com to discover a huge range of exclusive royalty free music.


Hand Drawn Animated Lower Thirds

DISCLAIMERS:

Some of these links are affiliate links, if you purchase gear via these links The Film Look will receive a small commission, but there will be no additional cost to you. Thank you!

Story in a Can #6 | "Steak Knife"

In each can there are 20 locations, 20 objects, 20 characters, and 20 scenarios. We pick one from each of the cans and try to come up with a film idea on the spot. Sometimes they are bad, but sometimes we turn the idea into a film.

In Story In a Can #9 Rob and Emily have to make a story about a Character who is a Single Father, a location of a Night Club, an object of a Steak Knife, and a scenario of the Car won't Start?

Watch the video to see what story was made.


DISCLAIMERS:

Some of these links are affiliate links, if you purchase gear via these links The Film Look will receive a small commission, but there will be no additional cost to you. Thank you!

Micro Documentary Breakdown

In this video we breakdown how we made our micro documentary Undeveloped. If you want to watch Undeveloped you can find it below.


This video was Sponsored By

http://bit.ly/track-solid - Thanks to PremiumBeat for providing the music in this week's video. Check out Premiumbeat.com to discover a huge range of exclusive royalty free music.


Micro Documentary Breakdown.jpg

DISCLAIMERS:

Some of these links are affiliate links, if you purchase gear via these links The Film Look will receive a small commission, but there will be no additional cost to you. Thank you!

Behind the Scenes | Indie Film Sound Guide

Now the Indie Film Sound Guide is over we wanted to share our thoughts about what went well, and how we messed up.

The Indie Film Sound Guide is a step by step series teaching you all of the basics to achieve better audio for your films. This includes preparation, recording, and mixing. The guide uses a scene shot specifically for the guide, and follows a proper workflow from start to finish. This is everything you will need to know to start recording great sound for your short film!

Anything we didn't cover? Leave us a comment and we'll create a wrap up episode at the end of the guide, answering any questions we missed!

More tips in the video.

The Indie Film Sound Guide is a step by step series teaching you the basics of recording sound on set.

Episodes released weekly:

Introduction: https://youtu.be/NzmDV5Z9c_o

The Scene: https://youtu.be/dGD8pIOx2ls

Positioning: https://youtu.be/1Ki442J5hUk

Dialogue: https://youtu.be/X8YPFNYgu8s

Minimise Noise: https://youtu.be/e6MEJd_rGvI

Gain & Room Tone: https://youtu.be/U5MJvJ9_guQ

Wild Takes: https://youtu.be/Ci9RIH5d1ew

Organise & Sync: https://youtu.be/ZyVvwsWQIwk

Mixing: https://youtu.be/7x5SnoftgUw


Behind the Scenes  Indie Film Sound Guide.jpg

DISCLAIMERS:

Some of these links are affiliate links, if you purchase gear via these links The Film Look will receive a small commission, but there will be no additional cost to you. Thank you!

The Cavalry isn't Coming | Let's Talk #3


This week we talk about the cavalry and why they aren't coming. We made this video because we watched Mark Duplass video from SXSW and wanted to share it with you. His keynote can be found below.


DISCLAIMERS:

Some of these links are affiliate links, if you purchase gear via these links The Film Look will receive a small commission, but there will be no additional cost to you. Thank you!