Every Boom Operator Needs This! | Rycote PCS-Boom Connector Review

Today I want to talk to you about the PCS-Boom Connector from Rycote, and why I think every boom operator would be a fool not to have one!

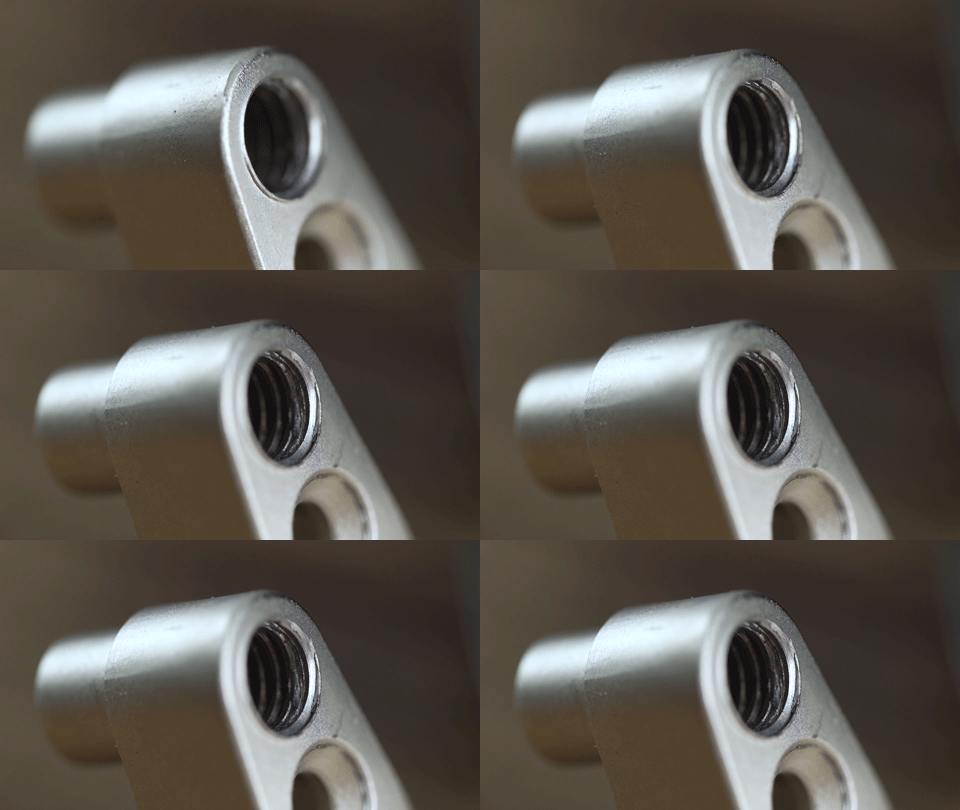
I’ve been known to have trouble screwing my boom pole to my shock mount. So much so that I chewed up the end and broke the whole system...twice!

Rycote-PCS-Boom-Review.gif

To fix this problem, I was looking for a quick release system for my boom pole. I did find a budget option which did the job; the Triad Orbit IO-R...I did a review on it a while back.

Then the guys at Rycote saw that video and wondered if i’d be interested in reviewing their quick release system, so here I am. They also sent me some free swag.

Rycote-PCS-Boom-Review1.gif

I’m gonna put these two boom connectors against each other. You have the budget option, coming in at around £20, and you have the premium option, coming in at about £80. So the Rycote is 4x the price of the Triad Orbit, but is it 4x better?

Weight

Let's start with the weight. If you are booming for long periods of time, the amount of weight you add to the end of the pole will matter a lot. You already have a microphone, shock mount, and possibly a blimp on the end, so any more weight will only cause more fatigue.

Rycote-PCS-Boom-Review2.gif

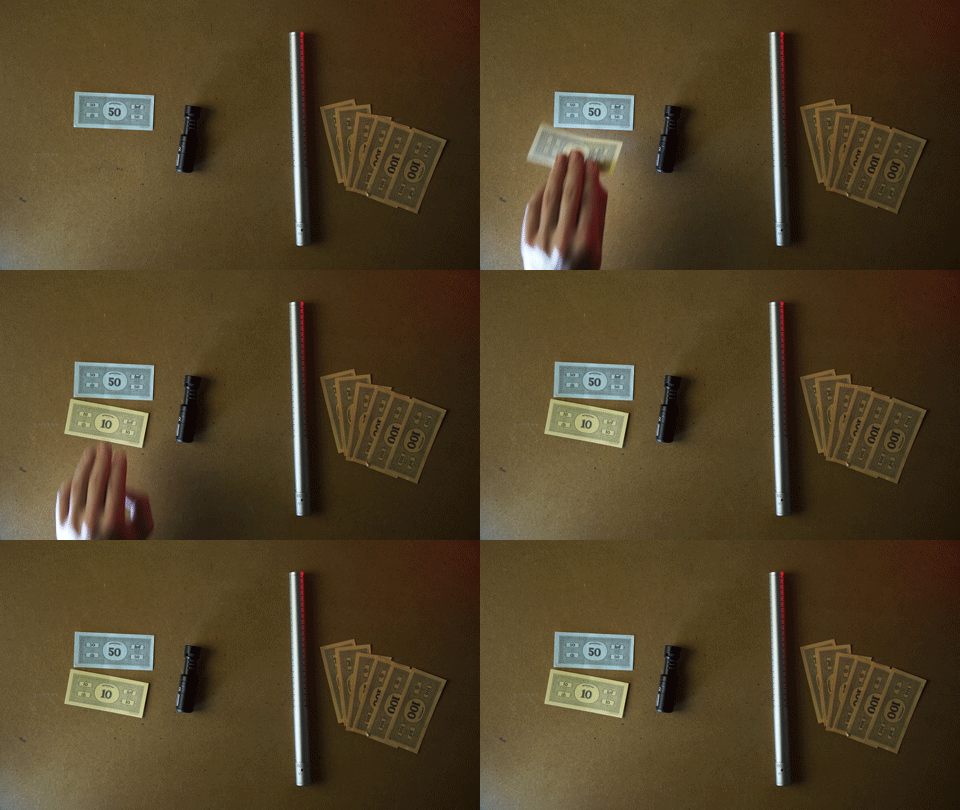
The Rycote weighs 53g.

The Triad Orbit weighs over 220g. That’s over 4x the weight of the Rycote.

Rycote-PCS-Boom-Review3.gif

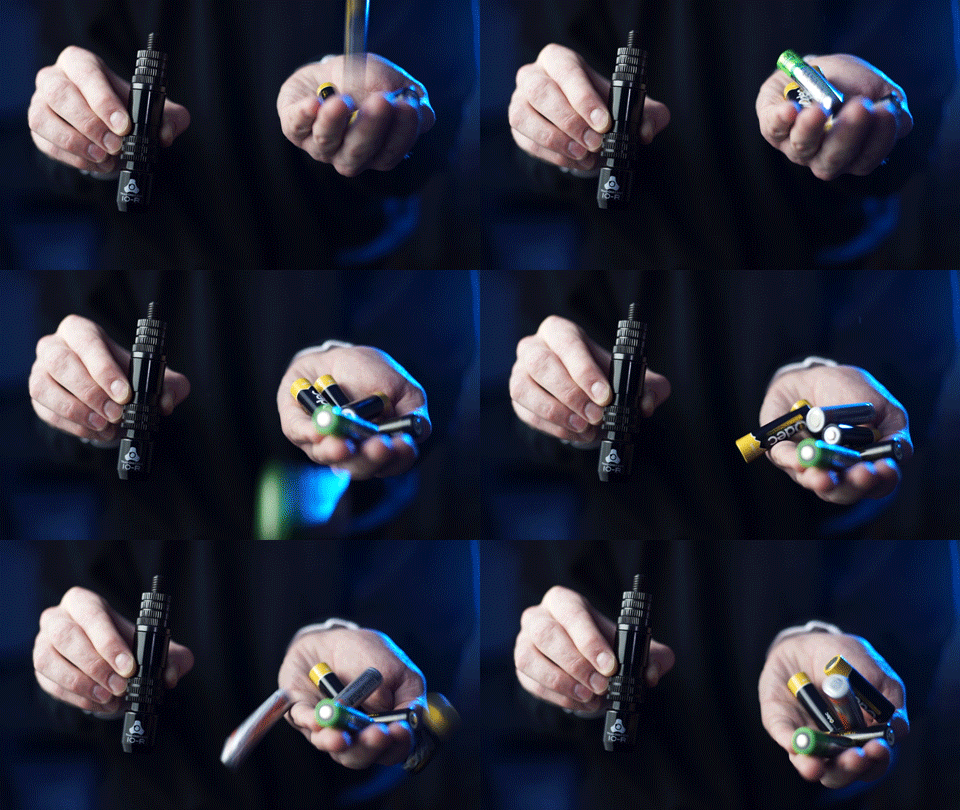
After having both of these in my hands, I can really feel how light the Rycote really is. This thing weighs less than 3 AA batteries. The Triad Orbit is over 12 AAs.

Rycote-PCS-Boom-Review4.gif

Strength

Both appear to be really strong. To test the strength I setup both on C-stands and hung sandbags from the tips. I can’t image you’d put any more than 2 sandbags on the end of your boom, so let's call this one a tie before I break something.

Rycote-PCS-Boom-Review5.gif

Release System

If you are purchasing a quick release system, the thing you want the most is that it can be attached and released with ease.

Attaching the Rycote is satisfying: it locks into place using the grooves on the tip, and its tapered design makes fitting it into the hole really easy. It also has a very satisfying click. Releasing the tip is even more satisfying because it's spring loaded, so you can release it one handed.

Rycote-PCS-Boom-Review6.gif

The Triad Orbit does a similar job, but everything is a little more tricky. The tip is hex shaped and lacks any taper so you need to feed it into the system more carefully. Not a big deal, but every second counts.

Rycote-PCS-Boom-Review7.gif

Design Extras

Both feature mount locking systems to secure them onto a boom. The Triad Orbit uses a Hex key design like the Rycote, but the Rycote wins with its rubber shielding to stop you damaging the tip of your boom.

Rycote-PCS-Boom-Review8.gif

One genius thing the Rycote does that the Triad doesn’t, is the hole they have milled out of the tip which is perfect for using your allen key and getting the tip rock solid on the end of your shock mount. It’s a clever little addition which shows that Rycote has thought about it from a user standpoint.

The Winner

So who is the winner? The Triad does the job, and would be perfect for musicians, for example, who have a bunch of mics on different stands and need to hotswap a setup. But honestly, if you are concerned about weight, like a boom operator would be, the Rycote is the best option, even for the premium price tag.


DISCLAIMERS:

Some of these links are affiliate links, if you purchase gear via these links The Film Look will receive a small commission, but there will be no additional cost to you. Thank you!
10 Ways to use Blackout Curtains for Filmmaking

Recently we bought a load of blackout curtains and you wouldn’t believe how useful they have been when making films and content for this channel.

Today we are going to show YOU how we have been using them, and how to roll them up into a burrito like this to store them.

Welcome to The Film Look.

The first main use we’ve had for them is to block out light. In our studio, we place one in front of the window to block out all of the light when we are shooting videos so we have complete control over lighting.

Black-Back-Drops-1.gif

When on set shooting a film, we’ve used them to block out the light from a corridor, so when the door opened it looked dark as the scene was supposed to be at night.

Black-Back-Drops-2.gif

For the same film, we also used them to cover the background of the set, as the walls in the location did not fit the look that we wanted. This scene was set backstage at an event behind a big theatre curtain, so the blackout curtains fit well in the scene.

When we shot our short film the Asylum Groove we built a blackout fort around a window, then lit our actors from the outside. The reason we did this was to show our character's reflections in a window. By controlling what was behind the window, it stopped other reflections from showing up on camera. We even had to add gaff tape up any reflective parts of the camera.

Large Negative Fill

Black-Back-Drops-3.gif

If you need to add negative fill to your scene to create more contrast, you can hang up one of these curtains just out of frame. If you need something a little smaller, the black side of a 5 in 1 reflector works well.

Black-Back-Drops-4.gif

Sound

When we are recording foley sounds in our studio we have used the curtains to build a DIY sound booth, They help to dampen room acoustics and reverb by absorbing sound from bouncing off the walls of the room.

We have a video coming out soon all about this setup, and tips of how to record foley. So if you’re not already consider subscribing.

We have also used them to cover over me when operating the camera as we were pouring water in the scene.

To store them neatly you can roll them up like a burrito. This is a trick we learnt from our first AC Rob, and here is how you do it.

Blackout Curtain Fold like a  burrito

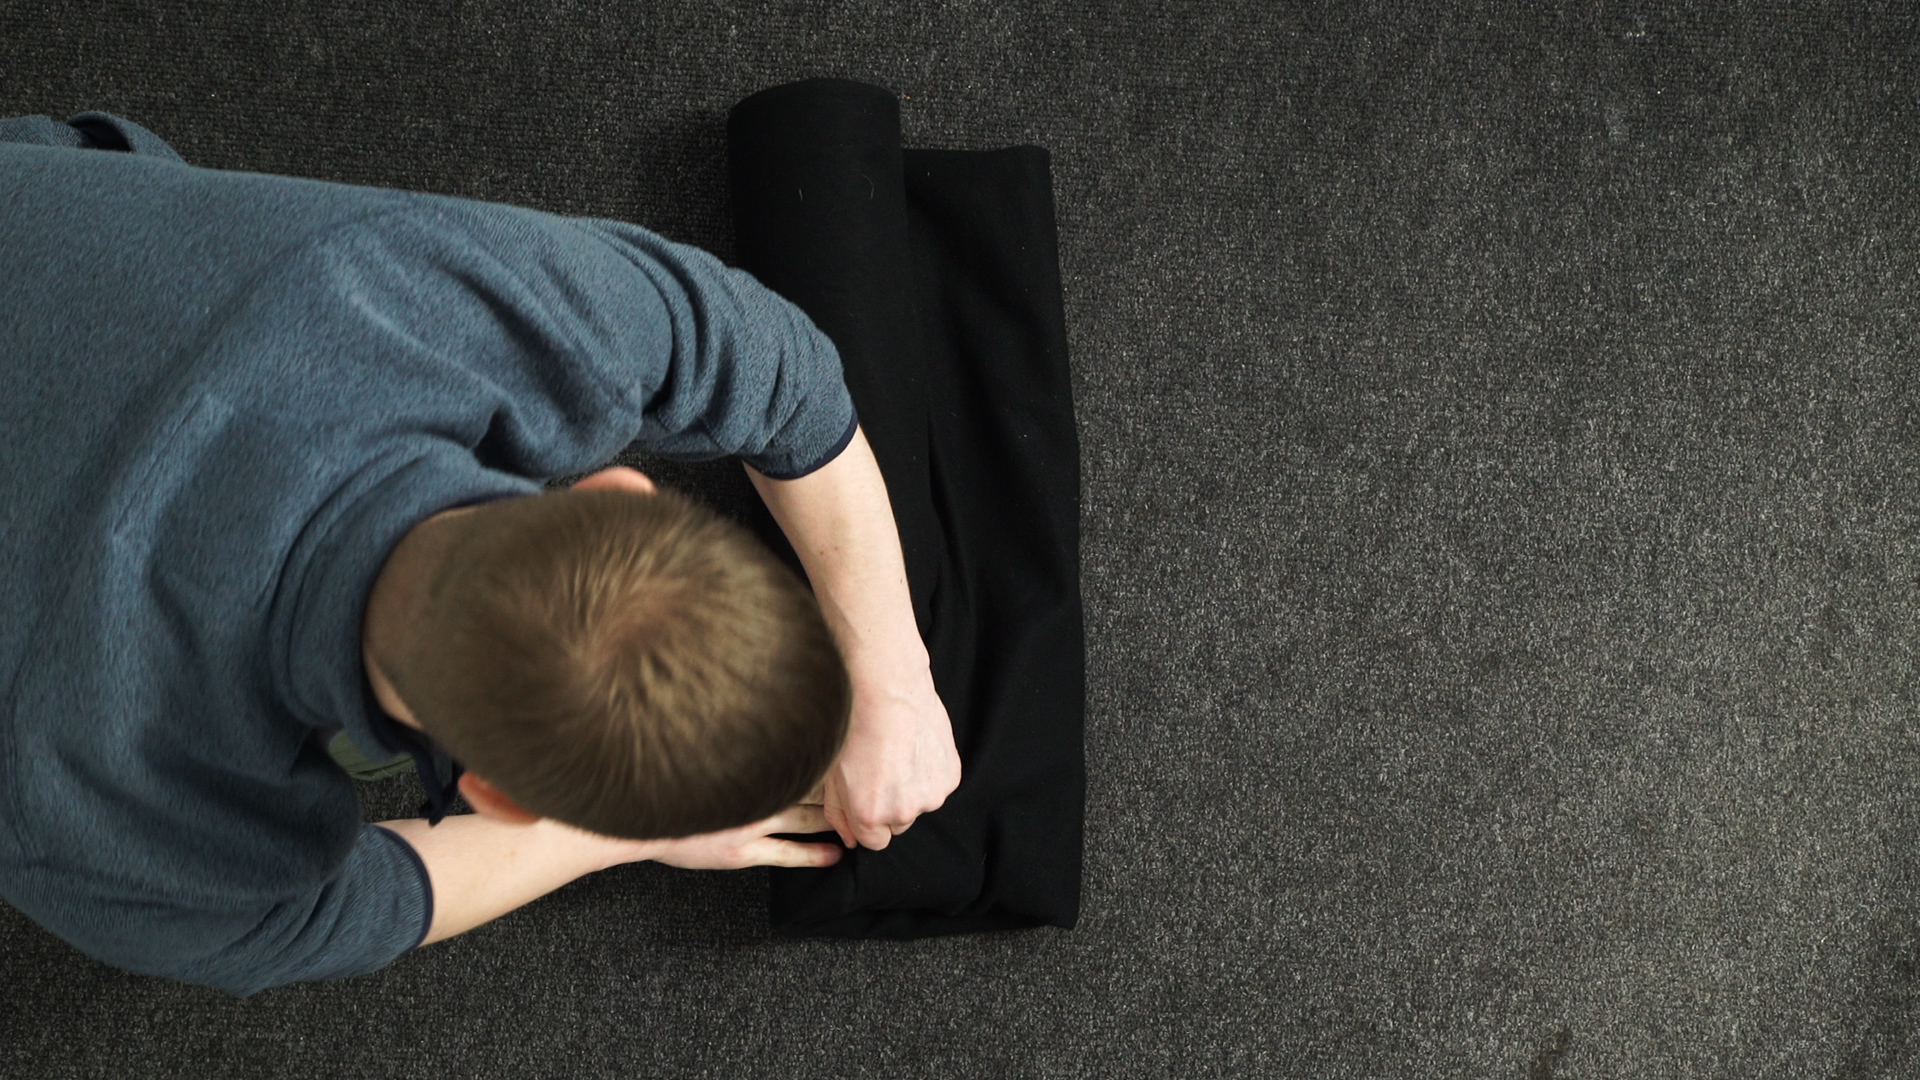
First, you want to layout your backdrop and then fold it in half. If you have a large backdrop keep folding it in half until you have a width of around 60 centimetres or just over an arm's length.

SEQ_1.00_01_50_14.Still002.jpg

Next, fold one edge over like this. A little more than a hands width will do.

Blackout Curtain Fold like a  burrito

From the edge you started at, fold that into a triangle and start to roll, keeping it as tight as possible.

Blackout Curtain Fold like a  burrito

When you get close to the end, again 60 centimetres or an arm's length. Fold the end of the backdrop towards you in half. Then tuck the rolled end into the pocket you have created.

Blackout Curtain Fold like a  burrito

Start with the thinker side first, which will make it easier to tuck it all in.

SEQ_1.00_02_15_21.Still007.jpg

Once you’ve done this a couple of times you should be able to roll up backdrops in seconds.

Once they are rolled up like this they are easier to store, they can be used to kneel on, sit on, and if you get some downtime on set, somewhere to rest your head.

The ones we bought aren't fire retardant, but we will not be putting these ones in front of any hot lights. If you need blackout curtains which are fire retardant, look out for ones which are made out of Duvetyne - that should do the trick.

We’ve added links to the ones we bought in the description below, along with the other grip equipment we used to hang them, like c-stands and clips.

The blackout curtains we used were just standard blackout curtains you would buy for your home, so check your local home store or eBay. Someone might be getting rid of some old blackout curtains you can have.

It’s crazy how useful having a bunch of them has been when shooting. If you want to help support this channel give us a thumbs up or down in you don't and remember to achieve it one shot at a time.


DISCLAIMERS:

Some of these links are affiliate links, if you purchase gear via these links The Film Look will receive a small commission, but there will be no additional cost to you. Thank you!

A light that does (almost) ANYTHING | LEDGO G260 LED RGB Light Review

A couple of videos ago we reviewed this small 16 watt RGB light, but when we need more light and colour we’ve been using this massive light.

LEDGO-G260-LED-RGB-Stuido-Light-1.gif

Today we are going to be reviewing the LEDGO LG-G260 Watt LED RGB studio light.

Welcome to The Film Look

The size of this light is massive. The light source is 67cm by 38cm and the main body of the light is made out of metal. The corners, handle, and other parts of the light are plastic, but no way does this make this feel like a cheap product.

The output of the light is 260 watts and with the light being so big it creates a large soft source. On the front of the light, there is a frosted panel which diffuses the light. You also get barn doors to help shape the light.

LEDGO-G260-LED-RGB-Stuido-Light-2.jpg

On the back of the light are all of the controls. It’s super easy to get familiar with the interface and control each setting as the buttons, dials and screen layout are simple.

One downside to this light is that it does not come with a remote, and you have to buy an extra control to change the settings over wifi. We’ve used a bunch of Aputure lights in the past which all come with a remote as standard. If your lights are up high, changing the settings will be a pain. The light can be controlled with a DMX board, but very people have one of those.

CTT

LEDGO-G260-LED-RGB-Stuido-Light-4.gif

You can dial the colour temperature of this light from 2700 kelvin to 7500 kelvin which is very blue. The best feature to this setting is the ability to add green or magenta. If you are using other lights which have a green or purple tint, you can match this light with other light sources. Then you can correct the colour in your camera’s white balance settings or in post-production.

HSI

LEDGO-G260-LED-RGB-Stuido-Light-5.gif

The HSI mode allows you to cycle through 360 RGB colours and change the saturation of those colours. The numbers of the 360 colour wheel matches up with the small RGB light we reviewed a couple of weeks back. So if we set both lights to 270 degrees we know both of them will give us the same purple light.

RGBW

The RGBW mode allows you to fine tune in RGB colours, and add more of one colour than another.

Tungsten

If you just want a tungsten light there is a mode for that.

Fluorescent

There is a fluorescent mode which has a warmer, cooler, and neutral preset so you can match this light up with the other lights in your scene. Which comes in very handy if you can not control the colour of the other lights in your scene, for example, if you are shooting in an office.

Lighting Effects

Where this light shines are the pre-built in effects modes. They allow you to create and fake different lighting conditions at a click of a button. In each different effect, there are controls to change and customise the brightness, speed, and colour type.

Storm

The storm effect allows you to create a storm. By changing the frequency and speed you can control how violent the storm is.

Cop Car

Showing a cop car in your film is going to be very expensive, so unless it is completely necessary to show the car, using the cop car lighting effect will save you a lot of time and money.

The flash of the red and blue lights are probably enough of a clue to the audience that there is a police presence in your scene.

Soft and Hard Disco

LEDGO-G260-LED-RGB-Stuido-Light-6.gif

We’ve been testing out the disco modes for our next short film Sixty Seconds. The two main characters are trying to defuse a bomb and things are going a little crazy. The soft disco mode has a longer transition between the colours, where the hard disco mode flashes between the different colours.

Once we’ve made the film we are going to break down the lighting setup, so if you haven't already, consider subscribing.

Candle Light

Other lighting effects this light has is a candle or fire mode which we used to fake this camping setup. The light is slowly flickering and to make it look like a fire we just waved our arms in front of it.

To find out the full specs and the different controls of this light, I've added a link in the description to the manual for the LG-G260.

https://resource.holdan.co.uk/LEDGO/manuals/LG-G260.pdf

We’ve only used this light in our studio and to test shoot our next short film Sixty Seconds. Most of the time this light has been around 10 or 20 per cent brightness and is definitely built to be used on bigger sets and studio sound stages.

In our small studio, we did have difficulty controlling the spill of the light from hitting the walls. You can get a honeycomb grid which attaches to the front to help with that, so if we get one we will include it in a follow-up video.

For a small space like our studio, we would need to use a grid which can be attached to the front of the light to stop the spill of the light from hitting all of the walls.

LEDGO-G260-LED-RGB-Stuido-Light-7.gif

It weighs 11KG, but because of the size of the light you need two people to set it up, and mount it on to a C-Stand. You can also get a hard case for the light with is an necessary to transport it safely.

It’s called a studio light which is the main place we have been using it and it’s been powered from the wall socket. It also has two v-lock mounts on the back of the light, so you can use it anywhere.

The price of this light looks like a scary number, it’s not really for indie filmmakers who shoot run and gun stuff. The LEDGO LG-G260 is for people who have a budget, working on bigger films, and for people who need a light which can do just about everything, therefore saving them time.

The nearest competitor to this light which is of a similar size and functionality are the Arri Skypanels. I’ve never used one, but from the outside, they look like they do just about everything the LEDGO LG-G260 can do but it's more than twice the price and then add a little bit more.

I’ve never used Arri Skypanel, but I am going to say that the LEDGO light looks like it has a much better price to performance.

This light gives you a lot of creative freedom at the turn of a button. There are some DIY solutions to some of the effects this light can produce, and you might look at this light and the price and think, it’s not for you, or I’m never going to be able to get access to a light like this for my films.

Well, we thought the exact same thing 5 years ago. A light like this was totally out of reach, we started using these 160 LED lights which were £30. As you make more films, gain experience, work on bigger productions. Equipment like this will make your job easier, and you will still use the more expensive equipment alongside your the cheap DIY solutions to make your productions even better.

This review was our first thoughts and a run through of what this light has to offer. We are going to be using it to light on our next couple of short films, where we will be doing a full lighting breakdown. So if you want to see more about this light, consider subscribing if you haven't already, and remember achieve it one shot at a time.


DISCLAIMERS:

Some of these links are affiliate links, if you purchase gear via these links The Film Look will receive a small commission, but there will be no additional cost to you. Thank you!

The Key to Editing Suspense

The order you arrange the shots in your edit is fundamental in film editing.

The structure of your sequence could hold back information from your character, but not your audience. Or, have your character know before the audience does.

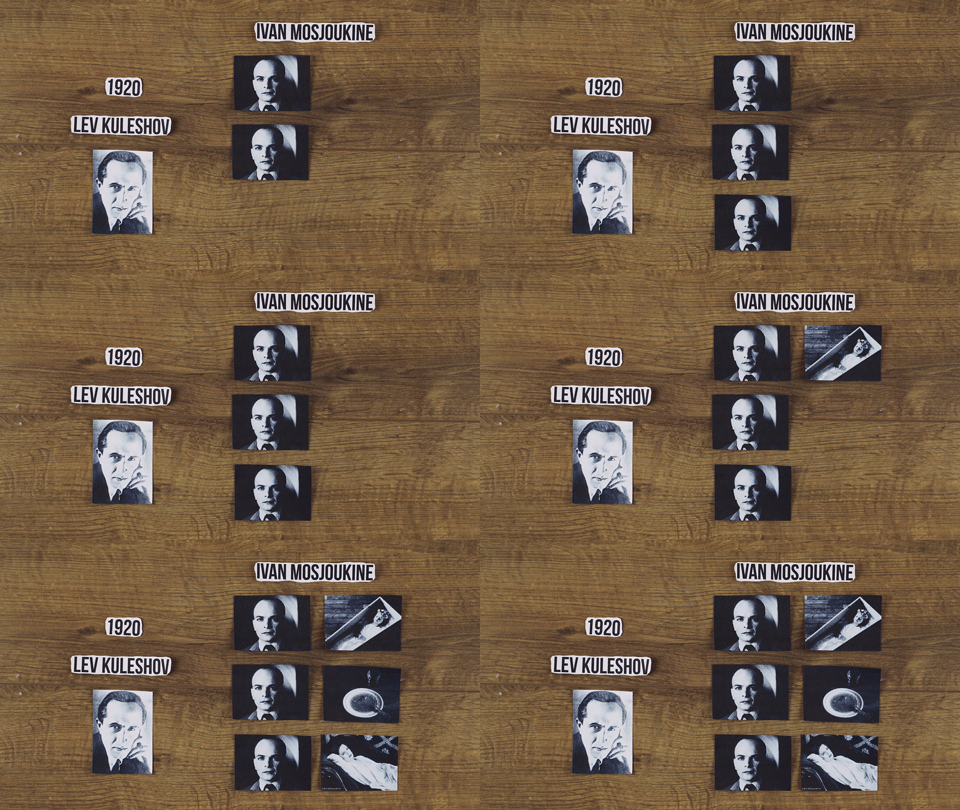
We are going to start with a little history lesson. In 1920 a filmmaker called Lev Kuleshov performed an experiment to demonstrate that, depending on how your shots are assembled, the audience will attach different meanings or emotion to them.

Kuleshov Effect 1

Kuleshov cut three different sequences together. The first shot was always an expressionless close up of Ivan Mosjoukine who was a Russian actor. The shots that followed shows the actor reacting to a child in a coffin, a bowl of soup, and a woman laying on a sofa.

When you watch each sequence separately, you get a different meaning and emotion. The first is sadness, the second is hunger, and the third is lust.

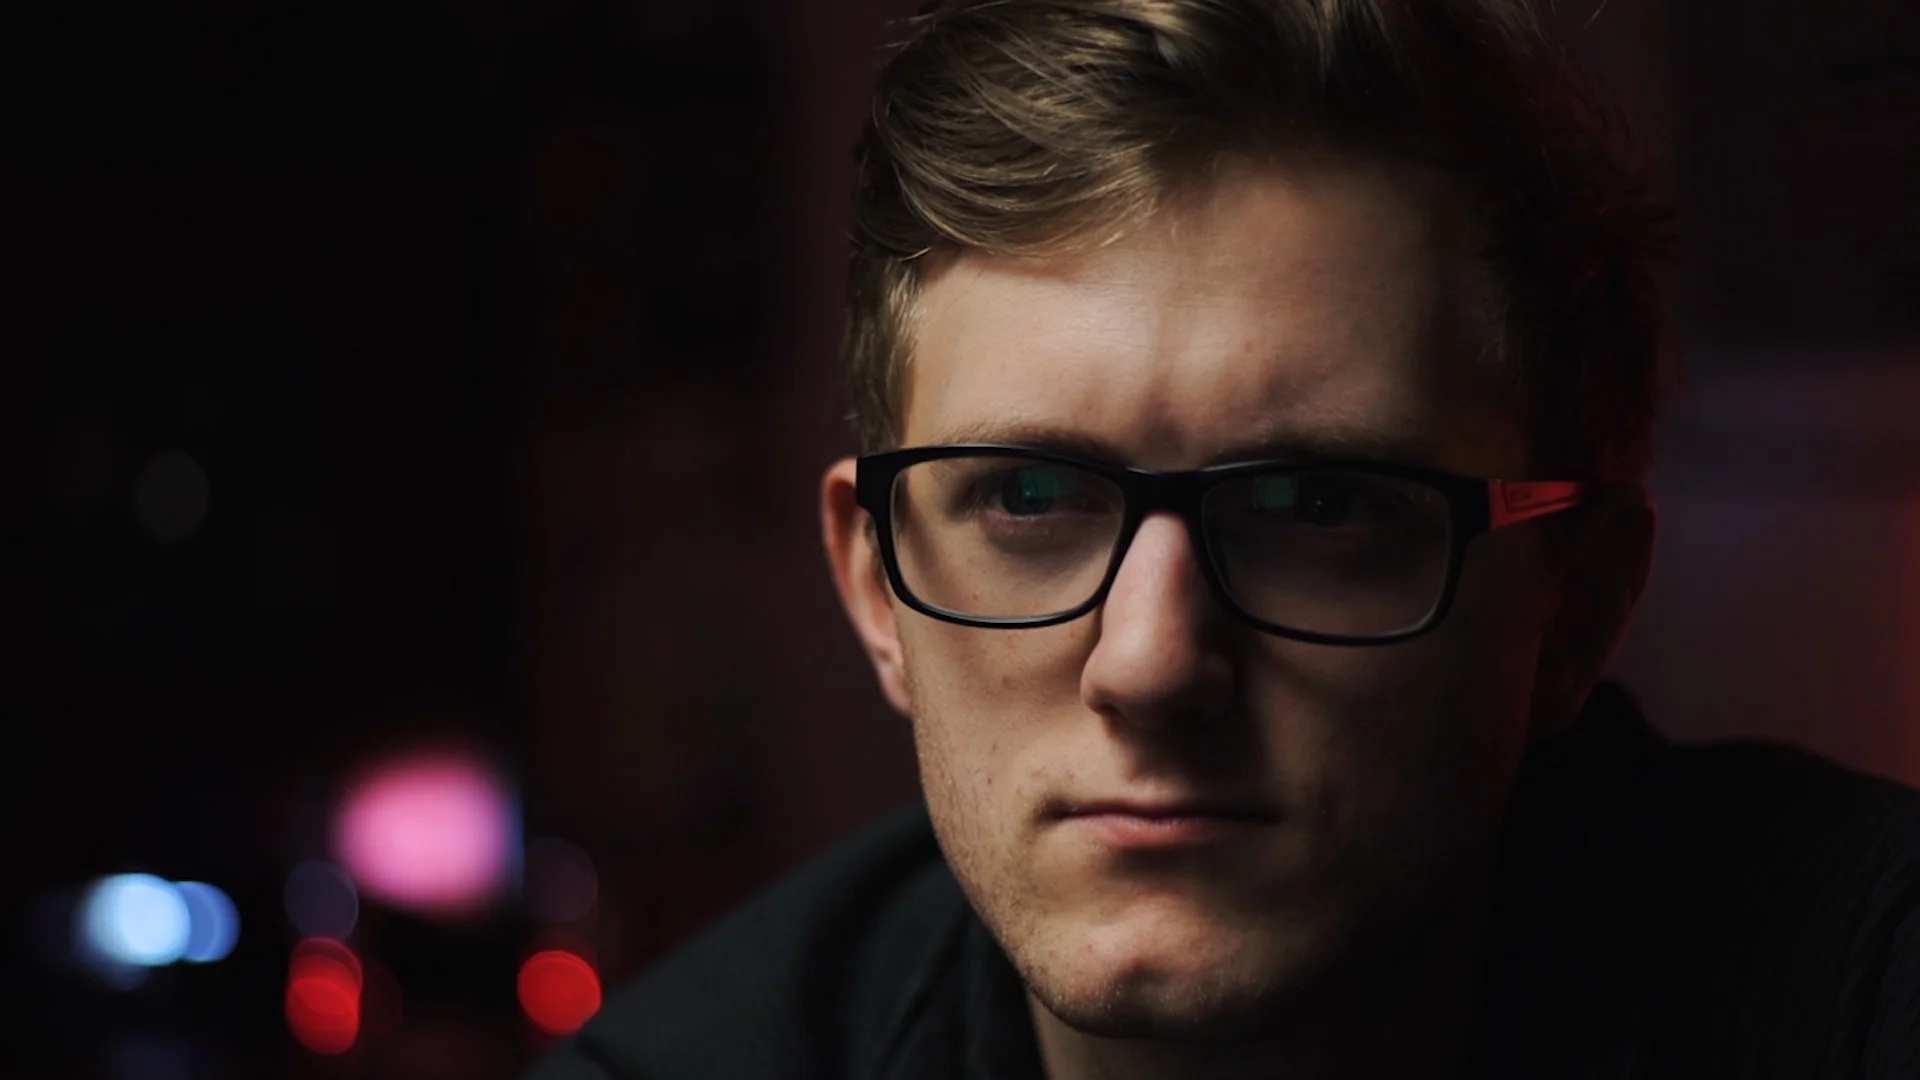
We’ve created 3 different sequences with Richard. Let us know in the comments below what emotion you get and what you think Richard is thinking.

Kuleshov Effect.jpg
Kuleshov Effect 1.jpg
Kuleshov Effect 2.jpg
Kuleshov Effect 3.jpg

This whole experiment is called the Kuleshov effect. I’ve put a link in the description of this video if you want to learn more about it.

This was the early days of editing, and a lot has been learnt and edited since 1920, but his experiment and the effect it has on the audience is still important when making films today.

Now let's expand on this. Instead of changing the shot, let's change the order of the shots in a sequence.

We have created a short scene which takes place in a back alley. Police Officer Rusty Johnson, is investigating crimes that have happened in the area when he hears glass smashing.

Example 1

The-Film-Look-1.gif

This sequence of shots is a question and answer sequence. It’s one the audience can easily follow along with and anticipate the outcome.

Shot A is of the Police Officer walking down the alley and asks the first questions: “where are the bad guys?” And “what was that noise?”.

Shot B asks a new question: “What has the Police Officer found?”

And shot C give us the answers. The Police Officer has found a bad guy committing a crime.

Example 2

Now let's change the order of the shots and put shot C after shot A and see how that plays out.

Shot A still asks the same question “where are the bad guys?” And “what was that noise?” but by changing the order, the context of the scene has changed and shot C becomes the answer to shot A “the bad guy is over here”. Shot C also asks another question, “will the bad get away before the Police Officer gets there?”.

The final shot of the sequence which is now shot B answers the questions, The Police Officer has found a bad guy committing a crime.

The order of this sequence allows the audience to share the information with the filmmaker by allowing them to know what the Police Officer is up against before the Police Officer does. By editing the sequence in this order it creates suspense because we know the Police Officer is getting closer to the bad guy, unlike the first example where we did not know the geography between the two characters.

Example 3

The-Film-Look.gif

Let’s change the context of the scene again and have shot C first.

By showing the bad guy committing a crime at the start of the scene, a suspenseful situation is established for the rest of the scene, and again, the audience knows something the police officer does not.

When we cut to shot A, the tension is raised because we know the police officer has heard the bad guy and is close. Shot B now asks another question “has the police officer got there in time to stop the bad guy?”

By changing the structure of the sequence in these 3 examples, it allows us to change what the viewer knows and when.

There is no right or wrong answer when it comes to the order of the shots in a sequence, it all depends on the type of film you are making.

Placing your shots together is obviously done in the edit, but you can start to think of how each shot connects to each other in the storyboard and even when writing your script. Making the decision in the script and storyboard stage will allow you to plan and shoot for the editing.

If you start to change the sequence of shots for the first time in the edit, you may not have all of the coverage needed to do so. But the 3 examples we showed all worked and give the audience a different context to the scene, and it was all done in the edit, so it really just depends on the type of film you are making.

There are a couple of things you can think about to help you work out which is the best structure for your film.

Do you want to hold back information from your character but let the audience in on the secret?

Or have your character hide information from the audience and reveal something big in the end?

Think about the best time to reveal the bad guy to your audience. Revealing this early will create suspense and have your audience screaming at the screen telling your character not to trust them, but having it early might spoil the surprise.

In a murder mystery, where your character is finding clues about the killer, it might be best if the audience just goes along for the ride. Which is example 1 from the 3 that we spoke about.

Film-Directing-Shot-by-Shot.gif

A lot of the information for this episode was taken from the book Film directing shot by shot Steven D. Katz. I would highly recommend picking it up as it goes into a lot more detail about this subject and a bunch of others.

Film Directing Shot by Shot

Amazon UK: https://amzn.to/2T87GQZ

Amazon US: https://amzn.to/2sLbSe8


DISCLAIMERS:

Some of these links are affiliate links, if you purchase gear via these links The Film Look will receive a small commission, but there will be no additional cost to you. Thank you!

Still The Best First Lens to Buy | Canon 50mm F1.8 Review (6 Years On)

Is the Canon 50mm F1.8 or the nifty fifty any good in 2019?

Well, we still use it even after 6 years and think it is still the best first lens to buy, even if you are not using a Canon camera.

We have been using this lens for about 6 years now and first used it on the Canon 600D, but this lens has actually been out for 28 years. It was first introduced in 1990 a couple of years after Canon brought out the EOS mount system.

Canon-50mm-1.8-Lens-Review-1.gif

The one we have was probably manufactured 7 or 8 years ago, but the design and build are the same as the ones from 1990.

After moving from a crop sensor Canon to a full frame Sony, we adapted all of our Canon lenses to Sony mount with a commlite adaptor.

There aren’t too many new Canon 50mm F1.8 mark 2s out there, but you can pick up a second hand one for around £50.

When you shoot at F1.8, the centre of the lens isn’t that sharp and looks out of focus, as you can see when we’ve shot straight against a flat wall. When you look at the edge of the frame the image has started to become more out of focus from what it is in the centre.

Canon-50mm-1.8-Lens-Review-2.jpg
Canon-50mm-Lens.jpg

This happens with a lot of lenses when you shoot wide open, but when you start to change the F-Stop to F4 or F8, the focus naturally gets sharper from the centre of the frame to the edge.

You’ll find the Canon 50mm sharpness sweet spot is around F4 and F5.6.

But shooting at a lower F-Stop like 1.8 will give you that sweet looking bokeh which we all love, so there is a trade off.

Canon-50mm-1.8-Lens-Review-3.gif

When you are shooting between 1.8 and 2.8 you will get a lot of lens flares and your image will be milky if you are shooting in situations where there is a bright and direct light.

This is a cool effect if you want it, but to avoid it you can simply shoot at an f-stop of 2.8 or higher. This will give you a cleaner image.

Canon-50mm-1.8-Lens-Review-4.gif

When you first get this lens you will likely shoot everything at F1.8 because it looks cinematic, but you will soon realise that shooting everything at F1.8 can make your footage look amateurish if you can’t keep your subjects in focus.

When we first got the canon 50mm 1.8 we shot everything at 1.8, mainly because it’s fun and we had the ability to do so.

But we soon realised that the depth of field at 1.8 will be from the person's eyes to the tip of their nose. This is fine if you are shooting a static subject as you can focus on the person's eyes and they will stay in focus throughout the shoot.

If your subject is moving around however, you will find it very difficult to keep them in focus when shooting at f/1.8.

So when shooting on a 50mm try shooting at F2.8 or F4.

Canon-50mm-1.8-Lens-Review-5.gif

This is where the Canon 50mm performs the best. You get a sharp image with some nice shallow depth of field, but it keeps the focal plane a lot more manageable when focusing on a moving subject.

50mm on a full frame camera is known as a standard field of view as its roughly the field of view as your eyes, giving your image a very natural and pleasing look.

The Canon 50mm does give you the ability to shoot in low light situations because of that F1.8 aperture. This comes in very handy when we were shooting on the Canon 600D as you could not push the ISO past 800 before the image becomes too noisy.

Shooting on newer cameras like the Sony A7s has changed that. In a low light situation, we can shoot at F8 with an ISO of 5000 and the image is still clean.

So depending on the camera you have and the situation you are shooting in, work out a good balance between shooting at a low F-Stop and bumping up ISO so you have a manageable shot and a clean enough image.

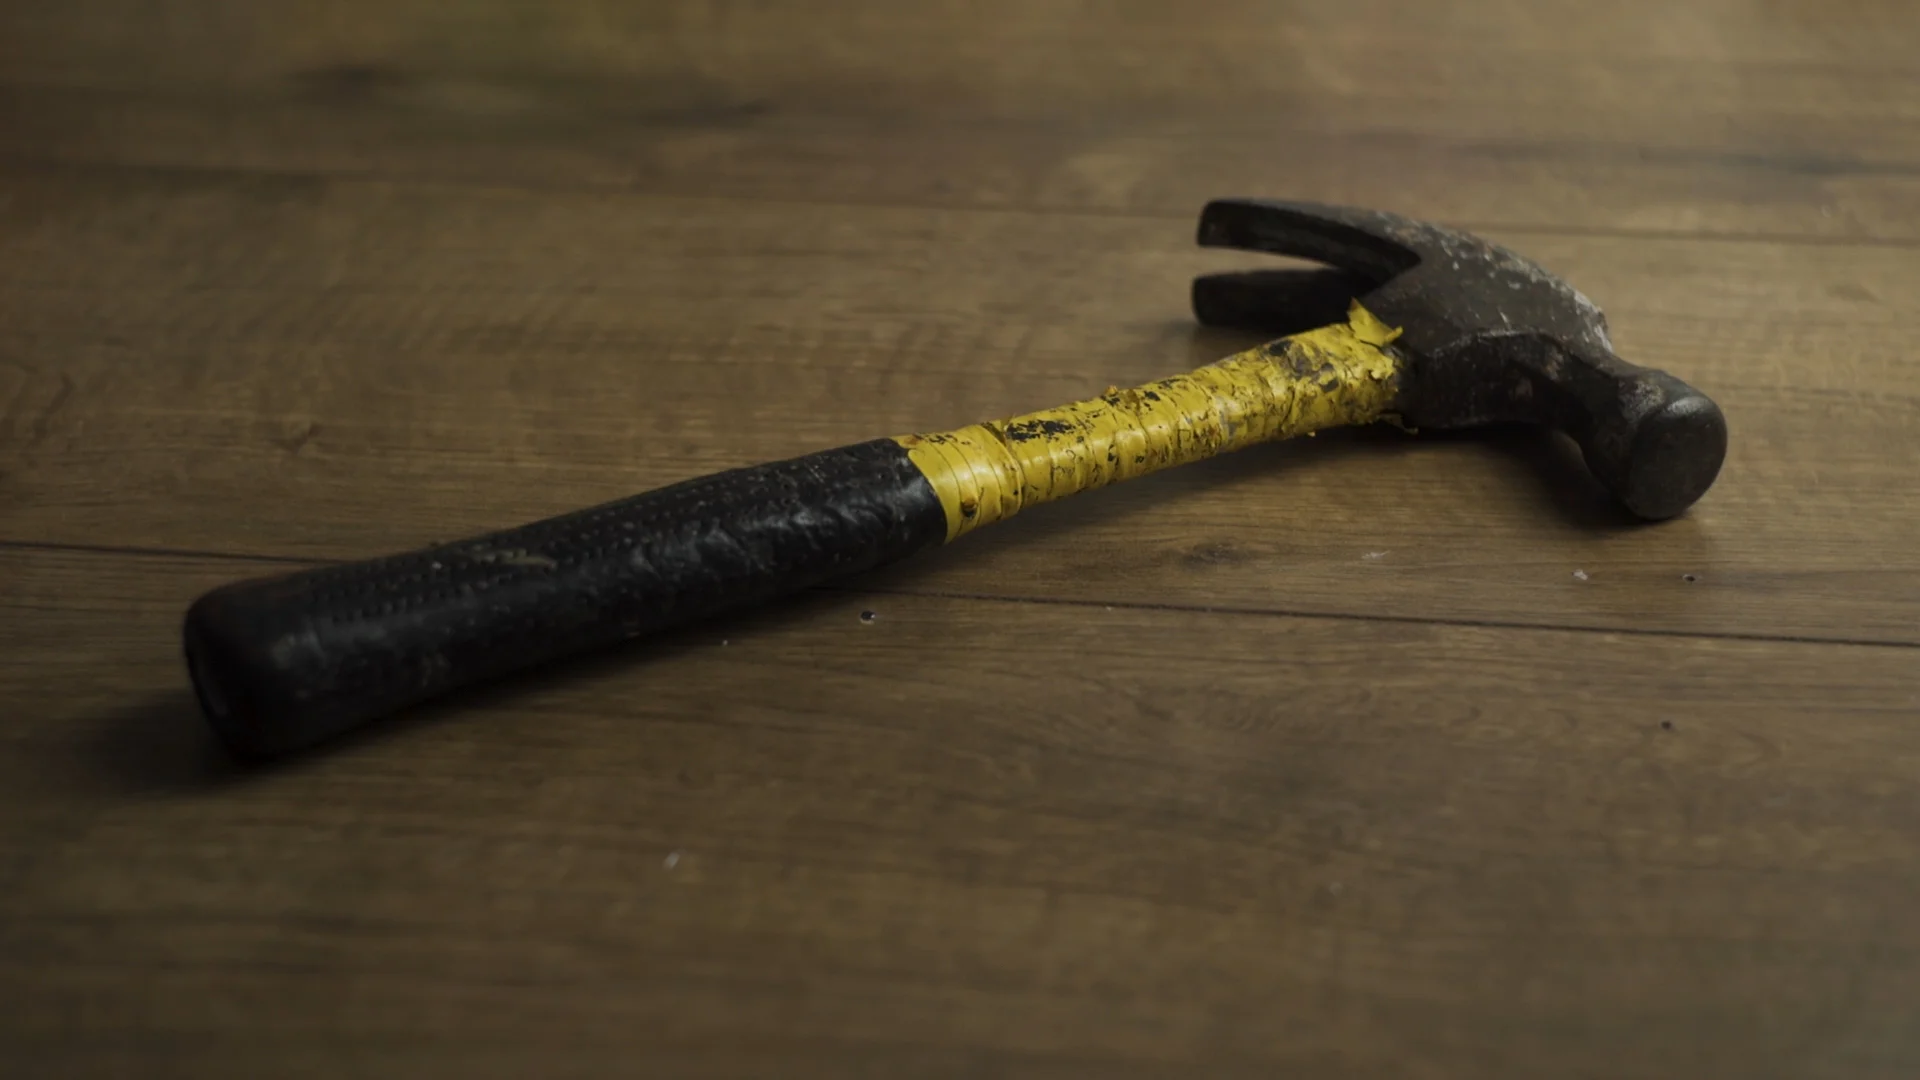
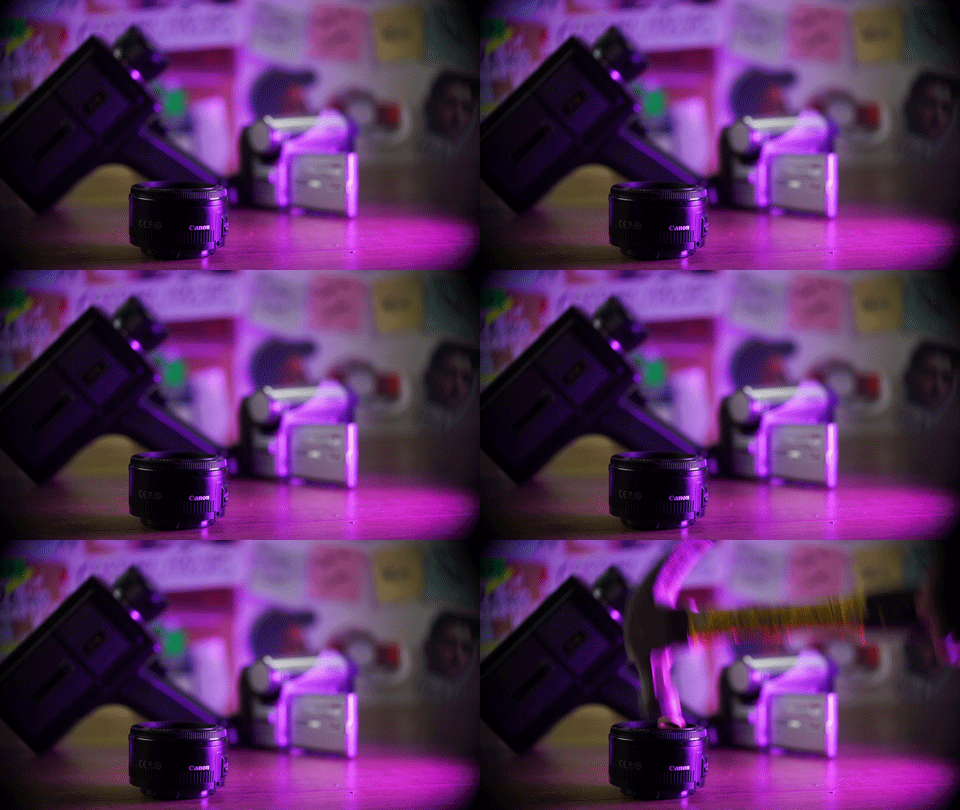
The construction of the Canon 50mm lens is all plastic, but this has not really been a problem. We’ve been using it for 6 years now, there are a few marks on it but that is just general wear and tear. Even after all this time, we’ve yet to drop it. The glass is still clean, and there is even a video of someone taking a hammer to the glass and it doesn’t break.

Canon-50mm-Lens-Hammer.gif

Links to that video can be found below but I wouldn’t recommend doing this, especially to the body of the lens.

The focus ring on the Canon 50mm lens is its biggest downside as it is very thin. There is not a lot of room to grip onto the focus ring when manually focusing. It’s not very smooth and it doesn’t sound great when you turn it.

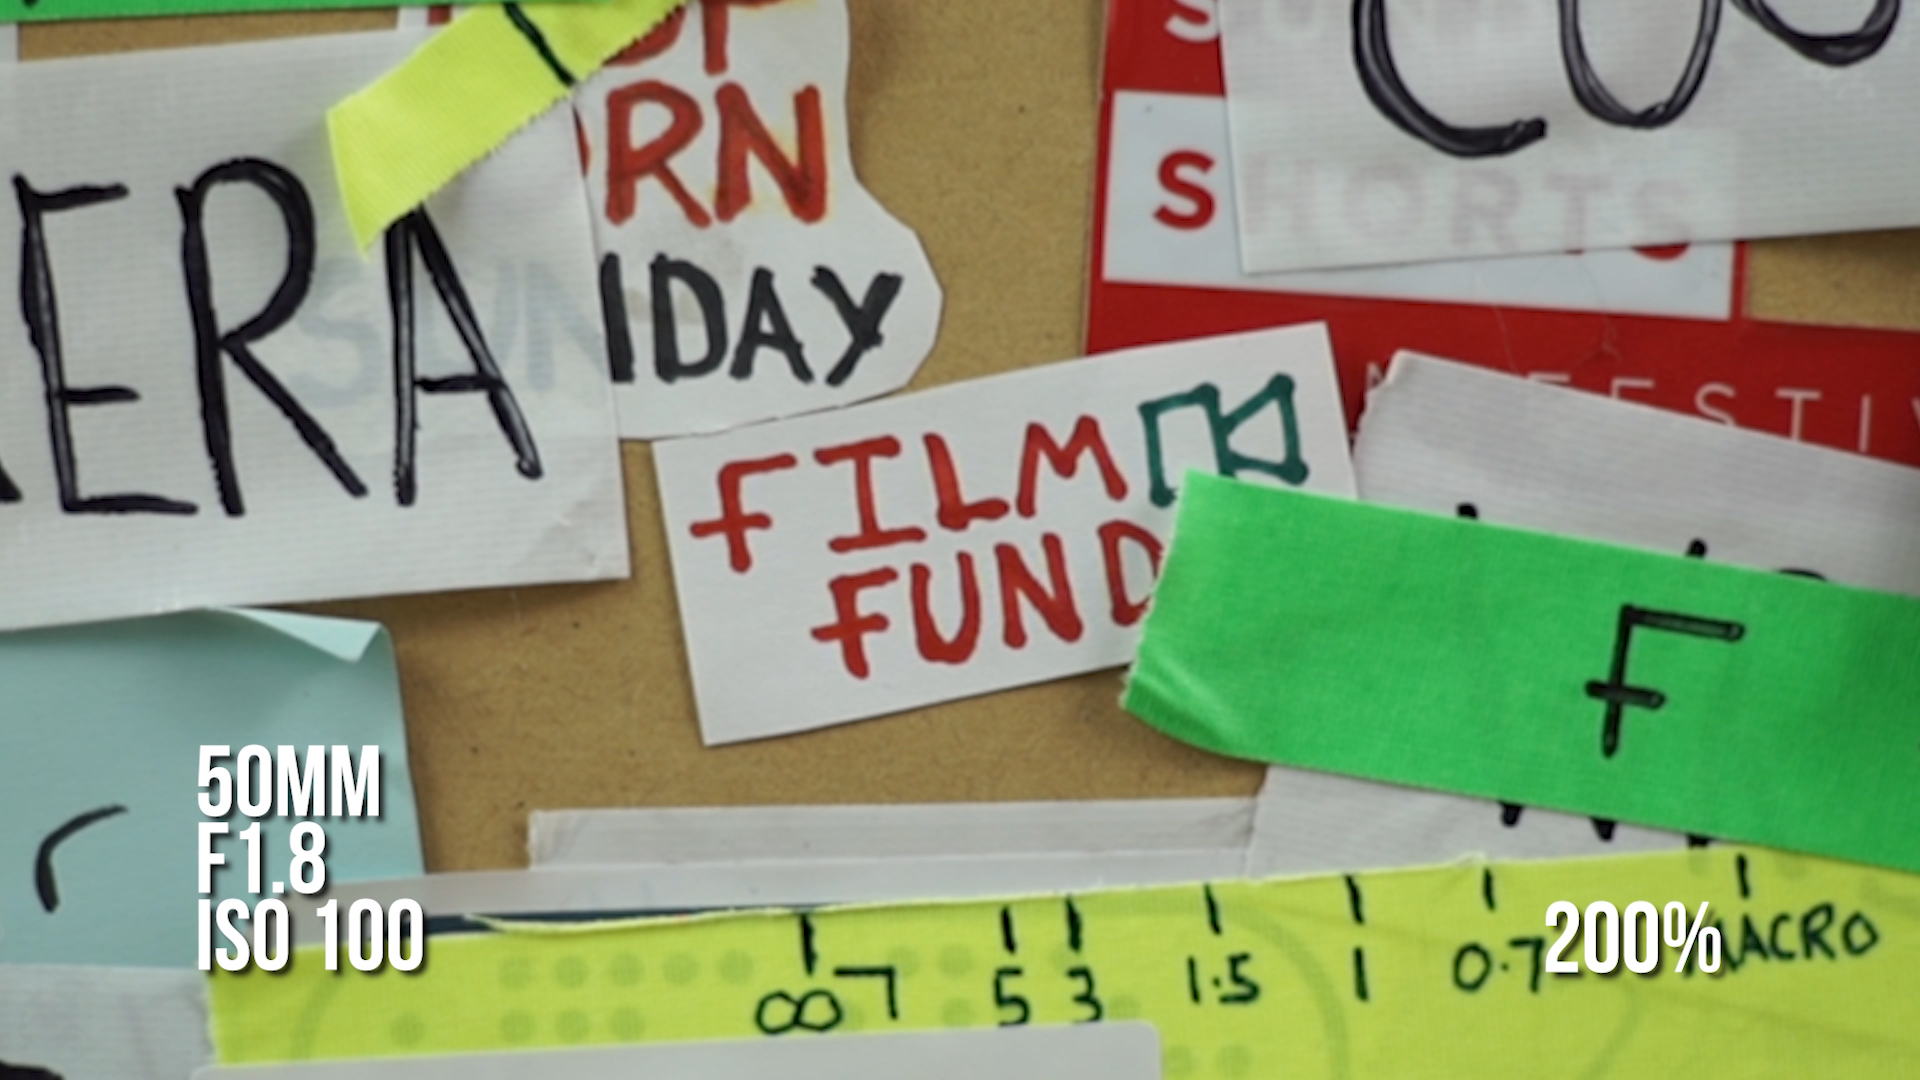
Most lenses we have used have a long focus throw which is simply how much you have to turn the focus ring to go from macro to infinity focus on a lens. A long focus throw gives you the ability to do fine focus adjustments and be a lot more accurate when focusing.

Canon-50mm-1.8-Lens-Review-6.gif

These manual vintage lenses have a very long throw, and if you have even seen cinema lenses, they have a massive throw and are extremely accurate.

The Canon 50mm has a very short throw, so when pulling focus, it is very difficult to be accurate and hit the same focus marks consistently.

Canon-50mm-1.8-Lens-Review7.gif

It does take practice to get used to the small focus ring and it might just take a couple of more tries to nail your focus when shooting.

When shooting a short film, we use a wireless follow focus which is operated by a 1st AC. Unfortunately, you’ll find it very difficult to use this lens with a follow focus because the focus ring it too thin to attach a focus gear properly.

But this isn’t really a problem for most people, especially if you are just starting out.

We have used the Canon 50mm 1.8 on Canon and Sony Cameras, and we would definitely recommend picking one as they are so cheap.

We’ve never used one on a GH4 or GH5, but if you have, let us know in the comments below about what you think about the lens. We’d love to give people advice about using this lens on that camera system.

If you are just starting out I would highly recommend getting this lens. It will allow you to learn about shooting at low F-Stops, focus, image quality, and also get your images looking like a film with the shallow depth of field and the natural, pleasing look you get from a 50mm lens.

Yes, there is a lot that goes into making your image feel and look like a film; you need props, costumes, locations, lights, good sound, and a solid performance from your actors. But when you are just starting out, and you just want to shoot some cool looking footage, this lens will allow you to do that whilst learning all the other things.


DISCLAIMERS:

Some of these links are affiliate links, if you purchase gear via these links The Film Look will receive a small commission, but there will be no additional cost to you. Thank you!
Cheap RGB Light | AL-360RGB Review

For 5 years now we have been using these 160 LEDs. The technology in them is old, the colour of them isn’t great, and the battery connection has started to go. So it was time to upgrade.

We have reviewed two AndyCine products in the past and they reached out at the right time to see if we wanted to review their new 16W LED light which is also RGB and has 360 different colours to choose from.

We obviously said yes, and that’s what we will be reviewing in this week’s video.

CHEAP RGB LIGHT  AL-360RGB REVIEW 1.gif

The AL-360RGB light has a max output of 16 watts. You can cycle from 3200k to 5700k, with the brightness staying at around 16 watts throughout the different colour temperatures.

When using the RGB mode on the light, most colours look like they use the full 16 watts of power, which is very impressive for a light of this size and price. Some colours look a little darker but this is just down to the shade of the colour.

You can change the brightness of the light a percentage at a time, all the way down to 10% and the colour temperature can be adjusted by 50 Kelvin at a time.

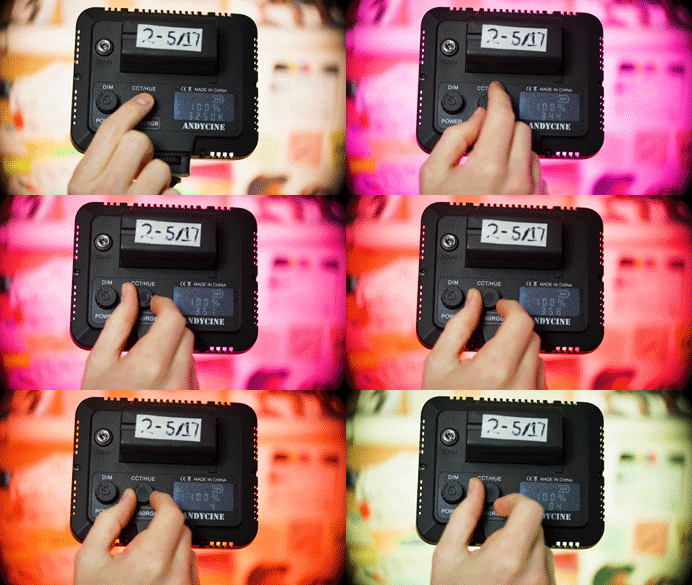
To access the RGB mode you simply press in the CCT/HUE button and use the dial to go through the 360 HUE colours.

CHEAP-RGB-LIGHT--AL-360RGB-REVIEW-2.gif

When turning the dials to control the brightness, colour temperature, or RGB colour, you can turn the dial one notch at a time to change the setting slowly. If you want to make a big change to the settings you can turn the dial quickly.

This is a nice feature to have so you are not spending a lot of time cycling through the settings if you know the one you are looking for.

There is a little screen on the back of the light which is quite dim and isn’t the clearest, but it does have a battery indicator and all of the settings information. It’s a nice little feature to have on such a small and relatively inexpensive light.

CHEAP-RGB-LIGHT--AL-360RGB-REVIEW-3.gif

The light can be powered via NPF batteries or via an 8.4v DC cable. One of the main uses we’ve had for this light is to add a coloured edge light when shooting product footage for this channel. Sometimes we can be shooting for an hour or two with the light always on, so having the ability to run the light directly from the wall is a feature we have been taking advantage of.

If you use one of these 970 NPF batteries you will get a run time of around an hour and a half with the brightness staying consistent until the battery hits about 10%.

In the past, we have used coloured gels to get different coloured edge lights. It’s worked well in the past, but with this new light, we have the ability to choose between 360 colours with a turn of a wheel. No need to faff with cutting and attaching gels.  

Each colour has its own reference number displayed on the screen. This allows you to record the colour you have used for future reference or have the ability to dial in the same colour on multiple lights.

CHEAP-RGB-LIGHT--AL-360RGB-REVIEW-5.gif

If you are shooting in a dark situation or have complete control of the light that’s in your scene, you could use this light as a key light. Most of the time this light would be used as an edge or hair light for a subject, and also to paint coloured light on a product or a background.

RGB LED lights are the next trend in lighting with lots of companies bringing out big expensive RGB lights. We have this one from LEDGO which we will be reviewing soon.

In the box you receive a light stand mount which allows you to tilt the light with ease. It is made out of plastic just like the rest of the light, but with the light being super lightweight it should last a long time.

One downside to this light is that it does not come with a battery or a DC cable to power it. It’s an extra expense you will need to make if you are thinking about buying this light. You can’t use it straight out of the box, unfortunately.

I’ve linked to an article in the description below from someone who has taken this light apart and tested it to the max, check it out if you are into that kind of stuff.

CHEAP-RGB-LIGHT--AL-360RGB-REVIEW-4.gif

Seeing the rapid RGB technology filter down into a budget light this small is really good to see as it makes it super accessible for low budget filmmakers like us.

I really like this light; it gives you the flexibility to switch between colour temperatures and is an upgrade from our older 160 LED lights, but the best feature is the RGB mode. Having that feature in such a small light gives you creative freedom with ease. We will not be messing around with gels for much longer.

🎥 This episode's kit/gear/equipment:

🇺🇸 US links:

AL-360RGB - https://amzn.to/2ChD74f

🇬🇧 UK links:

AL-360RGB - https://amzn.to/2H7yyze


DISCLAIMERS:

Some of these links are affiliate links, if you purchase gear via these links The Film Look will receive a small commission, but there will be no additional cost to you. Thank you!

$600 vs $60 Mic | Rode NTG3 vs Rode VideoMicro

The Rode NTG3 vs the Rode VideoMicro. One is $600. One is $60. One is 10x the price than the other - but is it 10x better?

Mic-Battle.gif

Today we are going to find out! Welcome to The Film Look.

We are giving each microphone a like-for-like comparison in some quintessential sound recording situations.

First up, our presenting setup.

When we present an episode, we boom a microphone overhead and plug it straight into the camera. We use the NTG3, and we have an SmartRig XLR phantom power adapter to convert it and plug it straight into the camera.

Mic-Battle3.gif

The VideoMicro on the other hand, uses a 3.5mm jack, so it doesn’t need an adapter, just an extension cable.

When you compare the sound of these microphones side by side, it is clear the NTG3 sounds more full and clear whereas the VideoMicro sounds a little tinny. But considering the VideoMicro is only a tenth of the price, it’s holding up really well.

To give the VideoMicro a fighting chance, I’m going to tweak the EQ and attempt to match it to the NTG3. Let me play those clips again.

Mic-Battle4.gif

This is sounding much better. In all honesty, now the VideoMicro sounds just as good as the NTG3 in this setup.

But what about if we are shooting a wide shot?

Mic-Battle5.gif

Booming the microphone in the same position as earlier will place the microphone in frame, so we must move the microphone further back. Let’s see how both mics handle booming from a distance.

Positioning the microphone from a long distance is the worst way to record sound; you get a lot of noise, low levels of dialogue, and it picks up a lot of acoustic tone in the room. From my ears, both microphones sound very similar. And similar being, both pretty rubbish.

So what about setting up a plant mic?

Mic-Battle6.gif

Because the VideoMicro is so small, it can easily be hidden in the shot, such as in a car, taped to the sun visor.

You just need to get creative and find a place to hide it close to your subject.

The NTG3, on the other hand, has a harder job of being so sneaky.

Mic-Battle7.gif

We have a video about different ways to record dialogue in a wide shot if you want to see some more methods.

Next up, we have foley.

Mic-Battle8.gif

We will record some clothing foley in a quiet room with the microphone really close. The environment needs to be silent and the microphone needs to pick up the nuances in the sound.

I’ll be recording in sync with our film Backstage, recording clothing foley for the Medium.

Mic-Battle9.gif

The NTG3 is an obvious winner. The higher sensitivity means it can record subtle noises a lot louder than the VideoMicro. So when the volume is balanced between both mics, the VideoMicro introduces a lot more noise into the sound.

NTG3.jpg
VideoMicro.jpg

So to conclude: The NTG3 is obviously a better microphone, that comes with the obvious higher price tag. It is more sensitive, so it records a cleaner and more well-rounded sound. It's perfect for recording high quality sound on short films.

But the VideoMicro also has its place. We use it when recording behind the scenes because it's so easy to set up on top of the camera.

Mic-Battle10.gif

It also wins in the “not breaking the bank” category, so if you are looking for a budget option, you CAN still record good sound for a short film with this microphone.


This video was Sponsored By

🎵 http://bit.ly/pbtfl-spinningcircles - Click here to download this episode's track. Check out Premiumbeat.com to discover a huge range of exclusive royalty free music!


DISCLAIMERS:

Some of these links are affiliate links, if you purchase gear via these links The Film Look will receive a small commission, but there will be no additional cost to you. Thank you!

Small Rig Cage for Blackmagic Pocket 4K

To be able to use the black magic pocket cinema camera 4k to its full potential you need an external battery source and an external SSD to be able to record at the highest level of quality.

This means this camera is going to need a cage to hold all of this extra stuff.

SmallRig-Cage-for-the-Blackmagic-Pocket-4K.gif

In this video, we are going to be reviewing the Small Rig cage for the black magic pocket cinema camera 4k.

We reviewed the black magic pocket cinema camera 4k in the last video, so if you haven't seen that you can find the video here to see what we thought about it.

We have been using cages for our Sony a7s cameras for a few years now and without them shooting would be a lot more difficult. The same goes for the pocket 4k. Without a cage, the camera is just about unusable, especially if you’re shooting all day.

To shoot at the highest quality you need to use an external hard drive, but there's nowhere to mount it. Also, the battery life sucks so you need to use an external battery solution, and again there is nowhere to put it.

SmallRig-Cage-for-the-Blackmagic-Pocket-4K-1.gif

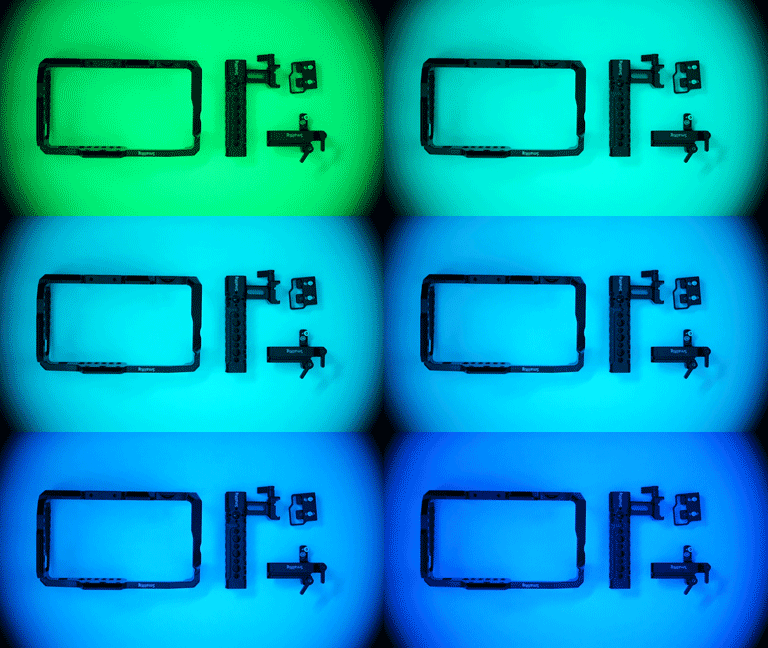
This is where the smallrig cage comes in. The cage is one piece of metal and has a bunch of mounting options. ¼ 20, ⅜, Rosette mounts for extra handles, and cold shoe mounts.

It fits the camera like a glove, and when holding it in your hand, the cage is curved and seamlessly joins the camera.

SmallRig-Cage-for-the-Blackmagic-Pocket-4K-2.gif

Next, we have the top handle. Small Rig has a few different top handles which will fit this cage. This one can change position and slide forward by turning these two screws. The best bit about this is that the Allen Key you need is magnetically stored on the handle.

the Allen key that you use to fix the camera in the cage is also magnetically stored on the bottom of the cage. This means you never have to go looking for the correct Allen key. It’s just there.

Having them magnetically stored on the cage is something I wish I had on my Sony A7s cage, as I take it in and out of the cage a lot.

SmallRig-Cage-for-the-Blackmagic-Pocket-4K-4.gif

Small Rig has designed an SSD holder which you mount onto the cage. You feed the cable through the front and tighten the hard drive in place.

This SSD holder is designed for the Samsung T5 SSD’s, but these Angel Bird SSDs also fit into the holder with a little bit of a wiggle.

Finally, you get this cable clamp for your HDMI and USB type C cable you use for the SSD. This just makes sure your cables are safe and secure.

SmallRig-Cage-for-the-Blackmagic-Pocket-4K-5.gif

With the cage, we have mounted our external battery solution which allows us to extend the battery life. Our DIY battery didn’t work great and the battery life kept dropping. So I would look into a different way to power the camera, maybe something that uses the 12v power input on the side of the camera.

But the smallrig cage has loads of room to mount something.

Just like all SmallRig products (and we have a few) everything is built to a high quality and they have a bunch of other accessories for all sorts.

Without the SSD holder and the ability to mount an external battery on to this camera, I don’t think we would use it. So spending an extra $190, which is how much all of these parts cost, is definitely worth the investment if you have a pocket 4K camera.

SmallRig-Cage-for-the-Blackmagic-Pocket-4K-6.gif

If you haven't seen our review on the Pocket 4K camera you can find that video here. Let us know in the comments below if you are thinking about buying one too and remember to achieve it one shot at a time.

🎥 This episode's kit/gear/equipment:

SmallRig Website - https://www.smallrig.com/

Cage - https://goo.gl/yj7w5H

Harddrive Mount - https://goo.gl/26Er3h

Cable Clamp - https://goo.gl/JUYnGx

Top Handle - https://goo.gl/opEJZ8


This video was Sponsored By

🎵 http://bit.ly/pbtfl-chillhopjazz - Click here to download this episode's track. Check out Premiumbeat.com to discover a huge range of exclusive royalty free music!


DISCLAIMERS:

Some of these links are affiliate links, if you purchase gear via these links The Film Look will receive a small commission, but there will be no additional cost to you. Thank you!

Blackmagic Pocket Cinema Camera 4K Review

The black magic pocket cinema camera 4K has an unnecessarily long name, but the camera packs a lot in for the £1100 price tag.

So if you’re looking to upgrade your camera or buy your first camera, is the pocket 4K worth it?

Black-Magic-Pocket-4K-Review-1.gif

We’ve been putting one to the test for the past few weeks and we are going to be reviewing it in this video.

Just to say up top, BlackMagic did send us over the pocket cinema camera 4K, but everything we say in this video is our honest opinion.

Tests

With every piece of filmmaking equip ment that we review, we always like to use it on a production and put it into real world shooting condition. With the Pocket 4K we have used it to shoot episode footage for this channel which is something we do daily, and we have also used to in a screen test for our next short film.

Since we have been shooting on the Sony a7s Mark I for about 2 years, and use it to shoot everything, we will be comparing it to the pocket 4K when we can.

Black-Magic-Pocket-4K-Review.gif

Features

Today’s video is certainly a user review and not necessarily a spec review. I’ll be speaking about the features I think matter when making films. But I have added a link to the black magic website if you want more details.

Interface

The black magic interface has got to be one of the easiest to use. With having a 5-inch touchscreen, the layout and buttons are big, it's easy to flick through and adjust the settings.

Black-Magic-Pocket-4K-Review-2.gif

When shooting with the camera, the record button is big and in a normal place, unlike the Sony A7s record button. In fact, the pocket 4k has two record buttons, but I am not too sure why it is here.

To change the setting on the camera, you select them on the screen and change them from there, or use the jog wheel on the front. On top of the camera, you have the most common buttons to change your ISO, shutter and white balance, and you can change to f/stop with the jog wheel.

Also, you have three custom function buttons which can be set to things like false colour, Zebras, grids, safe areas, also to turn a LUT on and off which is essential if you’re shooting with a flat picture profile.

Black-Magic-Pocket-4K-Review-3.gif

Recording Format and Resolution

With this camera, you have a bunch of recording formats to choose from.

Which is great to have if you are going to be using this camera to record a bunch of different projects like films or YouTube Videos.

If you are shooting a short film you’re most likely going to shoot RAW. You might as well as you have this camera. With RAW you will get the greatest level of control over your image in post-production you can change the white balance, you have more information to recover your highlights, colour grade, and noise reduction.

More on post-production later on.

You can record onto an SD card, C-fast card, and an external SSD. If you want to shoot at the highest quality you will need to buy external SSD to record onto. The SD and C-Fast card cut out after about 30 seconds because of the size of the RAW recording.

Black-Magic-Pocket-4K-Review-4.gif

In fact, the best value for money and capacity is an external SSD, as you can get a 500GB card for around £120. A 128GB C-Fast card will cost you 2 or 3 times that, depending on where you by it.

We have a 512 GB SSD. At 4K RAW Lossless you get 15 minutes of record time. For us this file size and the record time is unmanageable, but the camera can also record 4K RAW at 3 to 1 and 4 to 1 which is a reduced quality but you get a much longer record time and there is not a great difference in quality.

When shooting a film we would probably shoot at RAW 4 to 1.

Like us, if you shoot on a daily basis and make videos for YouTube, shooting RAW is again unmanageable in terms of hard drive capacity and unnecessary levels of image clarity, but the camera has a few different flavours of ProRes codecs and quality levels to shoot at.

For a recent video on our channel, we recorded the footage in a mixture of RAW and ProRes at different qualities and it all mixed together well. I even turned a 4K RAW Lossless clip into a gif for social media.

Black-Magic-Pocket-4K-Review-5.gif

That video was 5 minutes long with a project file size of 131 GB. On average, other videos of that length when shot on our Sony a7s have a total project file size of 20 GB.

For YouTube videos we would probably shoot Pro Res 422, as it has a good balance between quality and file size.

Image Quality Comparison

We pre light our short film 60 Seconds and tested the Pocket 4k. We recorded at a number of different formats and resolutions so flick through them to compare.

Inputs

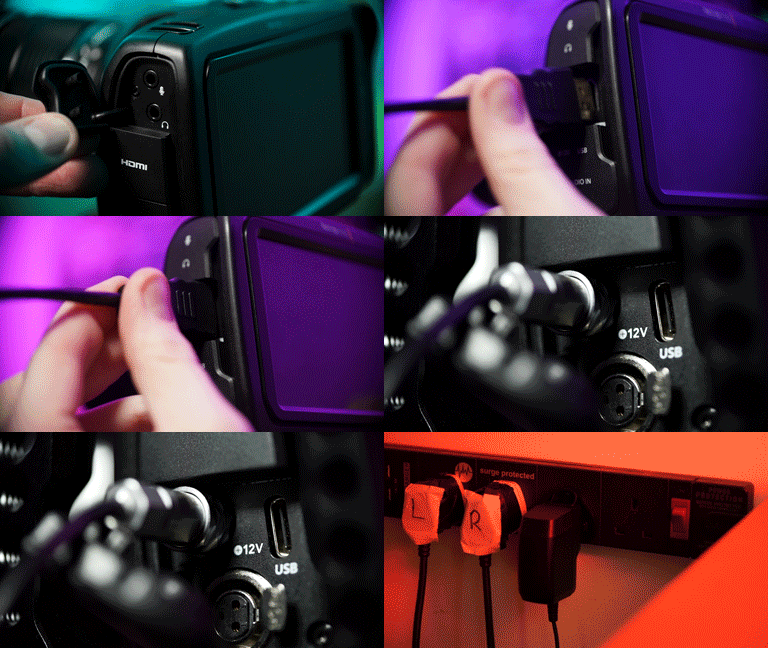
This camera has a 3.5mm microphone and headphone port. You can plug in a full-size HDMI cable, it has a 12v power port so you can run the camera from a wall socket. A USB-C port for external hard drives, and a mini XLR port.

Black-Magic-Pocket-4K-Review-6.gif

This allows you to plug in a mini XLR to full XLR cable into the camera. This is a great feature to have as you don't have to buy extra equipment like this smart rig converter box which we currently use.

When we tested this out and monitored the audio through headphones whilst recording, the audio was delayed from the video and sounded like this.

The footage was all in sync in the final clip, but it made it impossible to monitor the audio whilst recording. Hopefully, this can be fixed in a firmware update because it is a big problem.

Investment

This camera is an investment. You will need to build up the camera to be able to use it efficiently when shooting, but this is very similar to most cameras out there like our Sony a7s.

The first thing you will want to get after the camera is a cage as this will help you mount the other accessories you need for the camera. The cage we have is from SmallRig, it comes with a top handle, HDMI clamp, and hard drive mount.

Black-Magic-Pocket-4K-Review-7.gif

We have a full review of the cage in the next video, which you can find here if you are watching this in the future.

The battery life of the camera sucks and the LP-E6 battery will last about 30 minutes. So you will either have to buy a bucket load of LP-E6 batteries or work out some form of external battery solution.

We used a dummy battery and our DIY NPF mount, but the results weren’t great. A battery at 100% dropped straight down to 60 or 40%.

This could have just been our battery setup, so if you are thinking of getting the pocket 4k look into other external battery setups. Especially ones that run through the 12v power input which is on the side of the camera.

Like I said earlier, external SSDs are at the best option to record onto and having a cage like this will allow you to mount one and not just have it dangle down.

Black-Magic-Pocket-4K-Review-8.gif

If you are going to be shooting all day you will need to buy a few SSDs to get you through a whole day’s shoot. The other option is to have a computer nearby so you can copy the footage off the card.

If you have to do this whilst shooting a film, you would have someone whose sole job it is to ingest the footage off the card and onto the computer, this person is called a DIT.

Most of the time it’s difficult to find someone who can record sound on your film, so a DIT is a bit of a luxury for us indie filmmakers.

Post Production

If you want to shoot RAW, you’re going to need hard drive space for your computer, but the next investment is having a computer that can handle the workflow of editing RAW.

To process the footage you're going to be going through DaVinci Resolve which is an amazing program for being free.

Black-Magic-Pocket-4K-Review-9.gif

I am not going to go into any more detail about the RAW editing workflow in this video, but I have linked to a good tutorial in the description below.

In the past, I have edited a film which we shot in RAW on a laptop that could not handle the workflow, and it was very difficult to play back the edit and be creative. So some advice, make sure your computer system can handle the workflow before you buy this camera.

We have good computers that can handle the RAW workflow, I’ve linked to two videos below about the 2 computers we use if you want to check them out.

When grading your footage, DaVinci Resolve is the king. Again, it’s amazing that this program is free, and I am not getting paid to say that. There is a big learning curve with the program, especially when it comes to grading. So you want to spend your next investment learning it.

If you are looking for Resolve tutorials, check out Izak Jackson’s channel. He’s got a bunch on DaVinci Resolve and some other great videos too.

Shooting RAW will give you the greatest level of control over your image, compared to shooting at H.264 on the Sony or even ProRes on the Pocket 4K. The image will be sharper, you can correct mistake a lot easier by having the ability to adjust the ISO and white balance in post. There are just fewer compromises you have to make when trying to achieve the film look you want.

Who is this camera for?

So after all of that, who is this camera for? We have used it to shoot episodes for this channel and test shot for our up and coming short film. For our YouTube videos, we wouldn’t really use the camera. As we make 8 videos per month the file sizes are just too high and we would be buying new hard drives every month.

To shoot a film, which we do 2 to 3 times a year, we wouldn’t mind the extra production expense we would need to spend on hard drives VS the quality of image we would get. Since every film is a one-off.

If you need the highest level of image quality because you are shooting video production work for a client and are making money from it, the pocket 4K is a very good option.

Any negatives that I have said about this camera or the extra investment you have to make to be able to use this camera, is all thrown away because of the price of the pocket 4K.

And at the end of the day, that’s what it comes down to, the price.

The image quality you get from it is amazing, and in order to get the same quality from another camera you’re going to need to spend 10 thousand pounds plus.

If you are looking to buy this camera, just remember the extra investment you will need to make in terms of accessories, hard drive storage, and a computer that can handle the workflow.

Black-Magic-Pocket-4K-Review-1.gif

But for £1100, you get a lot of camera for the price.

In the description below I have linked to a few different articles that go into more detail about the specs of this camera, which I would highly recommend reading if you think about buying this camera. If you like this video give it a thumbs up and down if you don't, and remember to achieve it one shot at a time.

Links

Black Magic Website - https://goo.gl/EyXXzE

Raw Editing Workflow - https://youtu.be/clRnEwOcVis

Data Rates - https://goo.gl/zZdGgW

Wolfcrow - https://goo.gl/id2dCA

Izak Jackson Resolve - https://youtu.be/zXOGJaAnwoo


This video was Sponsored By

🎵 http://bit.ly/pbtfl-drivingtowardthesun - Click here to download this episode's track. Check out Premiumbeat.com to discover a huge range of exclusive royalty free music!


DISCLAIMERS:

Some of these links are affiliate links, if you purchase gear via these links The Film Look will receive a small commission, but there will be no additional cost to you. Thank you!
Pre-Lighting & Test Shooting | Behind The Scenes

This week we head over to the location for our next short film and pre-light the whole scene. We break down each light we are using so you can see how it looks step by step!

🎥 This episode's kit/gear/equipment:

US links:

Aputure HR672c: https://amzn.to/2QHSkEX

LEDGO LG-260: http://www.ledgo.co.uk/products/LG-G260

LED Colour Changing Bulb: https://amzn.to/2SD190k

UK links:

Aputure HR672c: https://amzn.to/2zRfXkI

LEDGO LG-260: http://www.ledgo.co.uk/products/LG-G260

LED Colour Changing Bulb: https://amzn.to/2EcWKgo

🎬 In case you missed it

5 Tips for Nailing the 180°: https://youtu.be/Fs24DBoT-C8

🎧 Listen to our Podcast!

iTunes: https://goo.gl/hikhGF

Android: https://goo.gl/fmsp4s

📞 The Socials

Website: http://thefilmlook.com

Twitter: https://twitter.com/TheFilmLook

Facebook: https://www.facebook.com/TheFilmLook

Instagram: https://www.instagram.com/thefilmlook


DISCLAIMERS:

Some of these links are affiliate links, if you purchase gear via these links The Film Look will receive a small commission, but there will be no additional cost to you. Thank you!

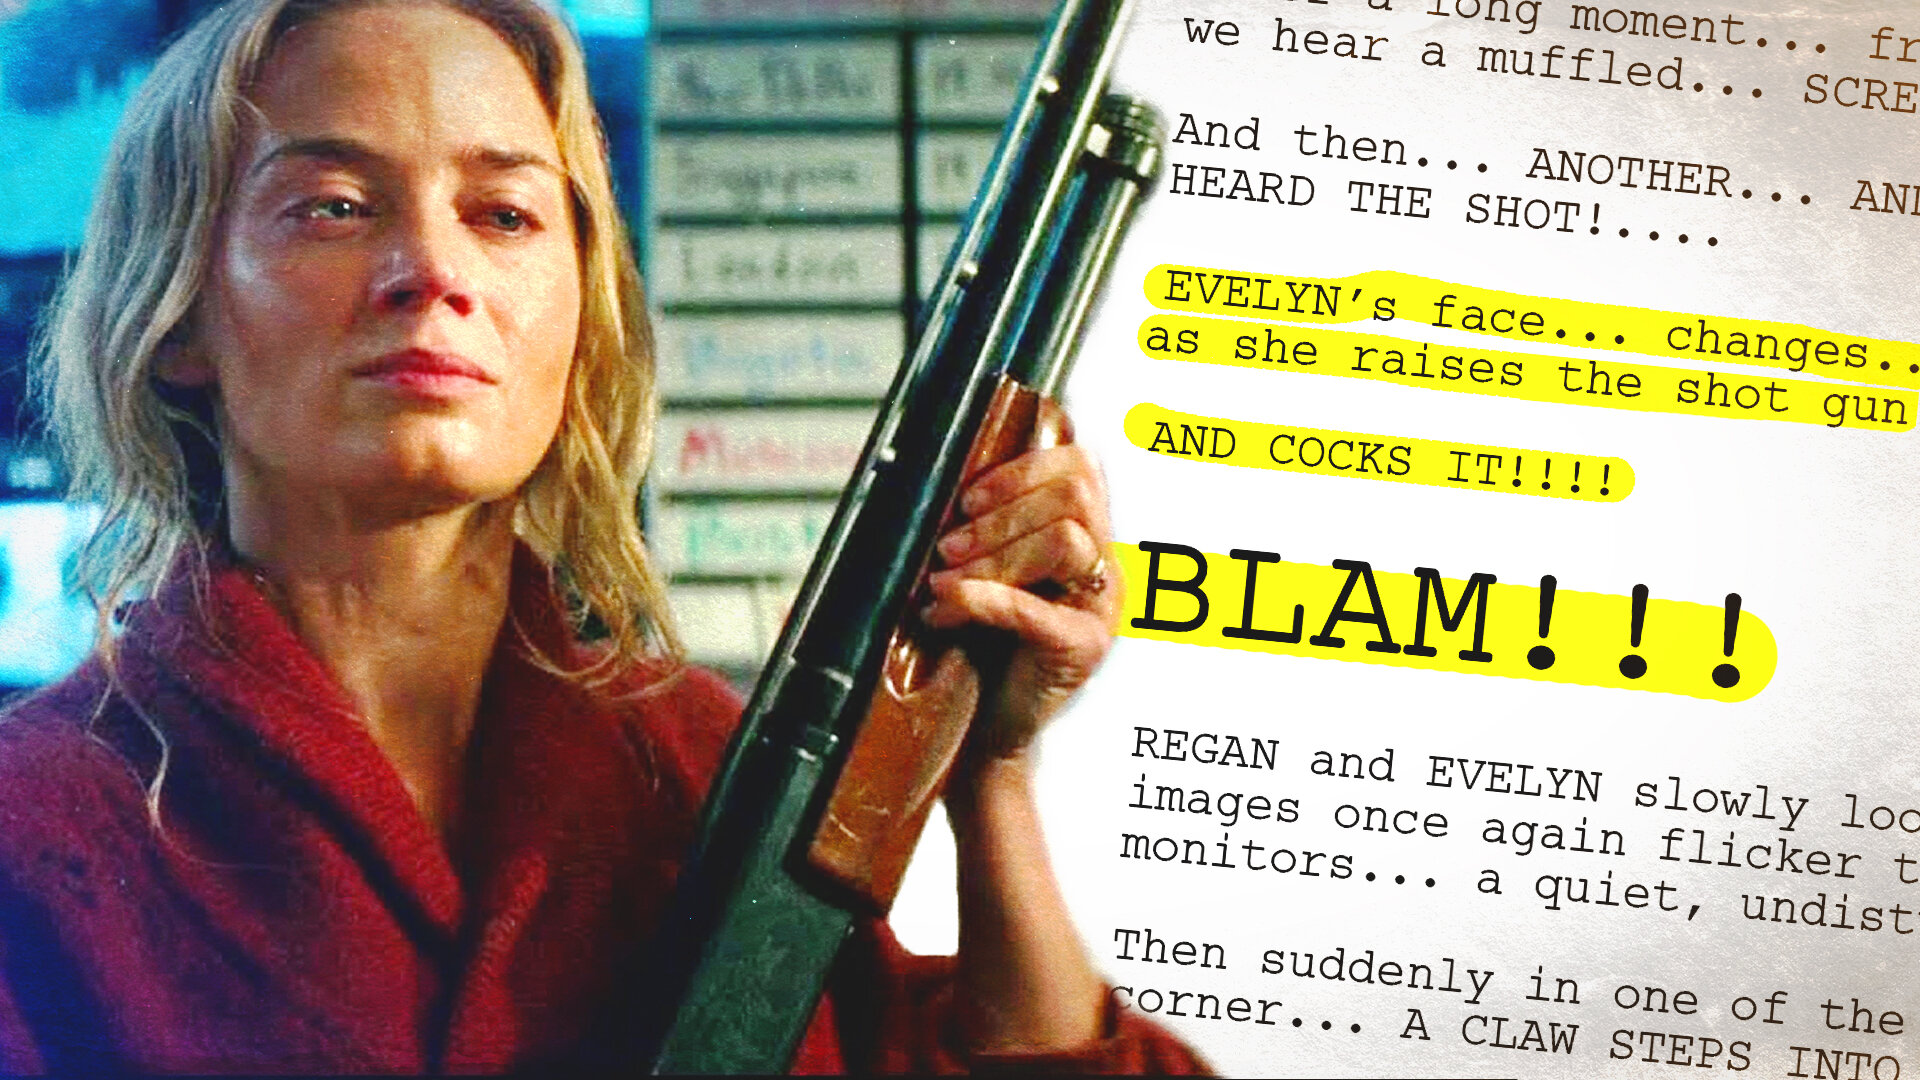
How to WRITE a more READABLE Screenplay

There’s a lot that goes into a screenplay. It’s not just a novel, it’s a blueprint for making the film.

Because of this, it can feel like a script packs a LOT of information but sometimes its readability and pace gets lost. Once you lose the readability, you’ve lost the reader.

How to Write a more READABLE script.jpg

So how do you write a more readable script that has some punchy pace? We have some tips which should guide you in the right direction. Welcome to The Film Look.

We’ve spoken about this a few times now, but it’s worth mentioning again.

Read the script out loud with a few friends. Give everyone a role to play, but have someone read the actions lines as well. This will give you a very clear indication if the script is easy to read.

Characters-Conflicting2.gif

To a newcomer, all this information is brand new, so they won’t have a bias or any previous knowledge when they read it.

While reading it out loud, you may notice dead stops in the script; points which cause a reader to stop, think, and read it again. This can be due to a bunch of things:

The first thing you can do is create more white space on the pages. You should be able to scan a script and understand it in a moment’s notice. This is especially helpful during a shoot.

How-to-Write-a-more-READABLE-script.gif

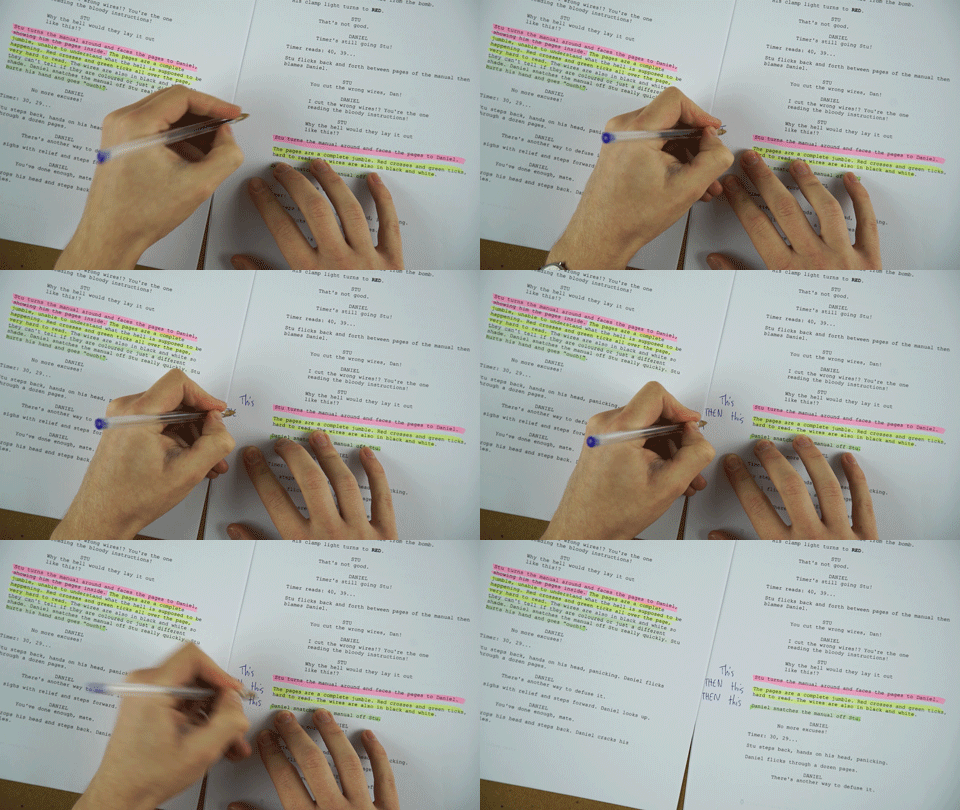
You can create more white space by thinking of each paragraph as a beat in the film.

If you have “this happens, then this happens, then this happens”, space it out and put each “THEN” on a new line.

If things are happening at the same time, or within a single moment, you can keep it in the same paragraph.

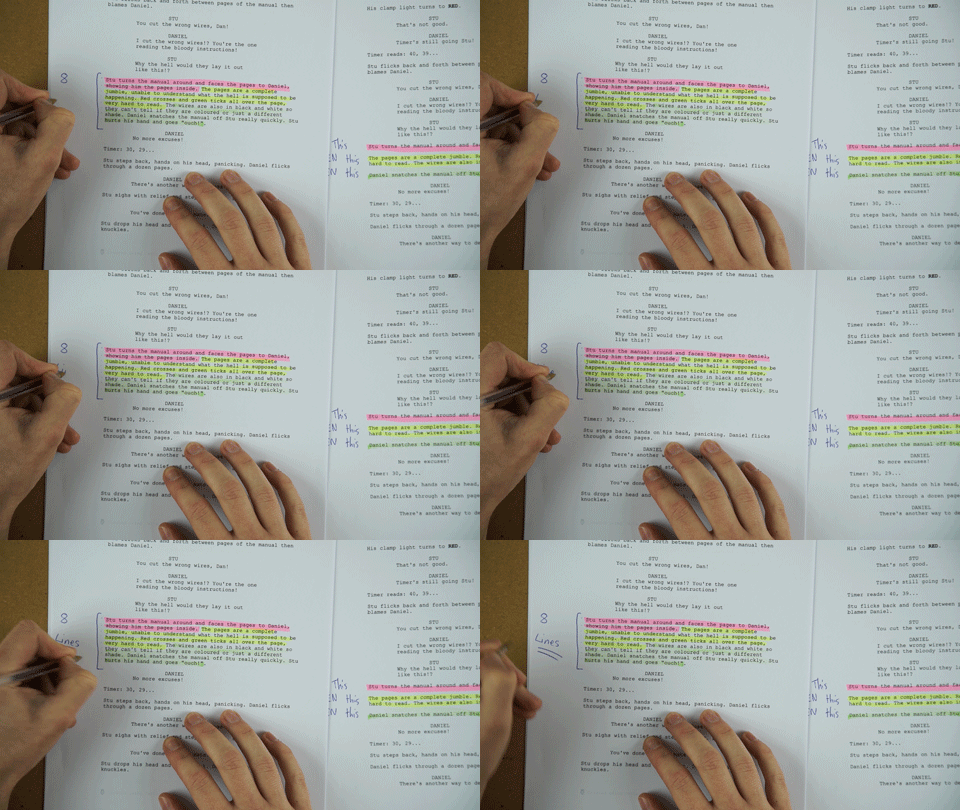
A good rule of thumb is not writing over 5 lines for a single paragraph. If you are taking more than 5 lines to describe something, you are probably describing too much stuff.

How-to-Write-a-more-READABLE-script1.gif

Saying that, more words doesn’t always mean more descriptive.

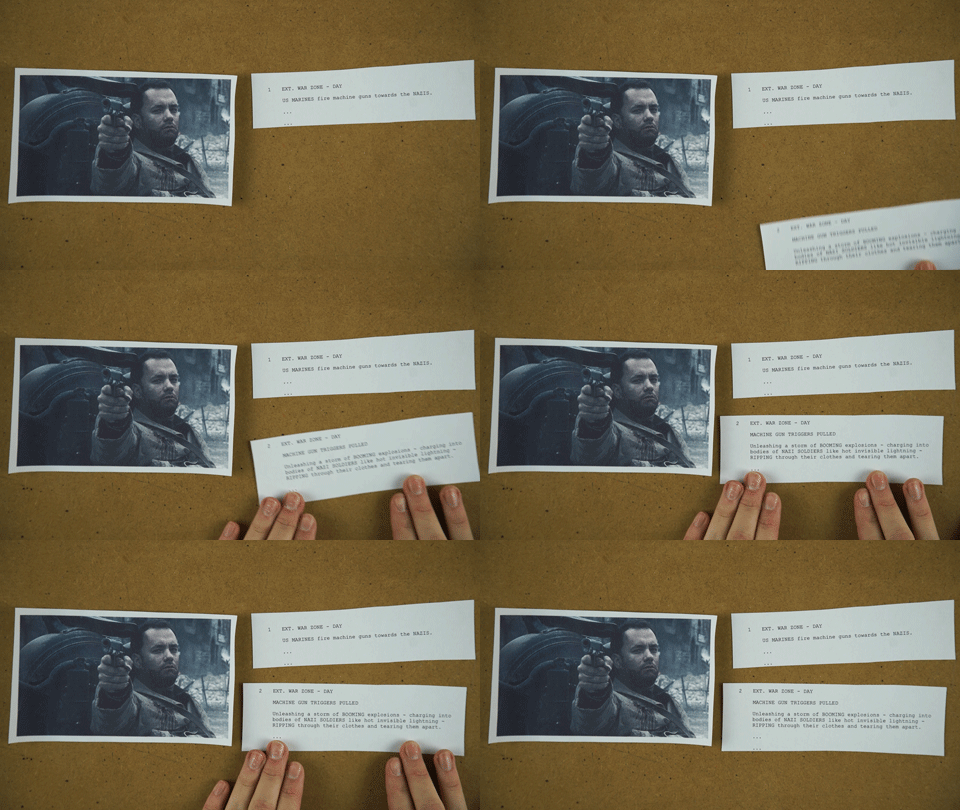
Want to the describe the immense gunfire and chaos from a battlefield in world war 2?

How-to-Write-a-more-READABLE-script2.gif

Then describe it like chaos. Instead of:

“US Marines fire machine guns towards the Nazis”.

how about this:

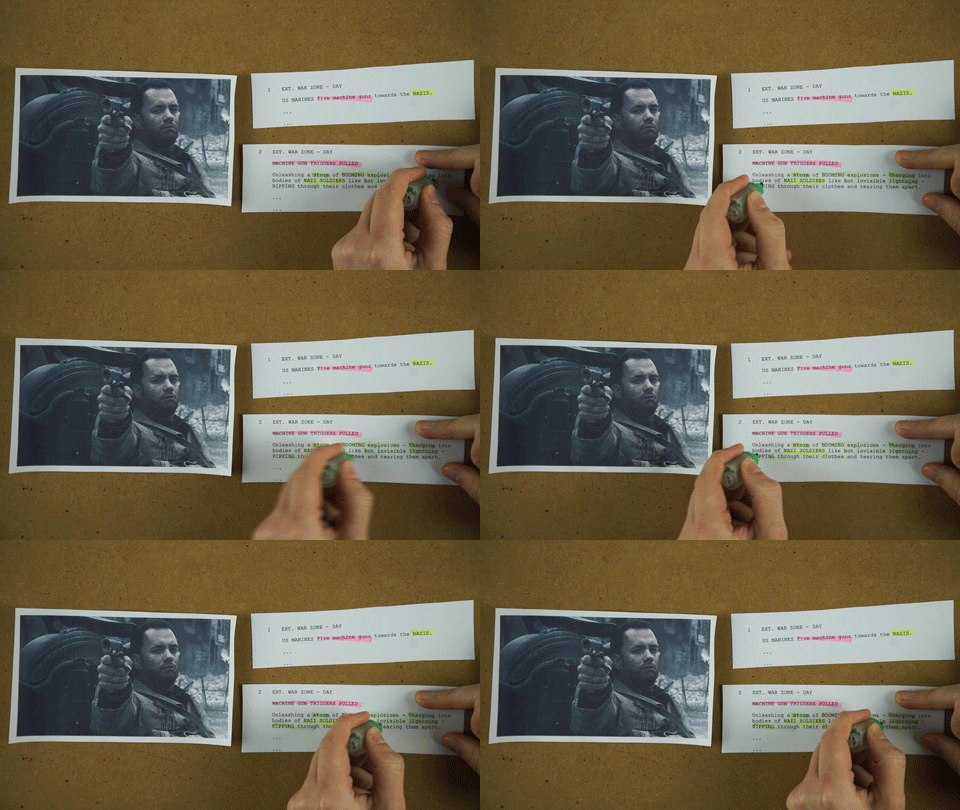
“MACHINE GUN TRIGGERS PULLED

Unleashing a storm of booming explosions, charging into bodies of Nazi soldiers like hot, invisible lightning, ripping through their clothes and tearing them apart.”

The two sentences describe the same thing, but the second gives you a sense of the image and feeling in the scene. It sounds a lot more chaotic and violent due to the use of metaphors, similes, and adjectives.

How-to-Write-a-more-READABLE-script3.gif

If you get creative, you can make your action lines paint pictures.

Let us know if you have any tips for making a script easy to read in the comments below. You can hit that orange lens cap if you want to subscribe for more videos just like this one, and remember to achieve it one line at a time.


This video was Sponsored By

🚀 http://bit.ly/rs-aspect - Give your video a clean look with Aspect by RocketStock. It features over 200 logo reveals, intros, lower thirds, overlays, icons, and transitions.

🎵 http://bit.ly/track-losinggames - Click here to download this episode's track. Check out Premiumbeat.com to discover a huge range of exclusive royalty free music!


DISCLAIMERS:

Some of these links are affiliate links, if you purchase gear via these links The Film Look will receive a small commission, but there will be no additional cost to you. Thank you!

Makin' Vids | Behind The Scenes

In this week's BTS ask for your advice on thumbnails, test out the Black Magic Pocket 4K, test a $600 mic against a $60 mic, and show you how we light products for reviews.

🎬 In case you missed it

BTS Last Week: https://youtu.be/lvWH-yMwA0g

Storytelling 101: https://youtu.be/JbLCZHmR2Ts

Maximise Your Location: https://youtu.be/44h6vy0Qvpk

Storyboard Using Photos: https://youtu.be/mbT5xNN8QkA

🎧 Listen to our Podcast!

iTunes: https://goo.gl/hikhGF

Android: https://goo.gl/fmsp4s

📞 The Socials

Website: http://thefilmlook.com

Twitter: https://twitter.com/TheFilmLook

Facebook: https://www.facebook.com/TheFilmLook

Instagram: https://www.instagram.com/thefilmlook


DISCLAIMERS:

Some of these links are affiliate links, if you purchase gear via these links The Film Look will receive a small commission, but there will be no additional cost to you. Thank you!

Our YouTube Presenting Setup

We have been presenting like this for almost 2 years, so I think it’s time to break down the setup.

Let’s start with the space we shoot in and the floor plan of our studio.

Studio Layout

To give us as much control over the lighting in the room, we start by blocking out all of the light coming through the window. Since the window is nearly 3 meters high, we use a large blackout curtain which we clip to the window.

Then we use a large fold-out backdrop and wedge it between a tripod head and the ceiling.

Our-YouTube-Presenting-Setup.gif

We didn’t say this was going to be pretty.

Next, we hook up a frosted shower curtain to the ceiling which is 1 meter away from where we present. Then we place a light behind it to create a large soft source.

Our-YouTube-Presenting-Setup1.gif

The light we use is this NiceFoto 330W LED light set to 5600K at 10% brightness and is 2 meters away from the shower curtain.

We have a video review all about the NiceFoto light if you would like to check it out here.

Before we got this light, we used one of our softboxes and placed right next to the shower curtain. We’ve had these softboxes for about 5 years now and they have a green tint to them, so we were always correcting the colour in the white balance setting on the camera and in the edit. More on colour correction later on.

Here is a side by side comparison of the colour difference between the two lights.

Our-YouTube-Presenting-Setup2.gif

Next, we add a background and a hair light by using a household bulb which is attached to our bookcase via our can lights. On the front of the can light is DIY diffusion paper to make the light softer, and also a cardboard flag to stop the light from spilling too much on to the presenter.

We have a video on DIY diffusion here.

Finally, we tape a DIY cardboard flag to stop the light from hitting the background as it is shiny photo paper, and we use this practical light which is a light up clapperboard on the shelf.

Links to all of the equipment will be linked in the description below.

To shoot the presenting we use a Sony a7s mark 1 which is about 1 meter away. We use a Canon 50mm lens set to F2.8, shutter 1/50, and an ISO of 160.

We present right in front of Richard’s desk which we raise to standing height. We do this as we do not have a teleprompter, so we can read the script for the episode off the screen.

Our-YouTube-Presenting-Setup4.gif

When it comes to presenting parts like this one where we are looking at the camera we just have to memorise the lines, but we don’t always get it on the first go.

For sound, we boom a Rode NTG3 on a C-Stand just out of shot above us. We use a smart rig which converts the XLR cable into a 3.5mm cable and provides phantom power to the microphone so we can feed the signal directly into the camera.

When recording the parts in the script where we are not presenting directly to the camera, we still roll video. We do this to keep the audio consistent throughout the whole recording.

Also, it would be a faff setting up another audio recorder just for this setup.

The time it takes to shoot the presenting for each episode depends on the length of the script, but having the same setup helps us save time.

In the edit, we cut it all together with the other footage from the episode and then we colour correct and grade the shot. The standard profile which we shoot with on the Sony A7s has a flat look to it, so we add contrast and bring up the highlights to help make the image pop.

And that is it. The setup is a bit makeshift and DIY, but it works for us.

Full-Plan.jpg

This video was Sponsored By

🎵 http://bit.ly/pbtfl-blissbay - Click here to download this episode's track. Check out Premiumbeat.com to discover a huge range of exclusive royalty free music!

🎥 This episode's kit/gear/equipment:

🇺🇸 US links:

NiceFoto HA-3300B - https://amzn.to/2TN09YC

Frosted Shower Curtain - https://amzn.to/2U65iLu

Lightup Film Clapperboard - https://amzn.to/2rg9bk8

🇬🇧 UK links: NiceFoto HA-3300B - https://amzn.to/2QvnMGk

Frosted Shower Curtain - https://amzn.to/2zyNh00

Lightup Film Clapperboard - https://amzn.to/2RqKn45


DISCLAIMERS:

Some of these links are affiliate links, if you purchase gear via these links The Film Look will receive a small commission, but there will be no additional cost to you. Thank you!

New Film - New Lights - New Challenges | Behind The Scenes

This week we work on our newest film, let you in on some of the tricks we use in pre-production, and let you in on when those tricks don't bloody work!

🎬 In case you missed it

Storytelling 101: https://youtu.be/JbLCZHmR2Ts

Maximise Your Location: https://youtu.be/44h6vy0Qvpk

Storyboard Using Photos: https://youtu.be/mbT5xNN8QkA

🎧 Listen to our Podcast!

iTunes: https://goo.gl/hikhGF

Android: https://goo.gl/fmsp4s

📞 The Socials

Website: http://thefilmlook.com

Twitter: https://twitter.com/TheFilmLook

Facebook: https://www.facebook.com/TheFilmLook

Instagram: https://www.instagram.com/thefilmlook


DISCLAIMERS:

Some of these links are affiliate links, if you purchase gear via these links The Film Look will receive a small commission, but there will be no additional cost to you. Thank you!

Get CINEMATIC by Connecting YOUR Shots!

The best shots in a film usually involve movement; whether that be camera movement or character movement. With the invention of things like handheld gimbals, achieving a big move is easier than ever! But achieving a good looking, and purposeful, camera move is more than just mindlessly whipping the camera around the scene.

Connect-Your-Shots.gif

Today we are showing YOU how we approach long takes, camera movement, and how we combine shots to make a film feel more CINEMATIC. Welcome to The Film Look.

This process is actually quite straightforward. The first thing you will need is a set of storyboards for your scene. You CAN create storyboards by drawing them out, but if you can’t draw, like us, you can take photos instead.

Connect-Your-Shots2.gif

We have a video going into more detail about storyboarding using photos here. It’s actually really helpful and has multiple benefits as opposed to drawing them by hand!

Once you have an idea of the types of shots you want to cover, lay them out in front of you.

For this example, we are using the photo storyboard created for a scene in our short film Corpse. This photo board includes 36 shots. But if you closely, there are a bunch of shots which we can actually connect together using camera movement, such as these three here.

Connect-Your-Shots3.gif

We have an insert of a character receiving a knife, a close up on one actor, and a close up on another actor. But all three of these actions can be covered in a single moving shot because they are all within a pan or a tilt of one another.

So instead of CUT CUT CUT, let's transform it into MOVE, MOVE, MOVE.

Connect-Your-Shots4.gif

We start off on shot A, using the action of giving the knife as direction for the camera move, which brings us to shot B, hold for a moment, then we continue up to shot C.

Connect-Your-Shots5.gif

If we do this with all of the shots in the scene, we can massively reduce the shot list, which in turn, reduces the shooting time. It looks better, and it's quicker to shoot than before! Two birds, one stone.

We also did this in our film The Asylum Groove during the execution scene. We start on our character, then up to the execution head cap, then down to his restraints, then back to the character for his emotional change.

Connect-Your-Shots6.gif

They started out as inserts, but we turned them into one single moving shot.

Let's use another example. Something a bit more technical.

Next up we have a scene from our film Backstage.

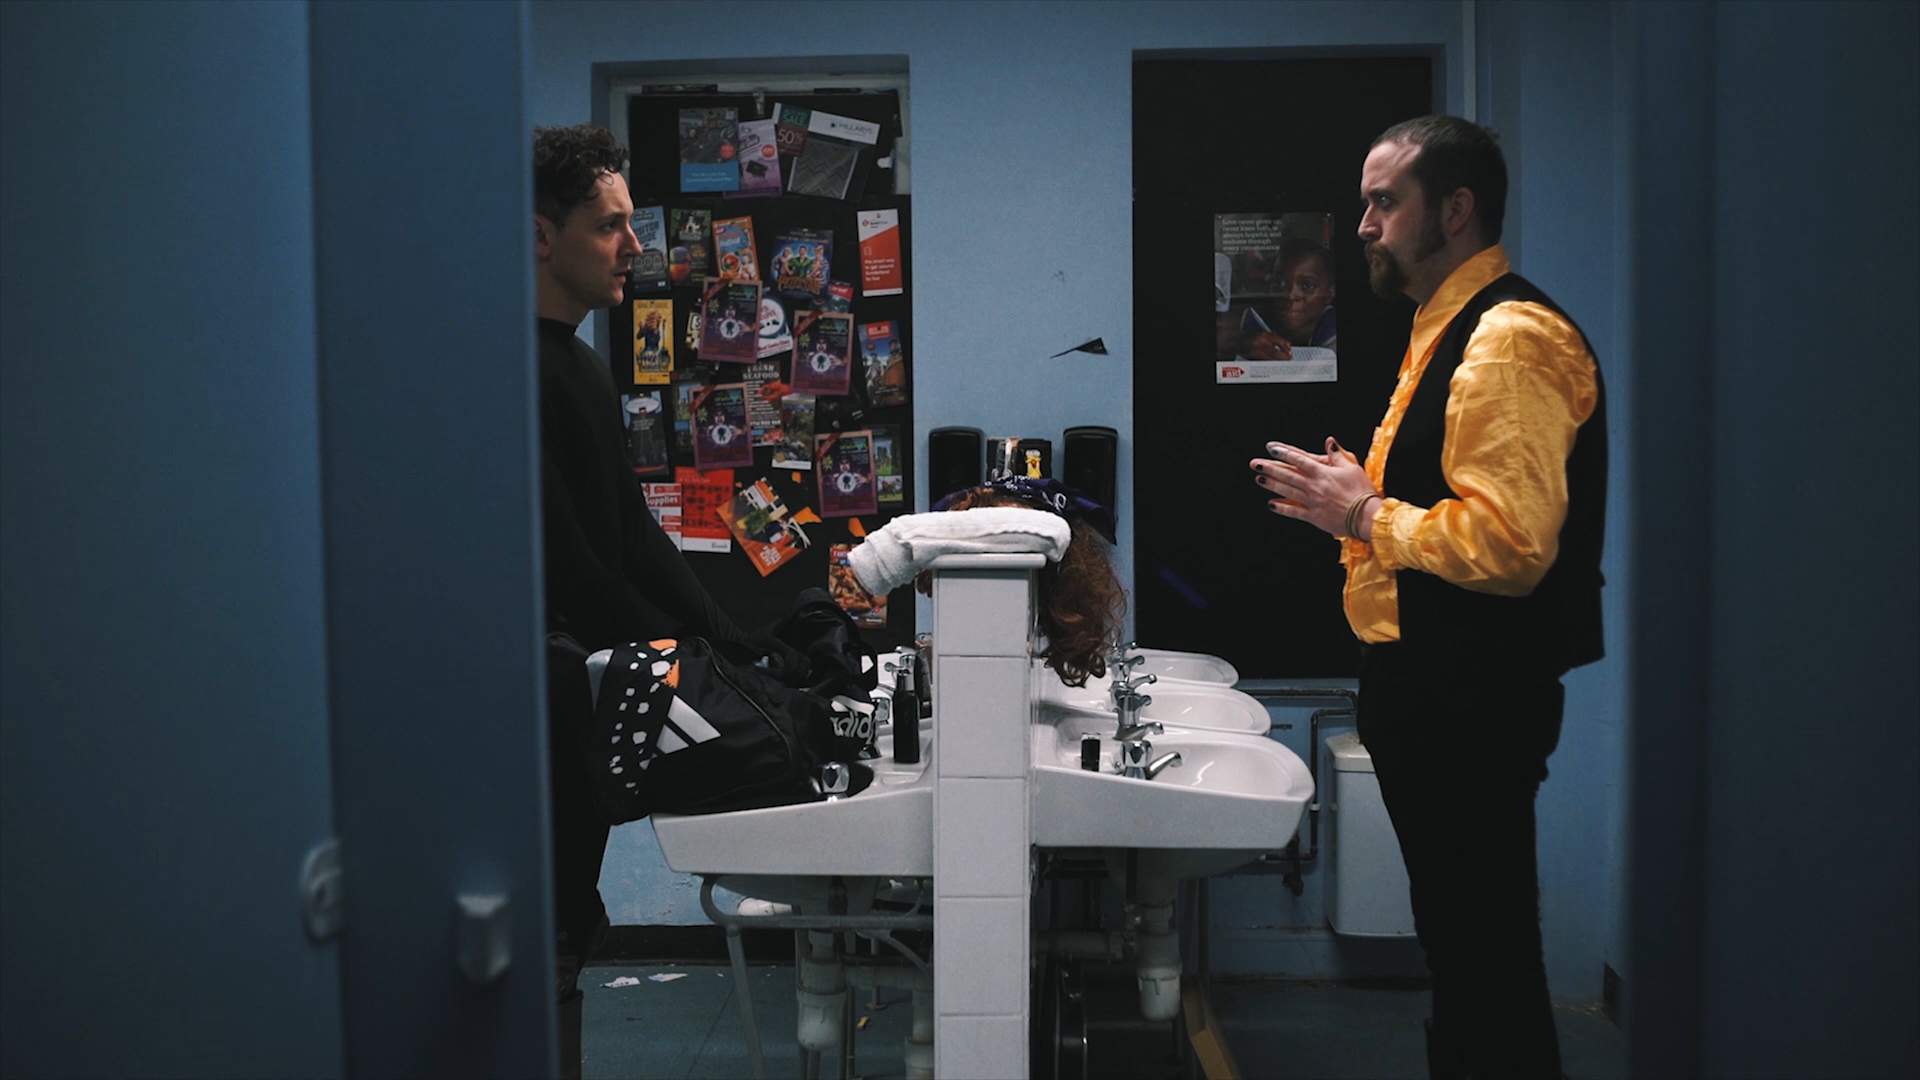
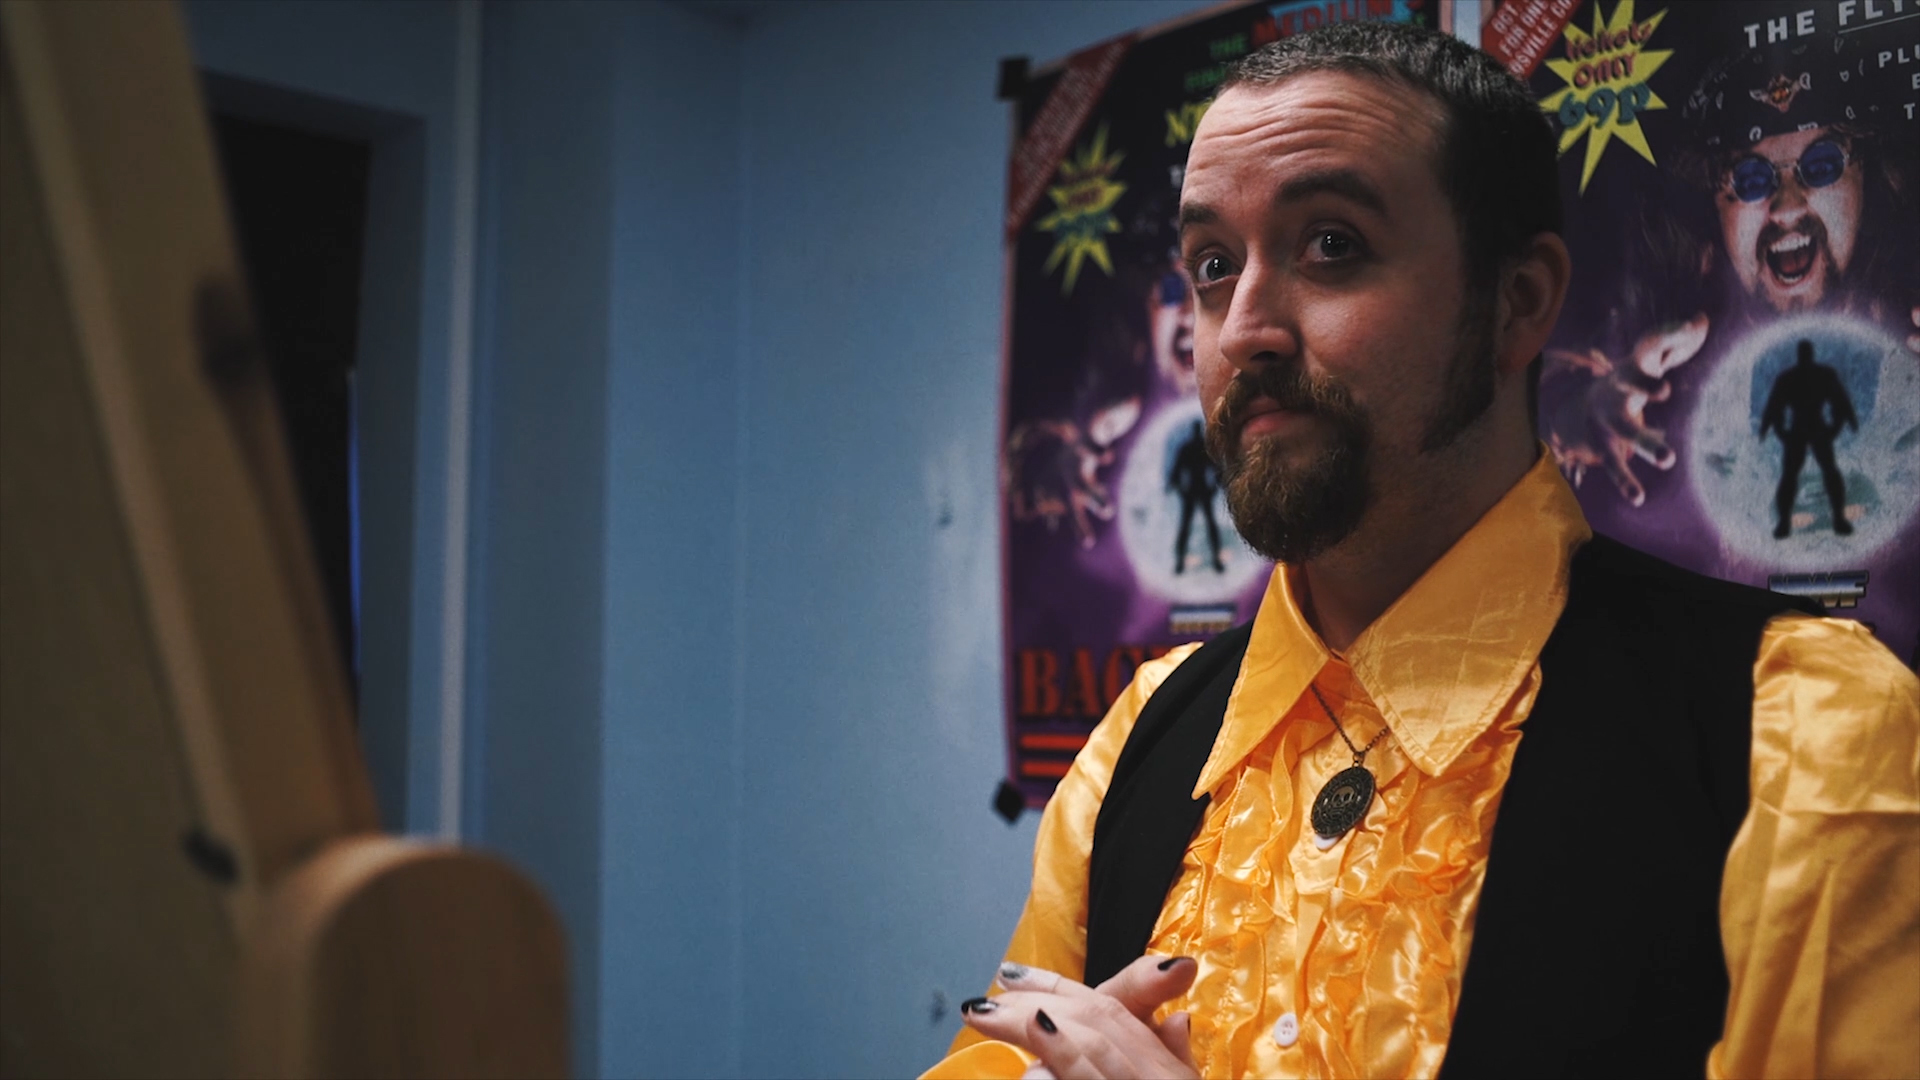
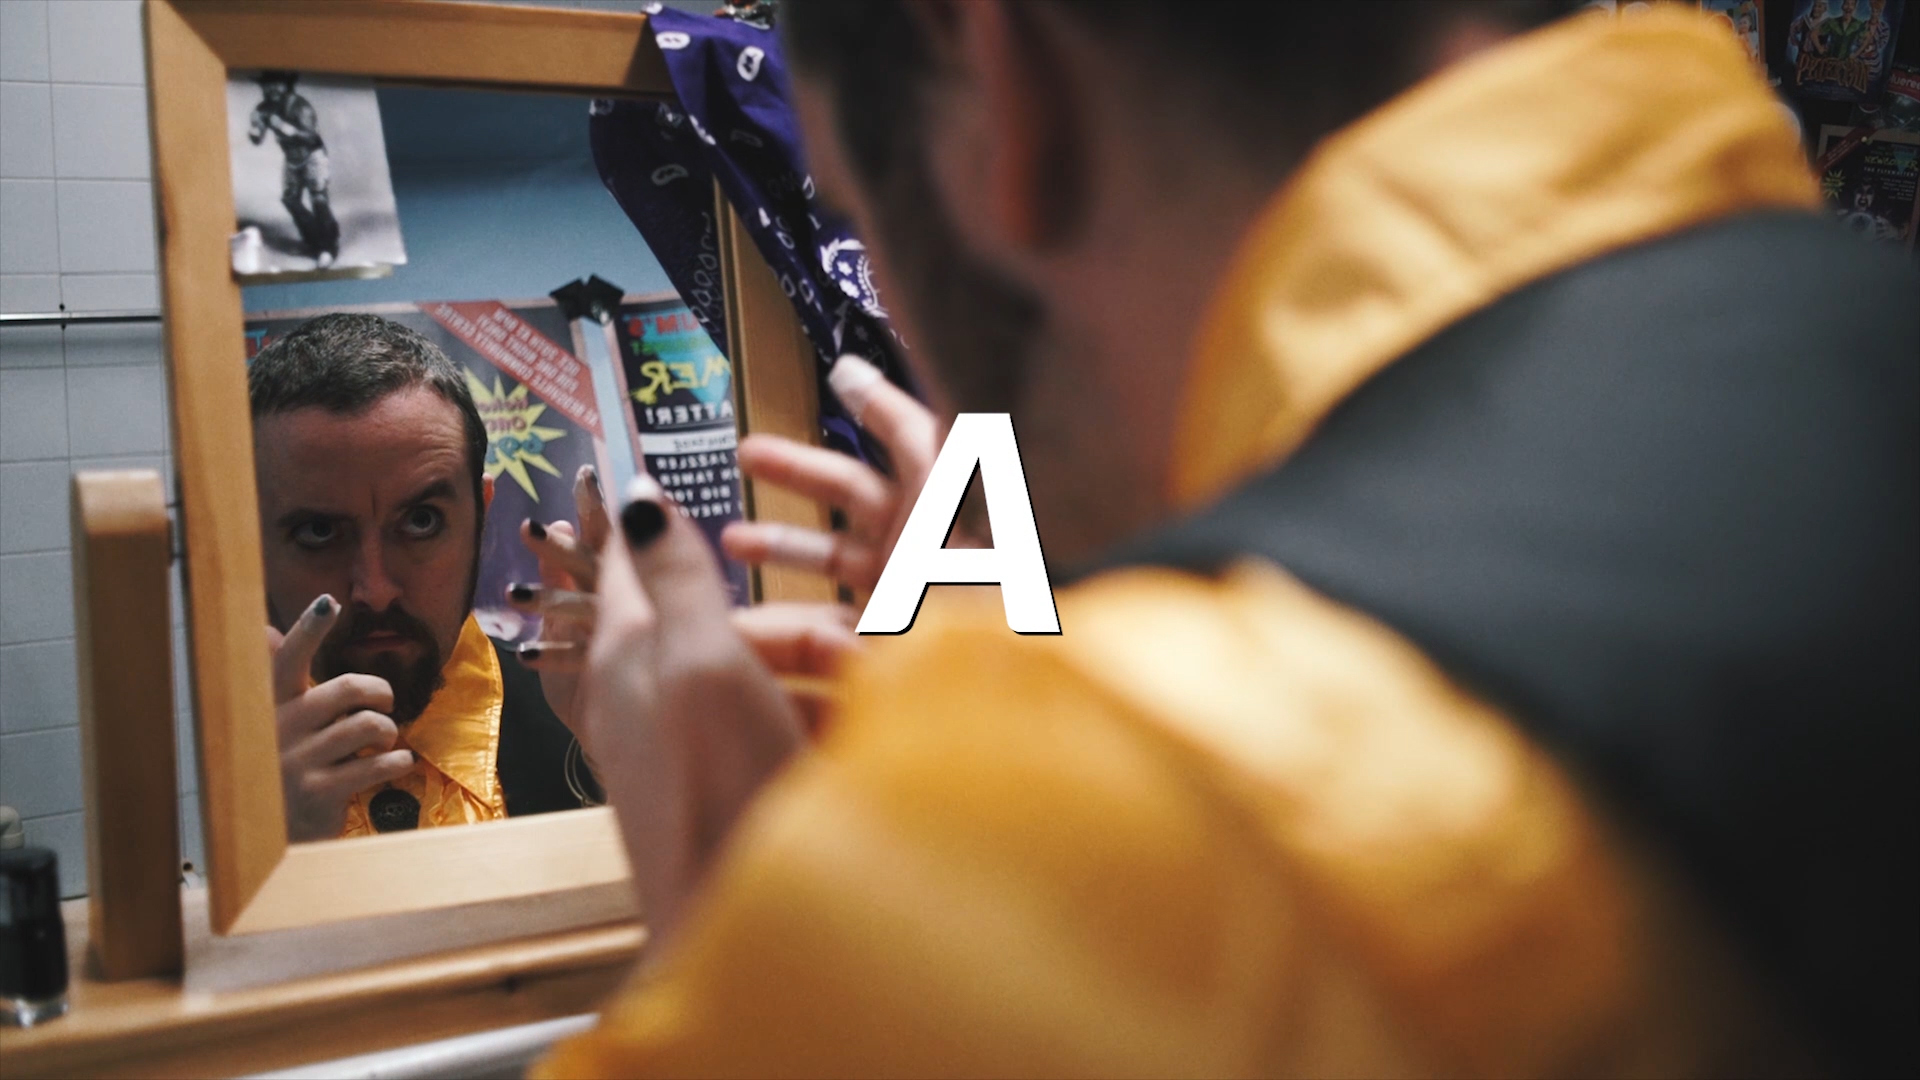
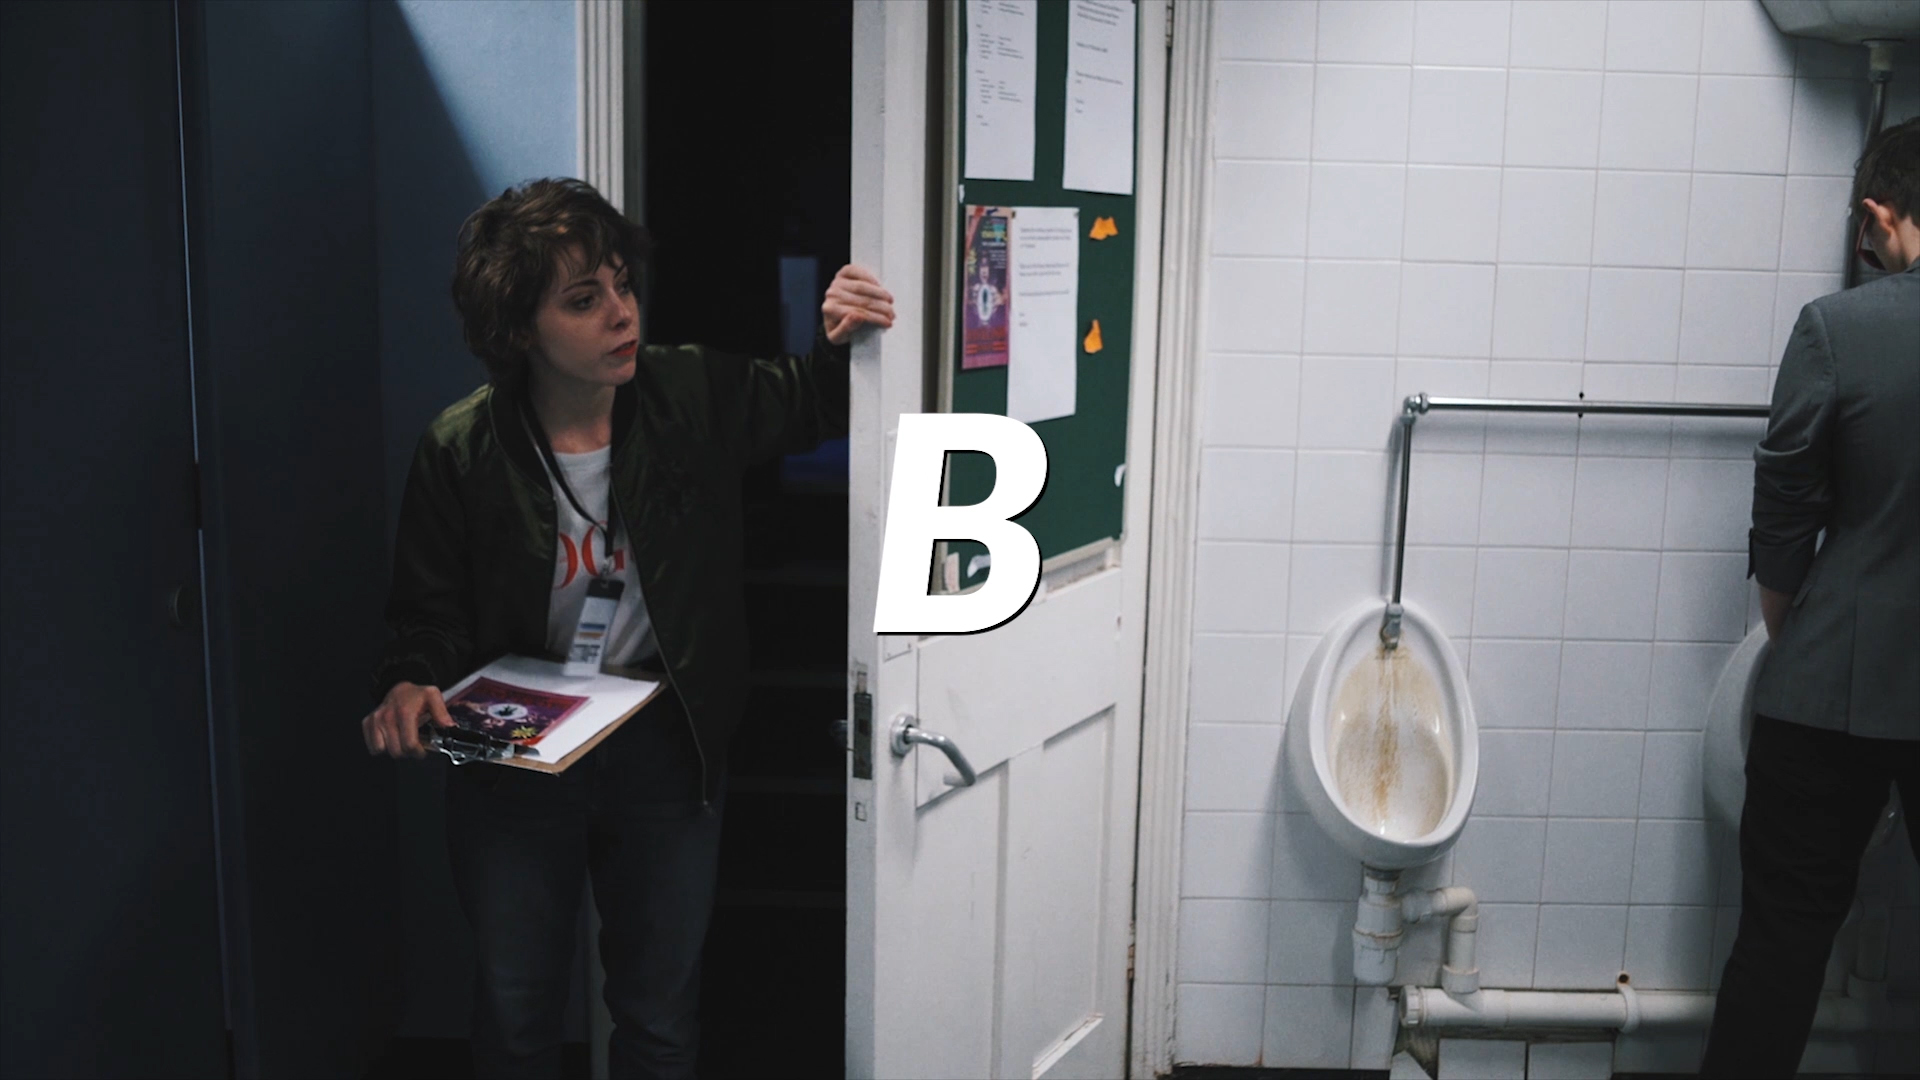
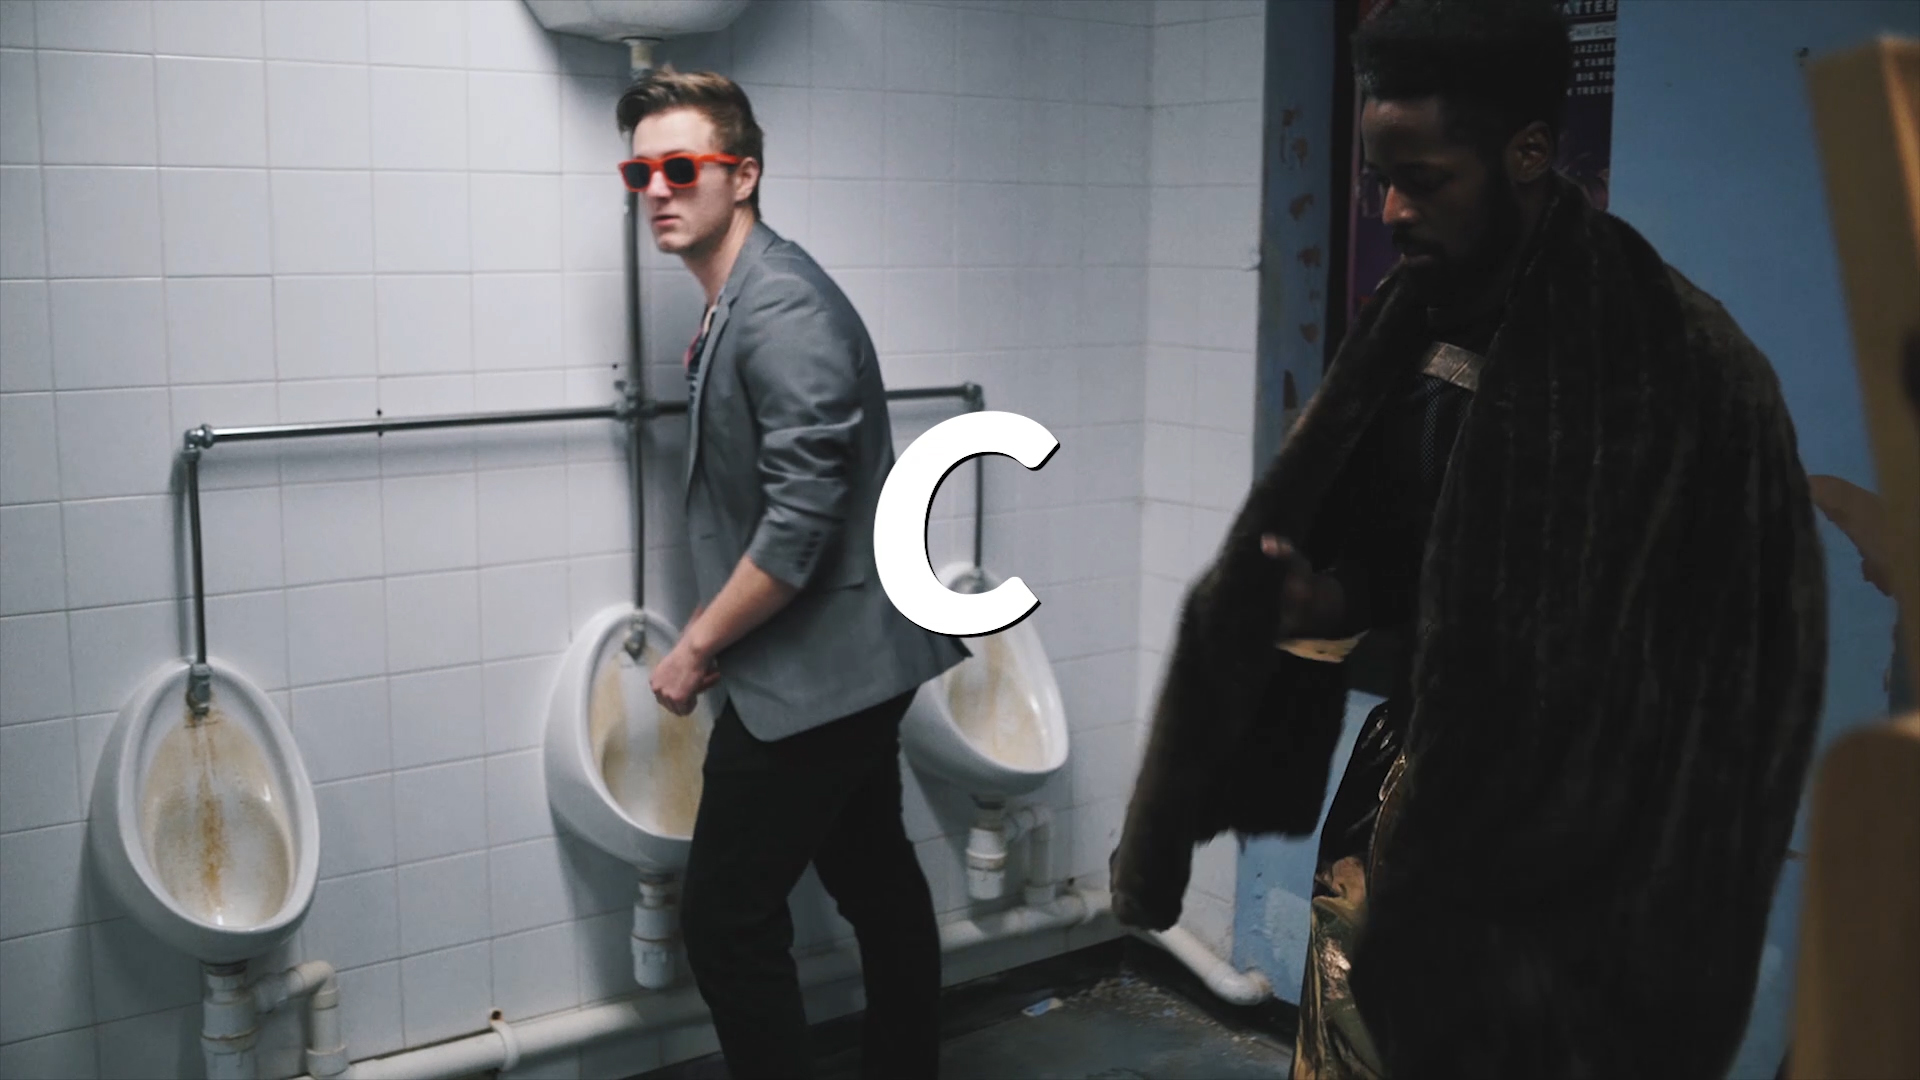
The original shots we had planned for this scene were: a wide establishing shot of the bathroom and the people inside, a shot of Jenny, and a shot of the Medium.

The room itself was quite small. We didn’t want to use a fish eye lens, so instead, we connected the three planned shots together into one camera movement which would hit all the marks.

Connect-Your-Shots7.gif

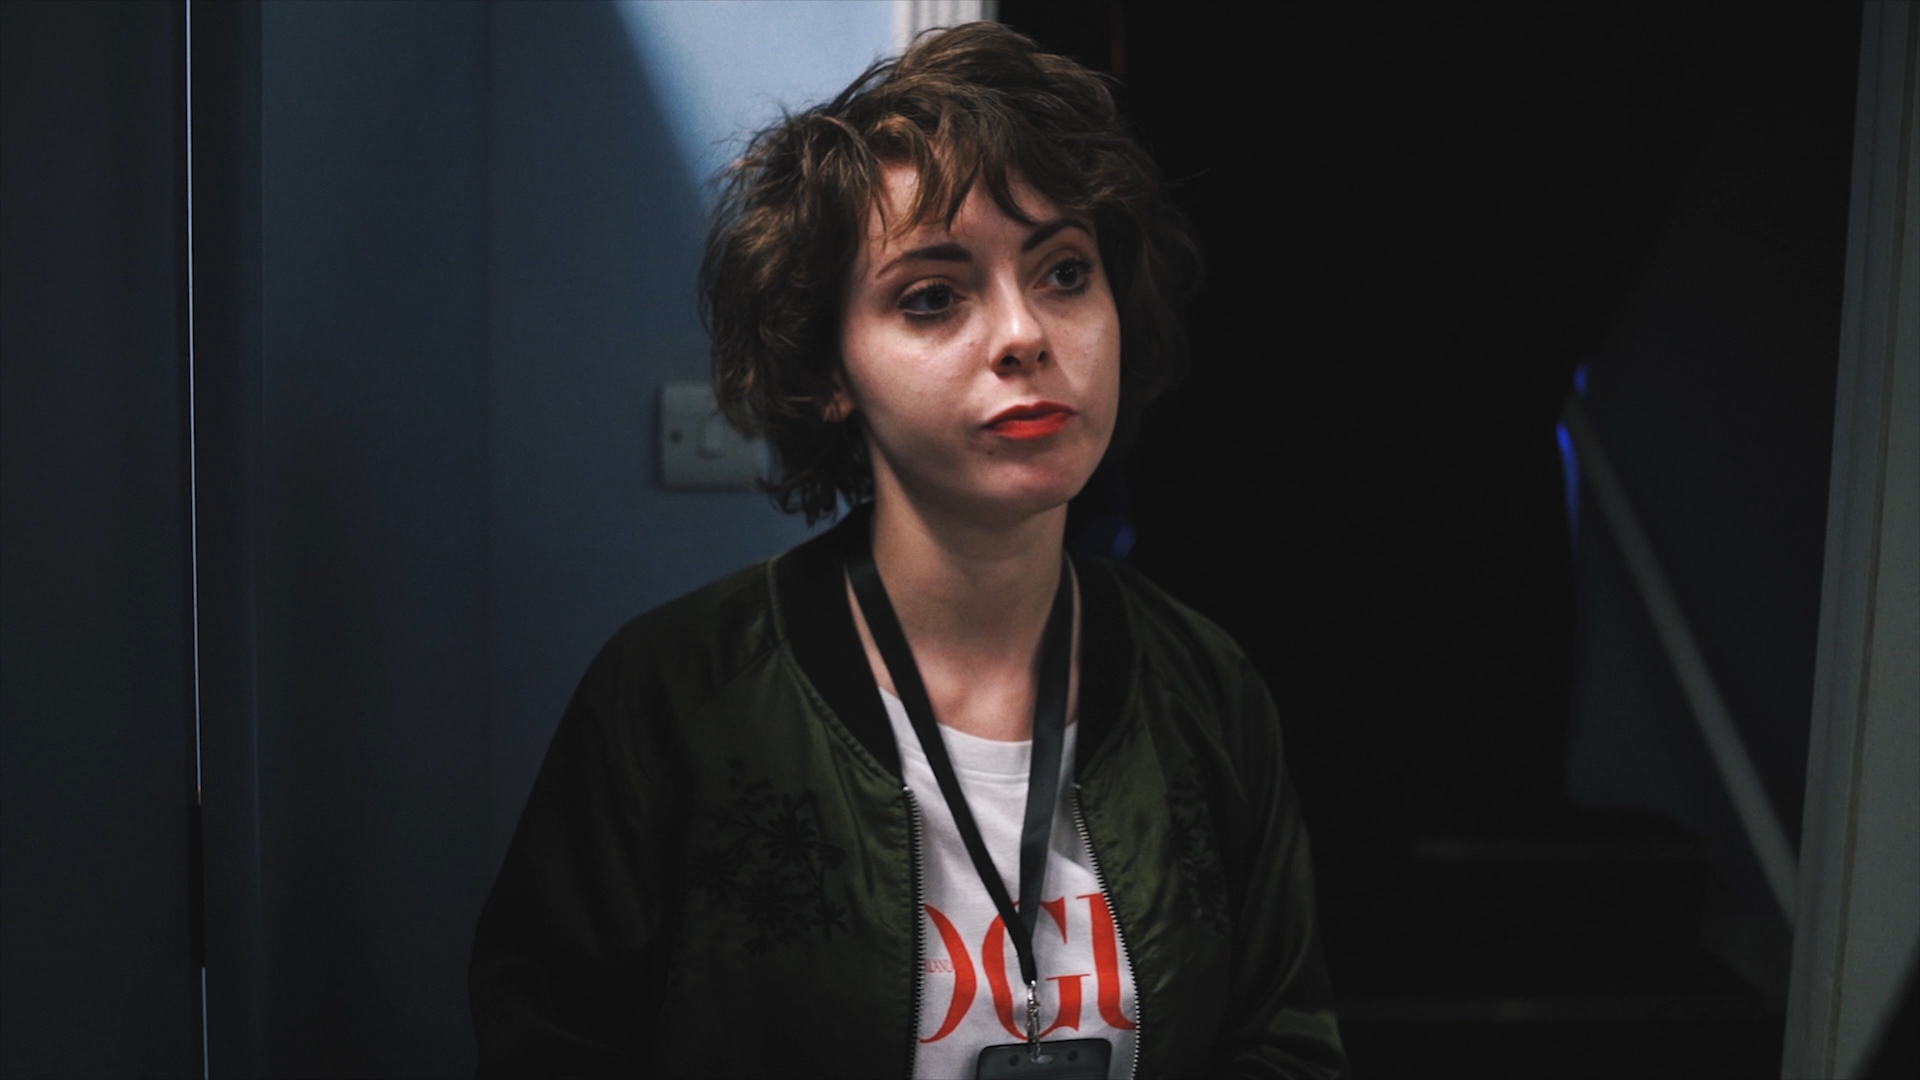
It starts with the Medium in a reflected close up using the mirror. Then it pans to Jenny as she enters the room - the camera move is motivated by the sound of the door. This move establishes the geography of the room and the space between our two characters.

Jenny commands the two wrestlers to get ready for the fight, so the camera can follow this by panning over to the wrestlers.

We have three shots in this one movement; A, B, and C. It establishes spatial connections between characters, gives us the geography of the scene, and every move has a motivated command.

This helps create a natural flow in a scene. If we cut all the time, we are breaking up the scene, and sometimes it prevents immersion. By keeping with the characters, and seeing the room, we gather a lot more information in the same duration of time.

Connect-Your-Shots8.gif

Finally, let’s talk about using this technique in the ultimate cinematic feat: the “oner”.

The oner: also known as a one take scene or a long take. Basically, the camera doesn’t cut for an extended amount of time, and instead, it moves around the scene with the characters and the action.

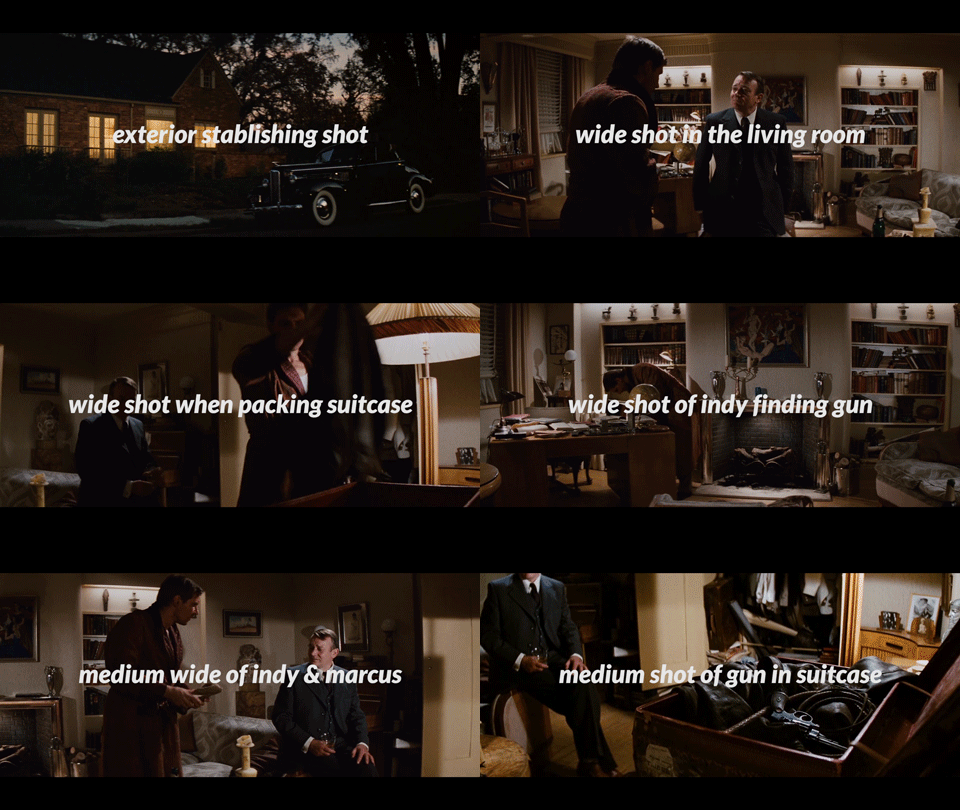
We haven’t done a oner yet, so instead, here is Indiana Jones.

At first you might look at this scene as one massive camera shot, but it’s actually the same as the examples we showed earlier. The scene is broken down into key positions.

Connect-Your-Shots9.gif
  • Ext establishing shot

  • Wide shot at the door

  • Wide shot in the living room

  • Wide shot when packing the suitcase

  • Medium close up on Marcus

  • Wide shot of Indy finding his gun

  • Medium wide of Indy & Marcus

  • Close up of the gun

  • Medium shot of the gun thrown into the suitcase

Connect-Your-Shots10.gif

Apart from the close up on the gun and the exterior wide establishing shot, the rest of the scene is covering these key positions and simply moving from one mark to the next.

We made a video essay on Raiders of the Lost Ark if you want to see how else this film gets it so right. I’d say this is the best film ever, but prove me wrong in the comments below!

So, next time you feel you have too many shots in your shot list, or want to give your film a little more cinematic movement, try connecting some shots together.

Connect your shots - connect your story - connect to your audience.


This video was Sponsored By

🚀 http://bit.ly/rs-aspect - Give your video a clean look with Aspect by RocketStock. It features over 200 logo reveals, intros, lower thirds, overlays, icons, and transitions.

🎵 http://bit.ly/pbtfl-blissbay - Click here to download this episode's track. Check out Premiumbeat.com to discover a huge range of exclusive royalty free music!


DISCLAIMERS:

Some of these links are affiliate links, if you purchase gear via these links The Film Look will receive a small commission, but there will be no additional cost to you. Thank you!

5 Tips for Nailing the 180° Degree Rule!

This week we are going back to basics and explaining the 180 degree rule; a fundamental method of filmmaking which can make or break your film.

We have a tip which will help you make sure you are using the rule correctly, how to quickly double check you are inside the line, and identifying when it's time to change it during a scene.

This is the 180 degree rule!

180-Degree-Rule.gif

The 180 degree rule is used for retaining spatial connections between the characters in the scene. The rule is used to make sure the audience knows exactly where everyone is in relation to each other.

180-Degree-Rule2.gif

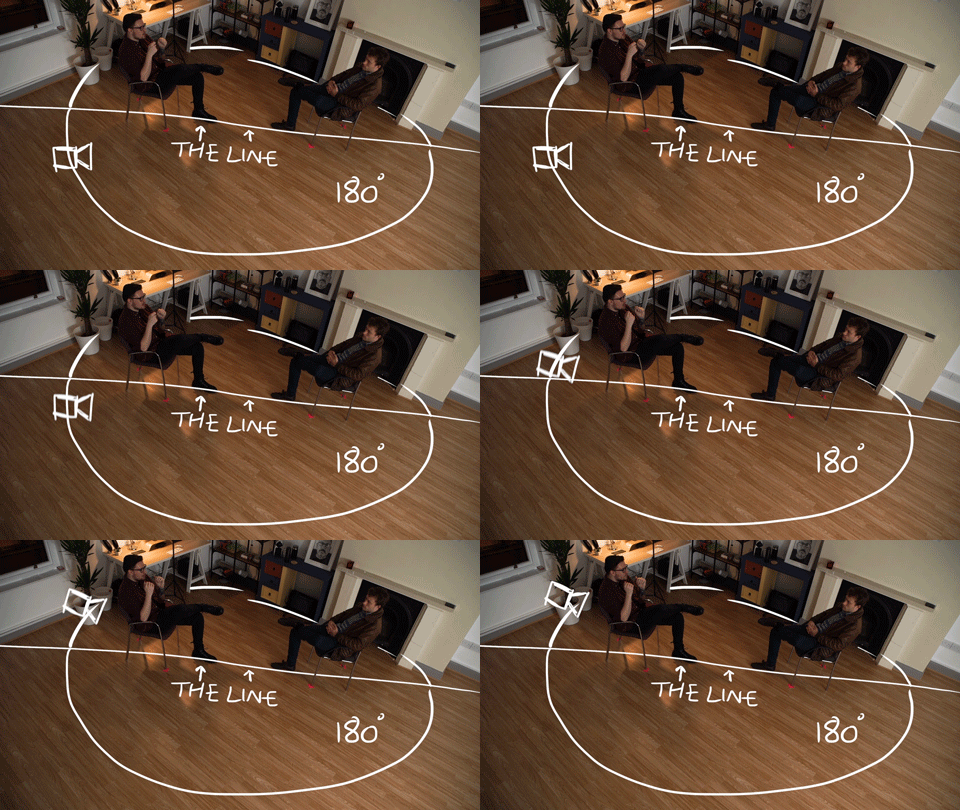
It’s actually quite simple. You have 180 degrees where you can place the camera. You can draw it out like a semi-circle, and you will usually place the straight edge from one character to another, the straight line between these characters is known as “the line”.

180-Degree-Rule3.gif

When you start shooting a scene, you can choose which side of the line to shoot on. Choosing a side will depend on things like what’s more interesting in the background and if you have limited space on one side of the set.

180-Degree-Rule4.gif

Once you draw out your semi-circle, you can place the camera down and shoot from any angle inside the boundary.

The easiest set of shots to achieve with two characters is a triad: a shot of both your characters in frame (known as a 2-shot) and a set of character singles, either by shooting them clean or over the shoulder (also known as shooting it “dirty” because you are hiding some of the frame).

180-Degree-Rule6.gif

This becomes your standard dialogue triad, but you aren’t limited to just these positions.

180-Degree-Rule5.gif

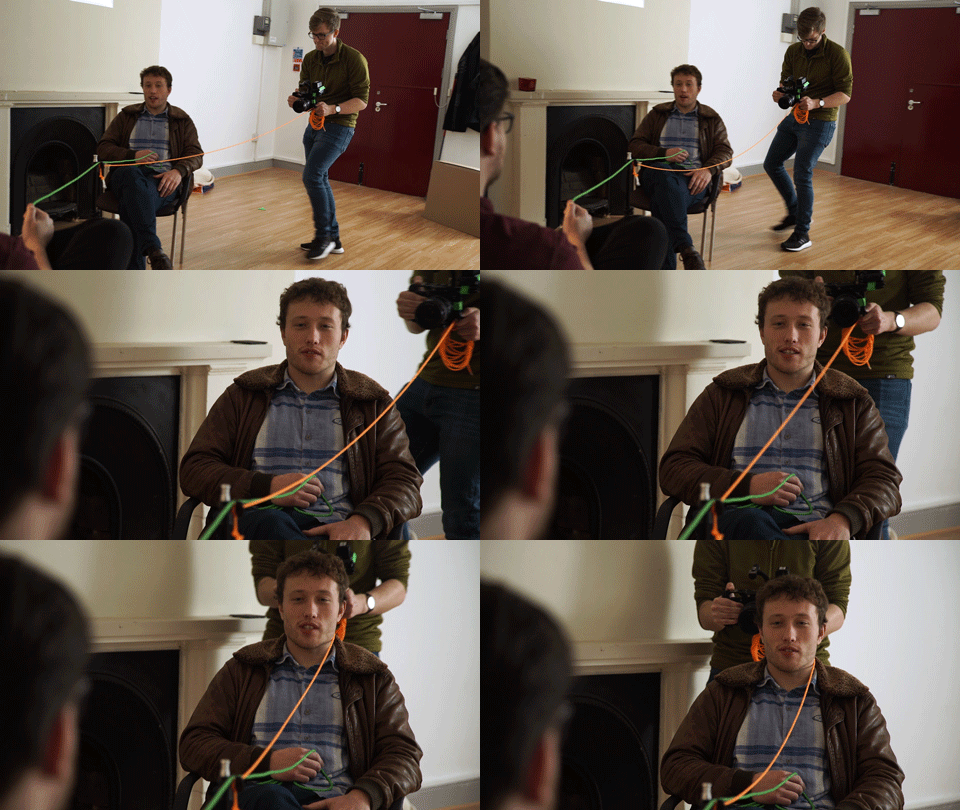
A good way to think about your shooting space is by having your actors hold a single piece of string between one another. This line is now a barrier which the camera cannot cross. In addition to the string between your actors is a pole in the centre with another piece of string attached to the camera.

180-Degree-Rule7.gif

The camera is now tethered to the line but you can still freely move the camera inside the semi-circle and choose a wide range of shots.

Because you have the string attached to the camera, the moment you touch an actor with that string, you are about to step over the line, breaking spatial clarity.

180-Degree-Rule8.gif

The string method is a good way to double check if you are going “over the line”. So what’s this “line” all about, anyway?

180-Degree-Rule9.gif

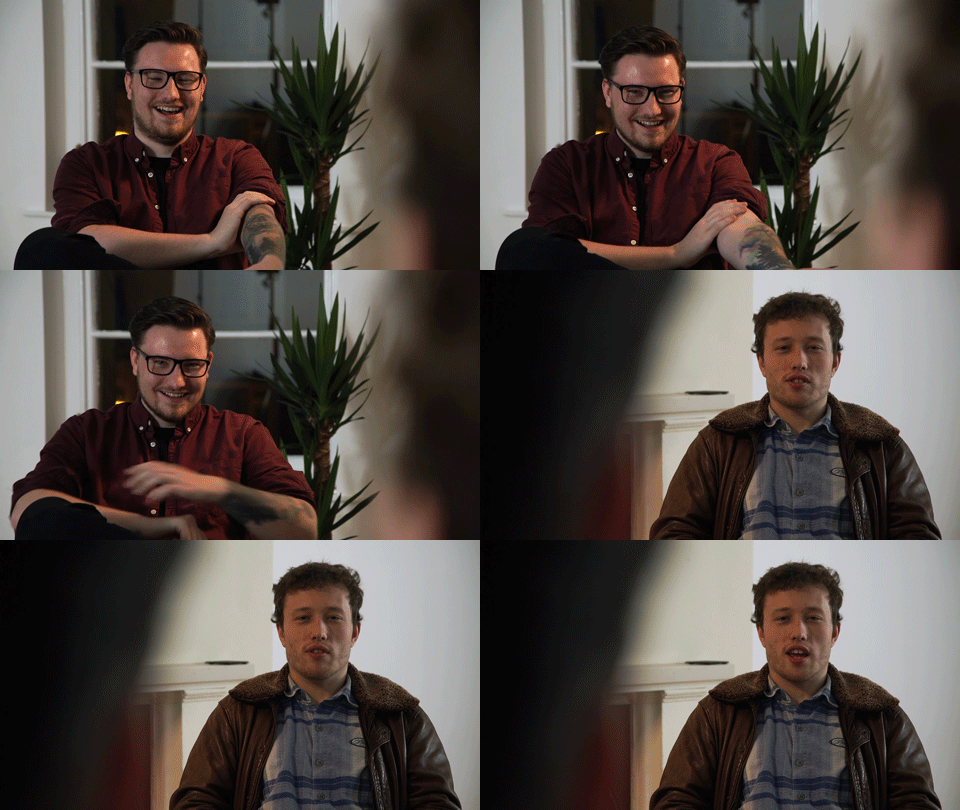
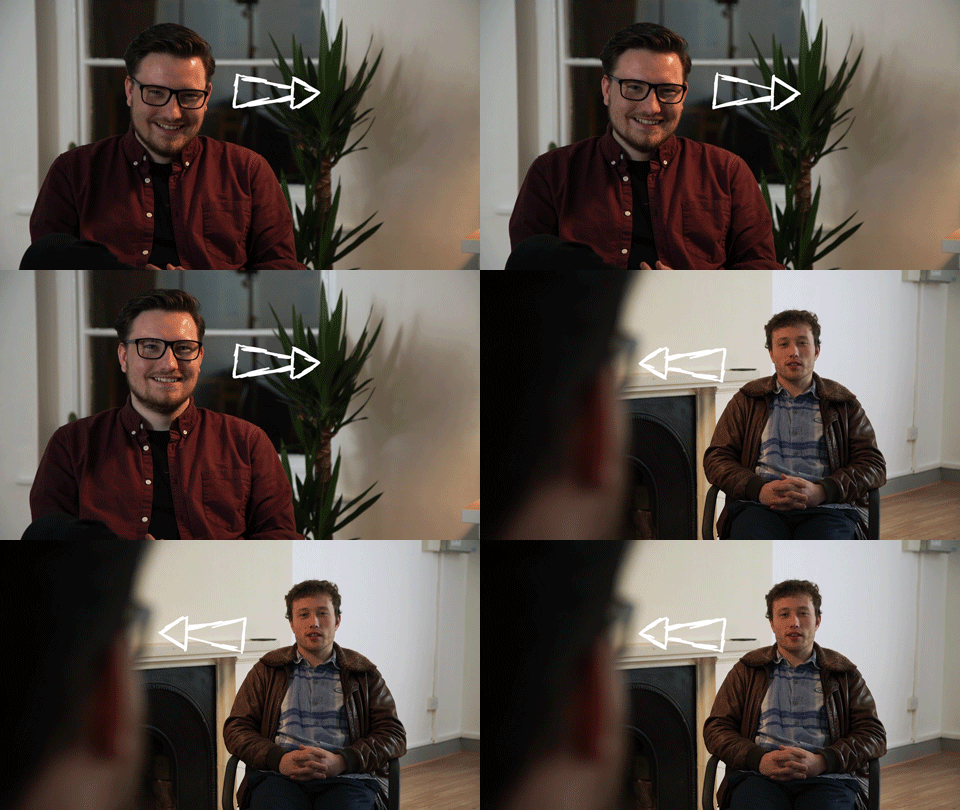
The 180 rule is all about spatial awareness. You want each shot to have the actors looking towards each other. So, in shot A the actor is looking to the right of frame, and in shot B the actor is looking to the left.

When cutting between the shots, it looks like they are speaking to each other even if we don’t shoot an over-the-shoulder.

180-Degree-Rule12.gif

Let's break the rule and see what happens.

We will use the same shot of actor A, but we will step over the line to frame up on actor B.

180-Degree-Rule10.gif

If we cut between these shots, both actors look like they are facing the same direction, losing spatial awareness, and very likely confusing the audience.

180-Degree-Rule11.gif

If two actors are looking at each other, they must be looking into different directions of the frame for it to make sense during editing. A 2-shot applies the same rules; they look to each other, resulting in opposite directions, so we must use the same rules for the single character shots too.

180-Degree-Rule13.gif

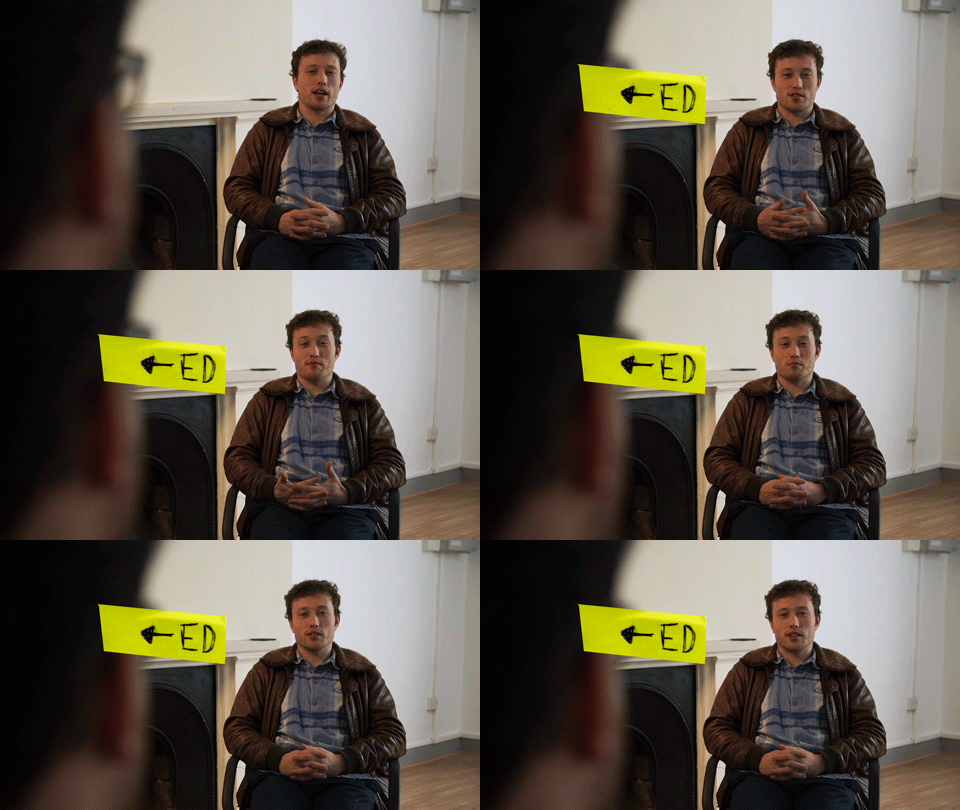
As well as the string method, you can make sure you aren’t breaking the 180 by using a little gaff tape on your camera.  Make a note of the direction each actor is facing and pin it to your camera so you can double check with every shot.

180-Degree-Rule14.gif

You will know if you are crossing the line if the direction the actor is looking doesn’t match the direction of the arrow on your camera.

We still double check we aren’t breaking the line during every shoot because we know it’s a make or break mistake.

If you are worried you’ve crossed the line, double check by thinking of the string method, check each character is looking to different sides of the frame, and if you need to, stick a gaff tape reminder to your camera.

Breaking the 180 in a film is an clear example of amateur and poor filmmaking. Even if your film has lots of heavy action, and some crazy shots, the line is there to keep spatial awareness for the audience, and it should never be broken.

So don’t worry - and speak up if you think you are getting it wrong!

But this doesn’t mean you can’t move the line or draw a new line during a scene! Let me show an example.

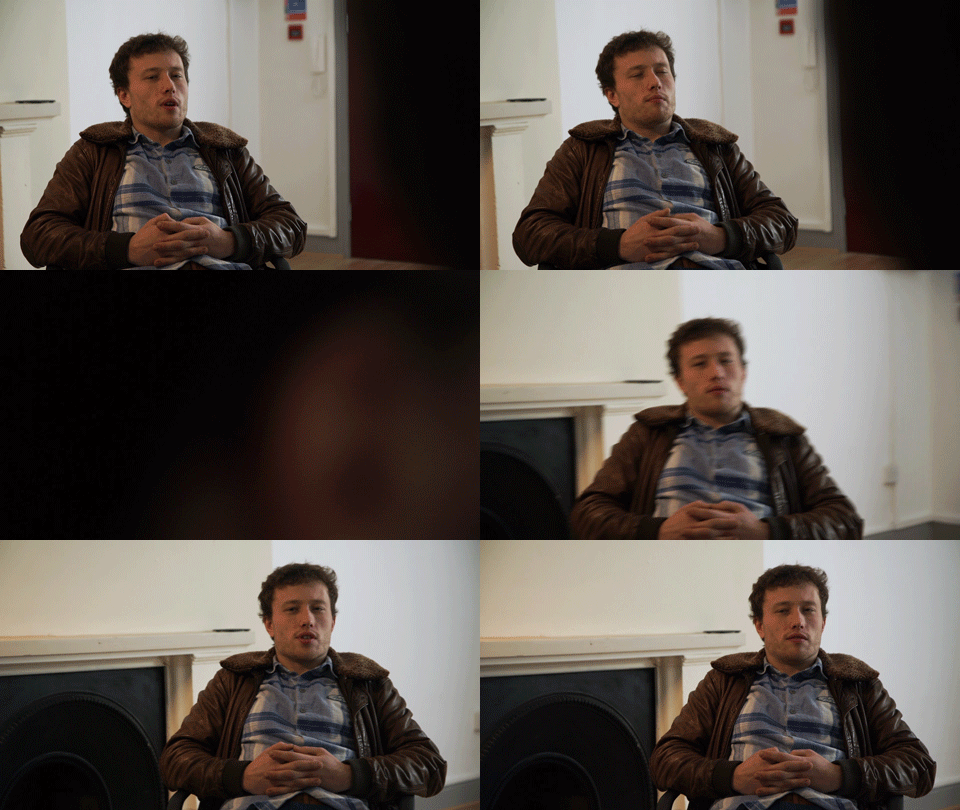
The first way you can change the 180 and re-establish a new shooting space is when the camera travels over the line during a take. If we slide behind a character and frame over the other shoulder, we’ve now crossed the line, which means we must draw a new semi-circle and adhere to this new space for the rest of the scene.

180-Degree-Rule15.gif

This “changing of the 180” is a great example of using the rules of filmmaking to emphasise a moment in a scene.

This “change” of the rule usually happens when something significant happens in a scene like a change of power dynamic or a big reveal.

180-Degree-Rule16.gif

But what about if your characters are walking around and moving over the line during the scene?

180-Degree-Rule17.gif
180-Degree-Rule18.gif
180-Degree-Rule19.gif

In our film Backstage, the 180 line actually changes 3 times during a single scene. This is because our characters step over the line, so we have to re-draw and re-establish spatial awareness of the scene.

180-Degree-Rule20.gif

The first line in the scene is between The Medium and Jenny. We draw a straight line between both of them and stay in this side of the semi-circle. The Medium looks to the left of the frame and Jenny looks to the right. When Jenny leaves the scene, we can draw a new line.

180-Degree-Rule21.gif

The Medium is now looking to the right of the frame, technically breaking the rule from earlier in the scene. But by shooting a wider shot we can show where the character is in the space and establish a new line, retaining spatial awareness.

180-Degree-Rule22.gif

The line is now on the other side, between The Medium and the Flyswatter. The Medium looks to the right of the frame, and The Flyswatter looks to his left.

This is actually a funny example because in this part of the scene The Medium and the Flyswatter aren’t actually making any eye contact because of the cubicle wall between them. But by making sure they both look into opposite sides of the frame, it still retains spatial connectivity between the two characters.

180-Degree-Rule23.gif

Later in the scene, the Medium returns to his original position, but we are now shooting on the new line, which means the Medium must continue to look to his right when speaking to The Flyswatter who is looking to the left.

180-Degree-Rule24a.gif

When The Flyswatter exits the toilet cubicle, we draw a third line. Again, we shoot a wider frame to re-establish the space. The Flyswatter now looks to his right, and The Medium looks to his left, putting the semicircle between the two characters when they stand in front of each other.

We used the first line to take advantage of a few things. It gave us the ability to see into the door when Jenny walks in, we were able to capture the other wrestlers in the room, and we got a clean close up on The Medium.

We established the second line for shooting a clear back and forth between The Flyswatter and The Medium.

And we established a third line so we could shoot back into the room for the end, rather than face the toilet cubicles.

The 180 degree rule is one of the fundamental rules of filmmaking. This isn’t a “once you know the rule, you can break the rules” scenario. You don’t break this one...instead, you change it.

Let us know if you you’d like any more back to basics videos just like this one in the comments below. Vote with your thumbs if you liked or disliked this video, and remember to achieve it one rule at a time.


This video was Sponsored By

🎵 http://bit.ly/track-losinggames - Click here to download this episode's track. Check out Premiumbeat.com to discover a huge range of exclusive royalty free music!


DISCLAIMERS:

Some of these links are affiliate links, if you purchase gear via these links The Film Look will receive a small commission, but there will be no additional cost to you. Thank you!

Aputure 300D Alternative? | NiceFoto HA-3300B Review

These COB LED lights, the ones with the big LED chip have become very popular over the last few years with Aputure leading the way with their 300D; something which we have used in the past to shoot our short film The Asylum Groove.

From our experience, the 300d is a very good light, but one of the main reason we have not bought one is because of the price.

So when a company called NiceFoto contacted us saying they have a light which has a very similar design to the 300d, but is brighter and is nearly half the price, we weren't going to say no to reviewing it.

Nice-Foto-Review-Aputure-300D-Alternative.gif

Just to say up top Nice Foto did send us the HA-3300B light to review, but everything in this video is our honest opinion.

Specs

Let's start off with the specs of the light.

We will be comparing this light to the Aputure 300D when we can, but we cannot do a side by side comparison as we don’t own one.

So everything we say about the 300d will be from our own experiences of using the light and some spec information which Aputure provides.

The HA-3300B is a 330W LED light. The output at one meter away with the standard reflector cone is 52000 LUX or a F20 at ISO200 1/50th of a second.

Nice-Foto-Review-Aputure-300D-Alternative1.gif

In the real world, this is well over a 2k light.

The Aputure 300D has an output of 31000 LUX or F11 at ISO 200 1/50th of a second at the same distance and reflector cone.

As you can see at 100% you would need to shoot at a higher f-stop to capture the correct exposure for the Nice Photo light.

Basically, the Nice Foto light is a brighter than the 300D.

The colour temperature is 5600K with the 300D being 5500k and both have a CRI rating of 95 plus.

You can dim the light in 10% increments, down to 10%. This doesn’t give you as much control as the 300D were you can change the brightness a percentage at a time but in practice, 10% increments are enough.

Nice-Foto-Review-Aputure-300D-Alternative2.gif

All of this is controlled on the light or via the wireless remote, and if you have a few of these lights you can control them all from one remote.

To keep the light cool there are 3 fans built in, which work great. We have had the light running for a few hours and it stayed super cool.

If people are concerned about fan noise from any of these types of lights, don't be. If you are recording your audio correctly, your mic should be pointing toward your subject and not the light.

Even if you are standing right next to the light, just position your mic away from it and you're never going to hear the fans over dialogue.

Build Quality

The main body of the light and the arm is made out of metal, but the knobs and handle are made out of plastic.

Nice-Foto-Review-Aputure-300D-Alternative3.gif

This is unlike the 300D, were most of the parts are made out of metal. This is where NiceFoto has saved money to make the light much cheaper.

After using this light a bunch of times it still has the feel of a high-quality product and it is going to last a long time.

The light has a Bowens mount and comes with a reflector cone. The Bowens mount is the same one you get on the 300D, so you could attach all of the Aputure Bowens attachments like the fresnel, softbox, and space light to this light.

There are loads of different Bowens mount attachments out there, which allow you to turn this light into many different types of light.

We are going to be making a video about all of the different Bowens mount attachments and how many different sources of light you can get from one light. So if you haven't already consider subscribing.

Power

The light has a very similar power setup to the 300d. First, you plug the DC cable into the light and then into the power adapter. The best thing about the power adapter is this strap which lets you easily attach it to the light stand.

This was the biggest problem we had when using the Aputure lights, as you had to hang the power and the control panel from the light stand.

Nice-Foto-Review-Aputure-300D-Alternative5.gif

This little strap makes it safer and saves rigging time on the NiceFoto light.

Next, you plug the AC cable into the power adapter, which is 5 meters long.

NiceFoto are releasing a V-Lock battery pack so you can use this light via batteries.

How have we used this light

We have used this light to bring up the general ambient light in a room by bouncing the light off the wall and ceiling.

We have used it at night to shine more direct light into our scene to bring up the exposure of our character, which is something we wouldn't have been able to do before.

We are also using it right now to light up this presenting setup. It is currently on 10% about 3 meters away shining through a shower curtain, creating a large soft light.

Negatives

One negative with this light is that it does not come with a bag. It’s an awkward shape and to protect it when in transport, it really needs a bag.

If we find one in the future that fits this light, we will add it into the description below.

Nice-Foto-Review-Aputure-300D-Alternative6.gif

Positives

You get a lot of light for the price, and that is what it comes down to. At nearly half the price of the Aputure 300D, you are getting a light which is brighter, at the same quality, and it has the same flexibility with the Bowens mount attachments at nearly half the price…

which I know I have mentioned but is worth saying again.

So who is this light for? It's for people that need a light that can replicate the sun, but also the control to turn one light in too many different sources of light.

This light holds up and beats the 300D in some categories, so if you are looking for a cheap alternative to the 300D you can find a link in the description below to the Nice Foto light.


This video was Sponsored By

🎵 http://bit.ly/pbtfl-drivingtowardthesun - Click here to download this episode's track. Check out Premiumbeat.com to discover a huge range of exclusive royalty free music!

🎥 This episode's kit/gear/equipment:

NiceFoto HA-3300B - https://amzn.to/2TN09YC


DISCLAIMERS:

Some of these links are affiliate links, if you purchase gear via these links The Film Look will receive a small commission, but there will be no additional cost to you. Thank you!

How to Light an Exterior Night Scene

In this video, we are going to be breaking down the lighting setup for this shot, which we used in the last video about building up the tension in your film.

Let's start off by playing the whole scene.

Building-up-Tension-1.gif

First, we blocked out the scene to make sure the camera move would work in this location. We tried this shot a couple of different times during the day at two different angles.

The move is a track and pan and works best when you have a wall that obscures the audience's view from what the character can see. This helps us build up the tension in the shot and reveal what is there.

You can find a link right here to the video, that goes into a lot more detail about the camera move.

When we had everything blocked out, and it was dark. We could see what available light we had to work with. Our main source of light is this white LED street light; it’s a newer type of light than most street lights in the area, so it’s a lot more white than the typical orange bulbs.

shot-designer.jpg

We did need to add more light to the scene to bring up the exposure on our main character and fill the alley with a little more light.

To retain the direction of the practical street light and motivate it with more light, we would have had to rig a light up high to keep it consistent. Luckily for us, our studio window is right above the location and the street light.

This meant we could shine the light through the window, down onto the street and onto our actor. Matching the direction of the light makes it seem like it’s all coming from the street light.

The light we used is this NiceFoto HA-3300B set at 100% brightness which is a 330 watt LED or over a 2k light.

NiceFoto-HA-3300B.gif

We will be reviewing the light in next week’s video so make sure you check that out.  

We added a blue gel to the light to help it match the colour of the street light and a little bit of black wrap to help shape the light and stop it from shining onto the rooftops of the buildings opposite.

Next, we added a light onto this wall here, as at the current exposure it is completely black. So we took our Aputure hr672c light panel, attached it to a c-stand and boomed it around 10 feet high.

C-Stand-Aputure-LED.gif

We set the colour temperature to 3200 kelvin and inserted an orange gel to give us a very vibrant orange light to make it contrast between our blue key light.

Then we added black wrap to the panel to cut the light into a sharp cone to mimic a street light and so it wouldn’t shine past the end of the wall.

We shot the whole scene on a handheld gimbal, using a Sony a7s Mark 1, with a 35mm lens. We shot with a daylight white balance with a ISO of 2500 and everything was shot at F8 to give us a greater focus distance as we could not pull focus whilst using the gimbal.

To grade the shots we used Lumetri in Adobe Premiere. We added contrast as the Sony standard picture profile has a flat look to it. We dropped the highlight brightness mainly for the wall which was closest to the light as it was too bright. Then dropped the shadows to create a greater vignette which helps lead our eye towards the light.

Next, we added the Fuji f125 Kodak 2393 LUT to help make it pop.

There is probably a reason it is called that, but I don't know what it is, so let us know in the comments below if you do.

We set the intensity to 20% as pushing any further would lose the essential detail in the image.

As you can see we only made slight adjustments to the image as the colour and texture of the walls give us a look that we already liked.

The-Film-Look-Colour-Grading.gif

Finally, we added a 35mm course film grain to the image which we got from the the Emulsion pack from RocketStock. We tried a couple of the different film grains you get in the pack, but the 35mm coarse grain looked good for this image. Links to the emulsion pack can be found the description below if you want to check them out.

Also, If you want to watch more lighting breakdown videos we have a bunch on our channel. This one is all about how we used the Aputure 300d to light this shot. You can find that video here.


This video was Sponsored By

🚀 http://bit.ly/pack-emulsion - Make your video look like it was tailor-made for the silver screen with RocketStock’s film grain overlay pack, Emulsion!

🎵 http://bit.ly/pbtfl-glamourparty - Click here to download this episode's track. Check out Premiumbeat.com to discover a huge range of exclusive royalty free music!


DISCLAIMERS:

Some of these links are affiliate links, if you purchase gear via these links The Film Look will receive a small commission, but there will be no additional cost to you. Thank you!

Slowly Building Tension | Motivated Camera Moves

A film should always rise in tension until you get to the tipping point where your character has to make the most important decision in the film.

So is it possible to build up the tension with one shot, let's find out?

Building-up-Tension-1.gif

For this video, we have created this small scene. Let’s check it out:

Just like our coming to a halt video, this scene was inspired by a camera move from the book Master Shots by Christopher Kenworthy.

Building-up-Tension-2.gif

If you want to check out the book and watch the last video we made, you can find it here.

Let’s set the story for the shot:

Throughout the film, our character has been running from a creature, monster, or some form of an antagonist. They get to a point in the film where they either have to keep running or stand up and fight.

Building-up-Tension-3.gif

Staring down a long corridor, our character can hear the creature, which is tense enough. But to raise the tension even higher, at the beginning of the shot we frame the corridor out of the view of the audience. The camera slowly slides along and we finally reveal the corridor and see what our character can see.

At this point, you can do one of two things. Either reveal the creature or just leave the corridor empty. Your character deciding to step down a scary corridor and accepting the unknown could be a lot more impactful than if the monster is standing there. Plus you can add a lot of tension by adding sound effects of the creature.

Building-up-Tension-4.gif

If you do want to show the monster at the end of the shot looking at your main character, this could work as a standoff between the two characters. Your antagonist is telling the audience, if your hero wants to advance in the story, he is going to have to get past me first.

Building-up-Tension-5.gif

The move itself is simple, it’s just a track and pan, but to help build up the tension you want a slow and smooth shot and achieve this shot we used a handheld gimbal.

Building-up-Tension-Gimbal.gif

We did try and record this shot using a hand-held camera, but the movement didn’t look as good as it wasn’t as smooth. Also, we filmed the same shot only using a tripod, but the lack of movement didn’t allow us to build up the tension as much.

Knowing when and how to build up the tension in your film is an important trick, and this shot is just one of the ways you can do it and can be applied to other types of scenes.

In this shot, our character has arrived at his bosses party and is anxious to enter. The creeping looking building doesn’t help either.

Building-up-Tension-7.gif

If you want to check out the master shots book we took this camera move from, you can find a link in the description below. This is the shot referenced in the book, the character in this film is geared up, ready to fight, and can hear the monster at the end of the corridor.

If you know what film this shot is from, let us know in the comments below.

Building-up-Tension-8.gif

Check out our other camera movement video which is called the coming to a halt, that can be found here. If you haven’t already, consider subscribing by hitting that orange lens cap and remember to achieve it one shot at a time.


This video was Sponsored By

🚀 http://bit.ly/pack-emulsion - Make your video look like it was tailor-made for the silver screen with RocketStock’s film grain overlay pack, Emulsion!

🎵 http://bit.ly/pbtfl-blissbay - Click here to download this episode's track. Check out Premiumbeat.com to discover a huge range of exclusive royalty free music!


DISCLAIMERS:

Some of these links are affiliate links, if you purchase gear via these links The Film Look will receive a small commission, but there will be no additional cost to you. Thank you!

Test Shooting: Why it's VITAL for YOUR Film | Behind The Scenes

This week we shot an episode, tested out some new microphones, talking about why dry running a scene is crucial to a successful film, and why you should test shoot any complex shots.

🎬 In case you missed it

When you can't pay your cast and crew: http://www.youtube.com/watch?v=KaT_Qaa_oks

We Failed to Make This Film 3 Times: http://www.youtube.com/watch?v=OEElrKSbYVM

1 EASY Tip for Writing BETTER Characters: https://youtu.be/kC_wW_toXuk

🎧 Listen to our Podcast!

iTunes: https://goo.gl/hikhGF

Android: https://goo.gl/fmsp4s

📞 The Socials

Website: http://thefilmlook.com

Twitter: https://twitter.com/TheFilmLook

Facebook: https://www.facebook.com/TheFilmLook

Instagram: https://www.instagram.com/thefilmlook


DISCLAIMERS:

Some of these links are affiliate links, if you purchase gear via these links The Film Look will receive a small commission, but there will be no additional cost to you. Thank you!