Editing and Feedback | Episode 7: Video Production Guide

You’ve finished shooting your client’s video - now you need to edited it. 

Welcome to The Film Look and episode 7 of the Video Production Guide.

Video Production - Editing.jpg

So you have finished shooting your client’s video. You have a bunch of cards you need to unload onto the computer which contain the picture and sound elements to piece together the video.

Before you begin editing, you’ll want to create a clear folder structure. To do this we use a program called Post Haste which is free.

Post Haste - https://www.digitalrebellion.com/posthaste/

Video Production - Post Haste.jpg

Post Haste comes with a few folder structured templates for different creative workflows. You can also create a custom project folder structure which suits your workflow. This is the one we have created that works the best for us as each type of media for your project has it’s own folder. You could just create the folders the normal way you do on windows or mac, but Post Haste saves time and everything is always structured correctly and consistently.

We keep the bin structure in our editing software the same as the Post Haste folder structure as it helps to keep everything organised. To save more time when setting up your project, create a project template that has only this bin structure and save it on your hard drive. When you create the project folder structure with Post Haste you can set it to import this template into your project, again saving more as you only have to create it once.

Make sure you have all of the main files in your editor and you can start to edit.

Interviews

The way I edit interviews is to first get the full interview in a sequence, bring in the B camera shot if I have one and the audio. Then I sync everything up. Lets call this sequence INTERVIEW_1_SEQV1.

Then I duplicate this sequence calling the new sequence INTERVIEW_1_SEQV2 and I lock and close sequence 1. I do this just encase I make a mistake or need to go back and check something I have cut out. In sequence 2 I cut out all of the dead space in between the person's interview, you can do this quickly by just looking at the wave form as you can clearly see where they are speaking. I also cut out anything they have spoke about which I know will not be used in the final video.

When you have edited about 100 interviews you learn what you can just cut straight out.

I duplicate the sequence once more, then i start to assemble the interview, moving and cutting out parts until I have something that tells the right story.

The length and structure of your interview will all depend on the subject, for the video we made for Sian Jordan Designs the interviews was very linear. We started of with an introduction, how she got started in watercolour, and then talking about the type of work she creates.

The video we made for Pamplemousse Recording Studio was very structured as they were talking about the services they sell, and was a lot more direct.

B-Roll

Video Production - Editing B-Roll.jpg

Once you have cut down your interview and it has a structure, you can start add your B-Roll. Go through the B-Roll you have shoot and pick the section you think you might use. You can subclip these into subfolders or just simply but them onto your timeline is a rough order. Go through and place shots that compliment what your interviewee is talking about. Your B-Roll is also used to place over and hide the cutting points on the timeline.

Logos

Video Production - Company Logos.jpg

Most client videos will require you to add their company logo and contact details to the edit. My advice would be to send your client a draft edit which have placeholder slides for where this information will go. I say this because companies have many different logo version, phones numbers and email address. Save time and let them send you the correct information.

Music

We spoke about how to choose the right music for your projects in the last video, so if you missed it, go check it out.

Send to client

Once you have a good first draft it’s time to send it to your client to see what they think. We use a website called Screen Light were you upload the video file and your client can leave feedback which is linked to the time code. You get a 1GB of storage for free as well which is more than enough, as you don’t need to upload the highest resolution video since this is only a draft.

Video Production - Screen Light.jpg

Screen Light - https://screenlight.tv/ 

The Feedback/Changes

When you get the feedback from your client take on board what they say and make the changes, but remember they are paying you not just because you have a camera, they are paying you for your creative knowledge so if there is a change that you know will not work, advice them.

If they still want the change, do it and let them decide if it works.

Video Production - Edit Versions.jpg

Have a limit to how many changes your client can have, we normally say when they have seen the 3rd draft this is when everything should be 100% complete.

Delivery

Once the video is complete it is time to export and deliver it. The quick and easy way is to just send the high resolution version via WeTransfer, but if you can take it to them in person this might get talking about the next video they want making.

Over Deliver

When we deliver the final video we always try to over deliver when possible. Normally this is done by giving them many different version of the video for different social media platforms. If the final video is 2 minutes long give them a 20 second version they can use as a preview, or for Instagram. You can also give them any stills you took during the shoot.

Your client may not be paying for these extra videos or even use them, but it just shows that you have gone above the original brief. It should only take you about 30 minutes to create them, and it might help you get the next job.  


The Video Production Guide is a step by step series teaching you the basics of shooting videos for clients.

Episodes released Weekly:

Want to make videos for a client: https://youtu.be/bBkQpobfAjU

How to get the job: https://youtu.be/A1-09ESSZew

How much to charge: https://youtu.be/3Djuh-xTL6Y

Preparing for a client shoot: https://youtu.be/sDbbKaaPjc4

How to shoot an interview: https://youtu.be/8TRdmj0Ao4k

Shooting b-roll: https://youtu.be/RYc2y_dsexI

Editing and Feedback: https://youtu.be/ipMmMp-241o

The Client Video: https://youtu.be/X9VZTuxvT9w


This video was Sponsored By

http://bit.ly/synergy-pack - Get professional assets for your video from RocketStock.com. Their "Synergy" video pack is perfect for video editors and animators looking for versatile elements for any type of project.

http://bit.ly/track-hot-fusion - Click here to download this episode's track. Check out Premiumbeat.com to discover a huge range of exclusive royalty free music!


DISCLAIMERS:

Some of these links are affiliate links, if you purchase gear via these links The Film Look will receive a small commission, but there will be no additional cost to you. Thank you!
Snowing at The Film Look | VLOG #39

In this week Vlog we screen our short film Backstage for our cast and crew for the first time. MSI send us over a computer to test and make a review video. Since we live in the North East of England it snowed at The Film Look HQ.

Links to all do the videos mentioned in the Vlog can be found below.


DISCLAIMERS:

Some of these links are affiliate links, if you purchase gear via these links The Film Look will receive a small commission, but there will be no additional cost to you. Thank you!

Choosing the right Music | Episode 6: Video Production Guide

In this video we are going to talk about some things you need to take into consideration when choosing music for your next short film or client project.

Welcome to The Film Look and episode 6 of the Video Production Guide.

Video Production - Music.jpg

Adding music to your film is another way to tell your story and the wrong music can change the mood and tone very easily and tell a different story than you intended.

With each scene in your film you need to think about a few things; what do you want the audience to feel? Will the music drive the scene?

For this scene in our short film Keep The Change, our main character is at his highest level of stress as his car has just broken down and if he does not deliver the pizza on time he is going to get fired.

Video Production - Music 2.jpg

In this scene we want our audience to feel the same tension our delivery delivery is feeling. 

Another question you need to ask when picking music for your film is ‘Will the music work with the other audio in the scene?’. 

The other audio in your scene could be your character's dialogue and the foley sound effects which also help you tell the story. If you add music into your scene and it is taking away from the story because the other sounds are being drowned, think about having no music, not every scene needs it.

Client video

Just like a short film a client video has a theme and a mood.

Video Porduction - YouTube Music Libary.jpg

There are lots of different places you can get music for your productions. Places like the YouTube music library is a good place to start and it is free, but after a while you will find it a little limited.

We have been using a website called premiumbeat to get all of our music for client videos and short films for over 2 years now. They have a wide range of genres and subgenres, and all of the music you have heard in this video is from premiumbeat.

Video Production - Prmium Beat.jpg

Finding the right song can be time consuming. Sometimes you will find the perfect track right away and other times it will take hours. 

One of the main reasons we use premiumbeat is because they allow you to download a range of different lengths of the preview track. This allows you to add the track to your edit and see if it fits the tone of your film. On other sites you have to play the track in your web browser, then click play in your editor which can be pain.

Just remember to tell your client that music is a preview track, so they aren’t confused when they hear a voice saying ‘premiumbeat.com’ in the background.

For the videos we made for this guide we edited the videos to a suitable track we found on premiumbeat, then sent a draft version of the videos to our client. If they did not like the track for whatever reason we can change it without paying for the music. When the video has been signed off by your client, that is when you can purchase the track as you know they are 100% happy with it. 


The Video Production Guide is a step by step series teaching you the basics of shooting videos for clients.

Episodes released Weekly:

Want to make videos for a client: https://youtu.be/bBkQpobfAjU

How to get the job: https://youtu.be/A1-09ESSZew

How much to charge: https://youtu.be/3Djuh-xTL6Y

Preparing for a client shoot: https://youtu.be/sDbbKaaPjc4

How to shoot an interview: https://youtu.be/8TRdmj0Ao4k

Shooting b-roll: https://youtu.be/RYc2y_dsexI

Editing and Feedback: https://youtu.be/ipMmMp-241o

The Client Video: https://youtu.be/X9VZTuxvT9w


This video was Sponsored By

🎵 Click here to download this episode's track. Check out Premiumbeat.com to discover a huge range of exclusive royalty free music!

http://bit.ly/track-easy-does-it2

http://bit.ly/track-storytelling-piano

http://bit.ly/track-keep-fighting

http://bit.ly/track-modern-corporation

http://bit.ly/track-elemental-glow

http://bit.ly/track-raiders

http://bit.ly/track-march-of-desire


Choosing the right Music for your video

DISCLAIMERS:

Some of these links are affiliate links, if you purchase gear via these links The Film Look will receive a small commission, but there will be no additional cost to you. Thank you!

Popcorn Sunday #06

If you want us to watch your short film simply leave it in the comments with a quick line about the film. We can't put them all in the videos but we comment on every single one with some constructive feedback!

Links to the short film can be found below - 

Twelfth Arrival by Nate’s Film Tutorials: https://youtu.be/fkw4-9v5Lw8

BITE! by thisiscambo: https://youtu.be/G0P6L1wZ_Ns

Also check out Nate's awesome channel: https://www.youtube.com/user/natejames17


DISCLAIMERS:

Some of these links are affiliate links, if you purchase gear via these links The Film Look will receive a small commission, but there will be no additional cost to you. Thank you!

Shooting B-Roll | Episode 5: Video Production Guide

In the last episode we spoke about how to shoot an interview. Most videos will need some form of B-Roll to layer over the interview and that is what we are going to talk about in this video.

Welcome to The Film Look and episode 5 of the Video Production Guide.

Video Production - Shooting B-Roll.jpg


Capturing B-Roll can be done in many different ways, but it will also depend on the type of kit you can afford, and don’t worry if you can not afford the best equipment now. Concentrate on the equipment you do own and make as much money with it as you can.

But if you have a slider, use a slider, if your client needs a drone shot price for a drone shot, but remember if you only have a camera and a tripod, a well composed shot always trumps the fancy ones.

B-Roll doesn’t just help you shape the interview or voice over into a story, it also helps you hide the cuts you’ve made to the footage. B roll will hide the unnecessary answers, pauses, ums and errs. 

By using some audio transitions you can blend the audio cuts together and prevent the sound from popping. 

There are loads of different techniques when it comes to capturing B-Roll, but each shot needs to represent what your client is trying to sell, offer, or promote.

Slider

Clients love slider shots as the clean movement turns a boring conference room into something more interesting. With some distance between the background and subject, you can create a parallax sliding effect, which can really enhance the shot of a product or piece of art. We have a video all about how to use a slider on our channel.

Drone

In the last couple of years drone shots have become the new slider shots. Just like slider shots, they can be overused and 95% of jobs usually don’t need them. Unless you have a passion for flying drones, budget in for a professional who already has their wings. It will save you time and money, as getting a drone pilot's licence is expensive and time consuming. If the client is asking for a drone simply because it looks cool, let them know a solid story is always the better option. It’s not all about the fancy shots.

Handheld

Video Production - Handheld.jpg

Handheld shots can help you move quickly, and create dynamic shots. The cliche video production handheld shot is to follow your subject walking. [Shots from Projects]

When shooting a busy event there is never really a safe space to setup a tripod, so handheld is definitely the way to go. Using a shoulder rig will allow you to move around freely, and combining that with a monopod will give you the chance to also capture static shots. [Shots from Projects and equipment set up shot]

Slowmo

Slow motion is great to shoot in if the subject in the frame is moving. Clients love it and it’s really easy to do. Just adjust your settings from 24 fps to, for example 60, and double your shutter speed from 1/50 to 1/100. Then you can half the speed of the footage in your editor.

In episode 2 of this guide we spoke about preparing a shot list and storyboards before the shooting day. 

Use this on the day and tick off everything you wrote down as you don’t want to miss something your client asked you to capture.

Take your time when capturing the B-Roll. At first it may seem like it’s less important than any other footage, but the quality of your b roll will make or break the final video. Be patient, and do multiple takes if necessary. 

Don’t Over shoot

When you start to shoot videos you will have the tendency to overshoot, it’s not a bad thing but you will start to realise the more you shoot, the more time you’ll be sorting through the footage, and the more storage space you will need.

If the final video length needs to be 2 minutes you don’t need to shoot an hours worth of B-Roll shots.

Whatever tools and techniques you use to capture your b-roll shots, remember that every shot needs to help you tell a story. Practice makes perfect, and eventually you will be able to turn up at a location and know exactly what will look good because you’ve likely shot somewhere like this before. 

And remember to enjoy it! It might feel stressful to begin with, but just remember to take your time and enjoy yourself.


The Video Production Guide is a step by step series teaching you the basics of shooting videos for clients.

Episodes released Weekly:

Want to make videos for a client: https://youtu.be/bBkQpobfAjU

How to get the job: https://youtu.be/A1-09ESSZew

How much to charge: https://youtu.be/3Djuh-xTL6Y

Preparing for a client shoot: https://youtu.be/sDbbKaaPjc4

How to shoot an interview: https://youtu.be/8TRdmj0Ao4k

Shooting b-roll: https://youtu.be/RYc2y_dsexI

Editing and Feedback: https://youtu.be/ipMmMp-241o

The Client Video: https://youtu.be/X9VZTuxvT9w


This video was Sponsored By

🎵 http://bit.ly/stanza-pack - If you're looking for stylish transitions for your video, then check out "Stanza" by RocketStock. You’ll be cutting from scene to scene like a pro with this bold pack of 200 plus video transitions.

http://bit.ly/track-under-the-spotlight - Click here to download this episode's track. Check out Premiumbeat.com to discover a huge range of exclusive royalty free music!


Shooting B-Roll Video Production Guide
Video Production Guide Shooting B-Roll

DISCLAIMERS:

Some of these links are affiliate links, if you purchase gear via these links The Film Look will receive a small commission, but there will be no additional cost to you. Thank you!
How to shoot an interview | Episode 4: Video Production Guide

Knowing how to shoot an interview is an essential part of making documentaries and videos for clients, but how do you shoot one?

Welcome to The Film Look and episode 4 of the Video Production Guide.

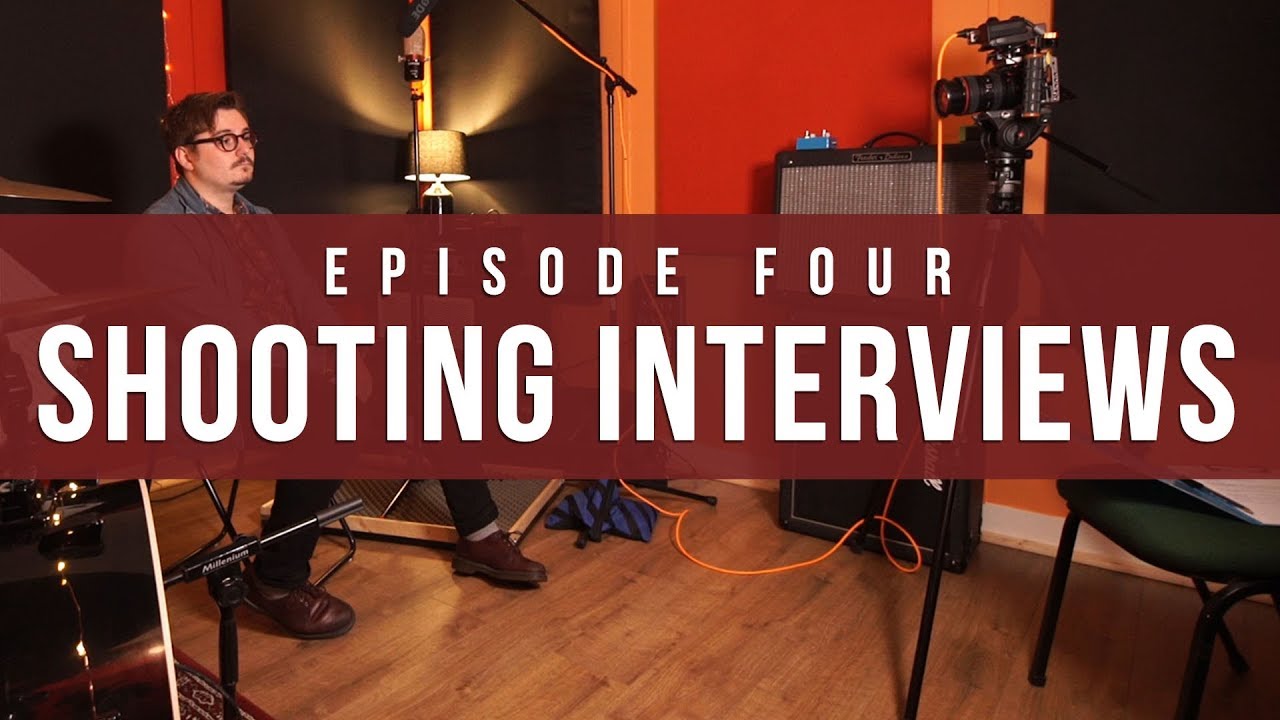
Video Production - Interviews.jpg

There are two different parts to shooting an interview, one is the interview setup and the other is the actual conducting of the interview. Let's talk about the setup first. 

Framing

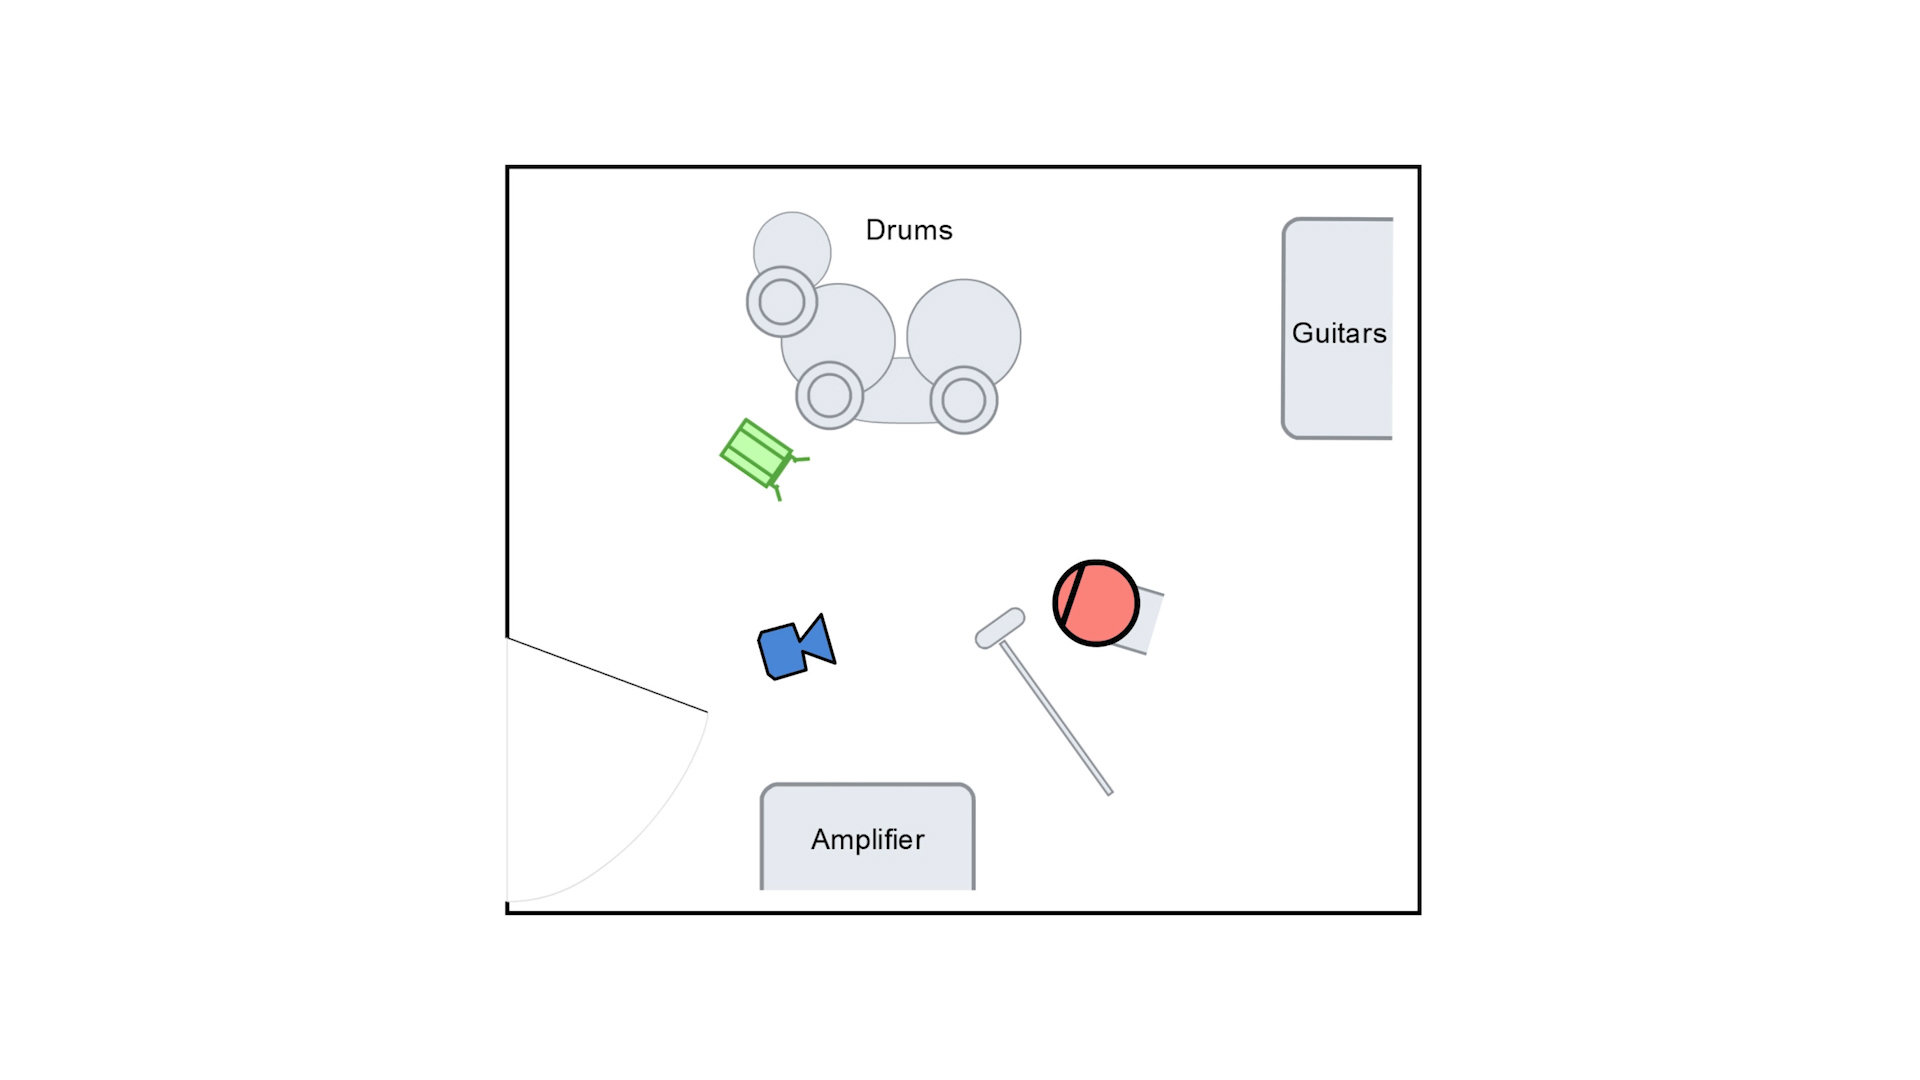
Video Production - Interview Layout.jpg

Every location will be different but before you set up your camera, look at the room and see where might be best for the interviewee to sit, then where the camera, lights and microphones can go.

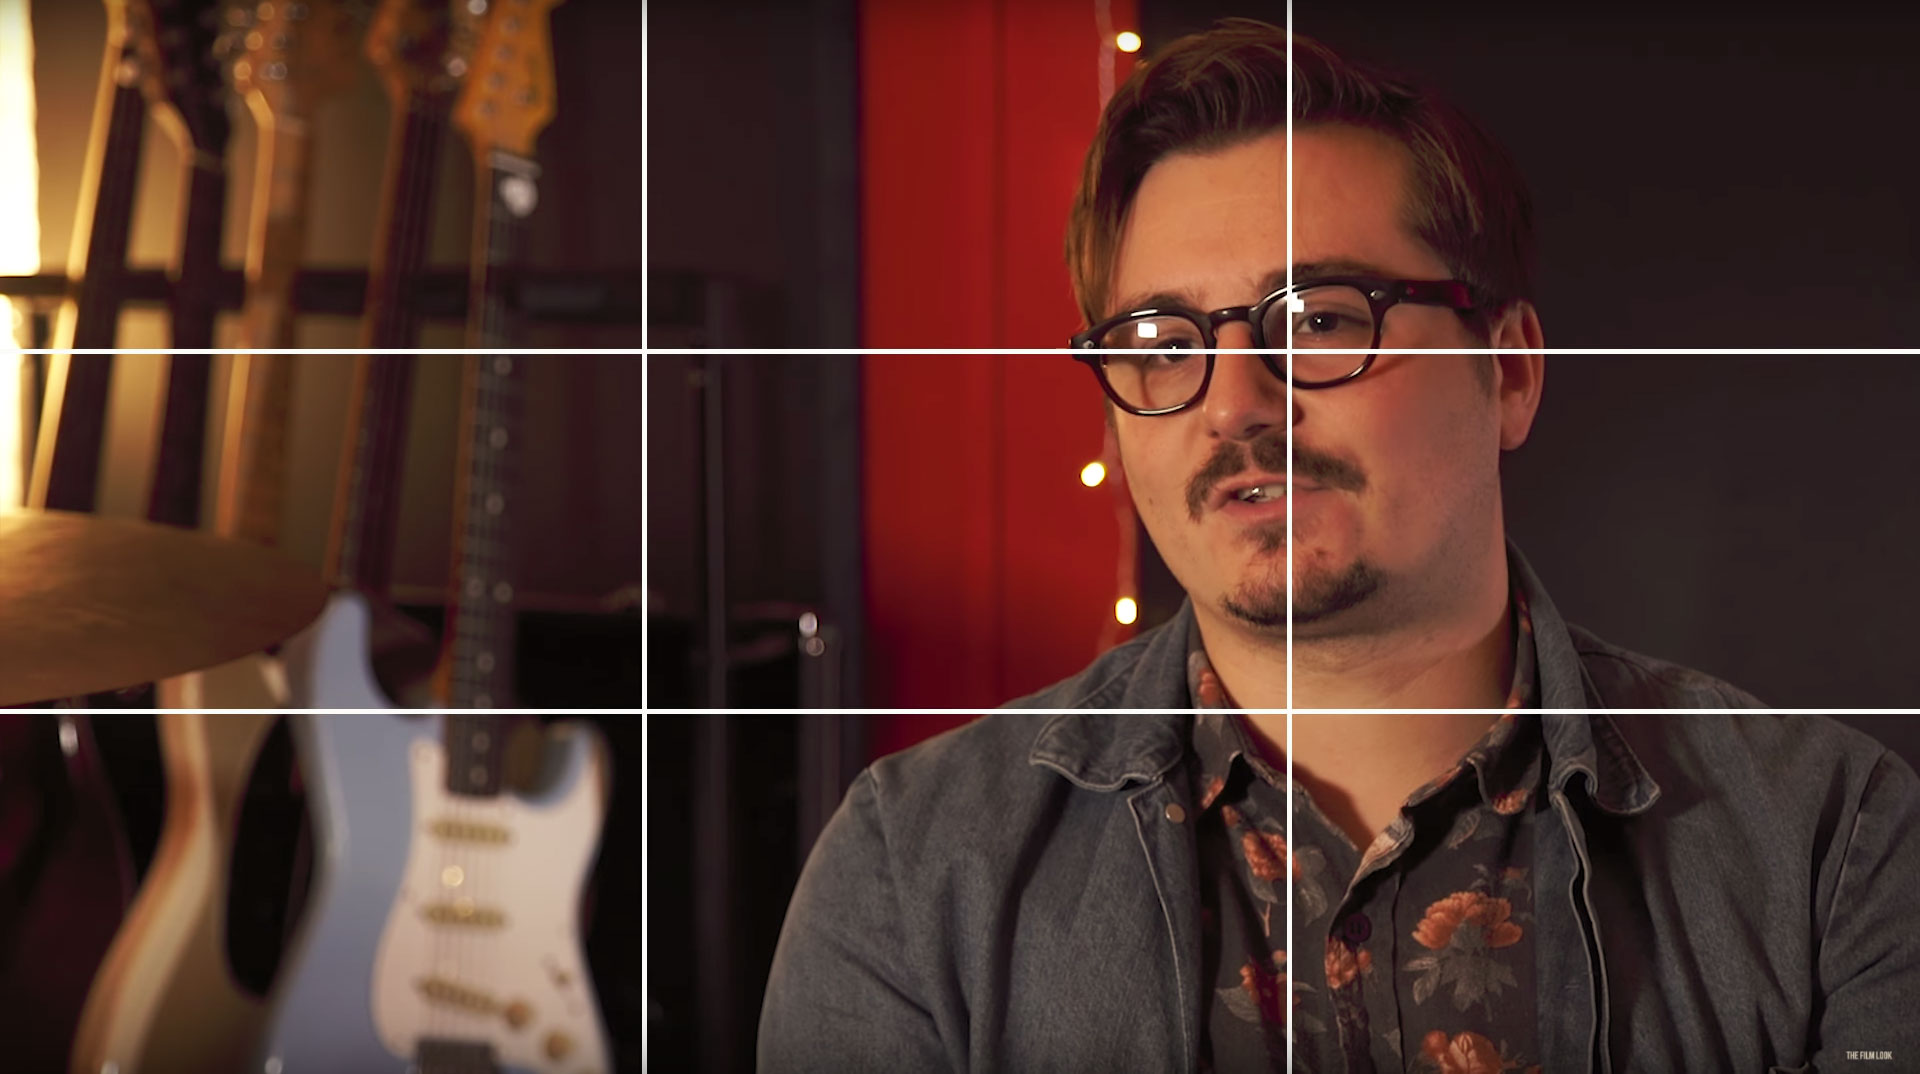
Your subject’s eyes should be positioned in one of the thirds of the screen, this can be on the left or the right depending on what is in your background. Having your subject placed like this is little more applying to the eye rather than placing your subject right in the middle of the frame.

How to shoot an interview - Rule of thirds

You can do this but it’s normally when your subject is talking directly to the camera like I am right now.

Your interviewee’s eyeline should be always looking into the space and not away from it when being interviewed. The interviewer should be sat next to the camera looking across the space towards the subject's eyeline.

Second Camera Angle

If you have a second camera and tripod, capturing a second angle will give you more cutting room as you can cut between the different angles.

One setup could to be position your B camera right next to your A camera and having them set at two different focal lengths.

A very popular B camera setup is a profile shot of the interviewee.

Video Production - Interview Profile Shot.jpg

If you have a second shooter they can operate the B camera on a shoulder rig or a slider and change the framing between each question, achieving many different angles. Just make sure you give them enough time to move before you ask the next question.

Lighting the Interview

The interview in a client video is there to tell the viewer certain information. This could be about a product or service the company is offering, or someone talking about their experiences.

The way the interview looks needs to represent the subject matter. 

For the example client video we shot for Pamplemousse Recording Studio we wanted to match the mood of the studio, so we used turned on the practical lights in the studio. Then we added an Apture H267c LED panel 2 meters away from the subject, set the brightness to 100%, and the colour temperature to 5500 kelvin.

Then we added a 160 LED right of frame with gave Jordan a edge light, which also separated him from the background by lighting up the guitars behind him.

There are lots of different types of interview setups, sometimes you will only add one light and sometimes you will need to add three. 

Here is a basic lighting kit which will work for most situation.

Video Production - Interview Lighting Setup.jpg

Key Light

We use an Aputure HR672C. You can change the colour temperature, but it’s not the brightest of lights so sometimes you need to get it very close to your subject. The good thing is, it’s a LED light so it doesn’t get very hot.

Fill Light

Our fill light is usually a reflector which is used to fill in the hard shadows on our subject’s face.

Edge Light

For an edge light we normally use one of these 160 LED panels. Its colour accuracy isn’t going to win any awards, but they are small and for £30 you can’t really go wrong.

There are loads of lights and modifiers you can use, but this kit will get you started.

Sound

There are several different types of microphones you can use when recording an interview. We’ve used on-board video mics, shotgun mics, and clip mics, and they all have their advantages and disadvantages.

Video Production - Sound Kit.jpg

A Rode videomic pro is a good place to start. They are reasonably priced and have a solid sound. When recording an interview, it’s best to get the microphone off the camera and bring it closer to your subject in order to capture something cleaner and louder. You can extend the length of the cable by using a 3.5mm extension cable like this one. Then throw it on a microphone stand to boom it without an operator.

We use a larger shotgun mic for the majority of our setups. This one here is a Rode NTG2. It gets a really nice sound and has very low noise, but it does require an XLR input so if your camera only has a 3.5mm socket, you can pick up something like this Saramonic Smart Rig which will adapt and connect the foreign inputs.

Clip Mics are great to use if your subject is moving a lot, or is far away. For a wedding it’s a great way to capture people's vows, or if you’re shooting a conference talk.

We recommend to start with a Rode Video Microphone, then upgrade to a shotgun mic when you can. We think a shotgun microphone is a lot more versatile than a set of clip mics as you can record interviews, voice overs, sound effects and Foley with it.

Conducting an interview

Setting up your camera, lights, and sound equipment is not the only thing you will need to do if you’re shooting an interview. You’ll most likely have to conduct the interview as well.

If you’ve never done this before, like when we started, there are a lot of little things to learn that comes with experience.  

Questions

For an interview you will need to ask the interviewee some questions. It’s best to ask the client what questions to ask they know more about the subject matter than you do, but do a little research into the person or subject beforehand. 

If a person is nervous about being interviewed, just sit and chat to them. Go over the questions and answers, ask them questions that are not about the interview, like if they are going on holiday - just get them talking. 

At times the interviewee might ramble. If this happens, ask them the question again. The rambling was just them figuring out what they wanted to say, and since they now know, the second take will likely be better.

When they are talking, try not to speak until you are sure they have finished and leave at least 3 seconds before you say anything. You’ll be picked up on the microphone, and hearing your hums and arrrs in the edit is the worst. Just listen until it is your turn to ask another question. 

Question in the Answer

When you ask a question, ask the interviewee to present the question at the start of their answer. This will help them lead into their answer and allow the audience to know what the interviewee is talking about.

Here are two examples, one without the question in the answer and one with.

Example 1

I had porridge and a coffee

Example 2

For breakfast this morning I had porridge and a coffee.

The question was ‘What did you have for breakfast this morning?’ which, by the way, is a good question to ask when your are checking your sound levels. 

That’s the basics of shooting an interview. Take what we have said and put it into practice.


The Video Production Guide is a step by step series teaching you the basics of shooting videos for clients.

Episodes released Weekly:

Want to make videos for a client: https://youtu.be/bBkQpobfAjU

How to get the job: https://youtu.be/A1-09ESSZew

How much to charge: https://youtu.be/3Djuh-xTL6Y

Preparing for a client shoot: https://youtu.be/sDbbKaaPjc4

How to shoot an interview: https://youtu.be/8TRdmj0Ao4k

Shooting b-roll: https://youtu.be/RYc2y_dsexI

Editing and Feedback: https://youtu.be/ipMmMp-241o

The Client Video: https://youtu.be/X9VZTuxvT9w


This video was Sponsored By

http://bit.ly/illuminate-pack - RocketStock’s light leak pack, "Illuminate", is sure to impress your viewers. Shot using digital cinema cameras in 4K, it’s an unbeatable way to lift your video to new, cinematic heights.

http://bit.ly/pb-brooklyn-bridge - Click here to download this episode's track. Check out Premiumbeat.com to discover a huge range of exclusive royalty free music!


Equipment Links

🎥 This episode's kit/gear/equipment:

US links

Rode Video Microphone - http://amzn.to/2zDp4mS

Rode NGT 2 - http://amzn.to/2yK4dkR

Rode Link Clip Mic - http://amzn.to/2zBSK3G

Aputure LED HR672C - http://amzn.to/2y2U9Uv

UK links

Rode Video Microphone - http://amzn.to/2lcKOmU

Rode NGT 2 - http://amzn.to/2i3xOeN

Rode Link Clip Mic - http://amzn.to/2yKjUso

Aputure LED HR672C - http://amzn.to/2i35qt7


How to shoot an interview Video Production Guide

DISCLAIMERS:

Some of these links are affiliate links, if you purchase gear via these links The Film Look will receive a small commission, but there will be no additional cost to you. Thank you!

Popcorn Sunday #05

If you want us to watch your short film simply leave it in the comments with a quick line about the film. We can't put them all in the videos but we comment on every single one with some constructive feedback!

Links to the short film can be found below - 

I am trying to remember by JuanTheBone: https://youtu.be/tNPkhgD2jYg

Exodus by Iridescent Productions: https://youtu.be/wcZxBOWTytM


DISCLAIMERS:

Some of these links are affiliate links, if you purchase gear via these links The Film Look will receive a small commission, but there will be no additional cost to you. Thank you!

Preparing for a client shoot | Episode 3: Video Production Guide

In the last few videos we have spoke about how to set up your video production company, get a video job, and work out what to charge.

In this video we are going to talk about preparing for the shoot. Welcome to The Film Look and episode 3 of the Video Production Guide.

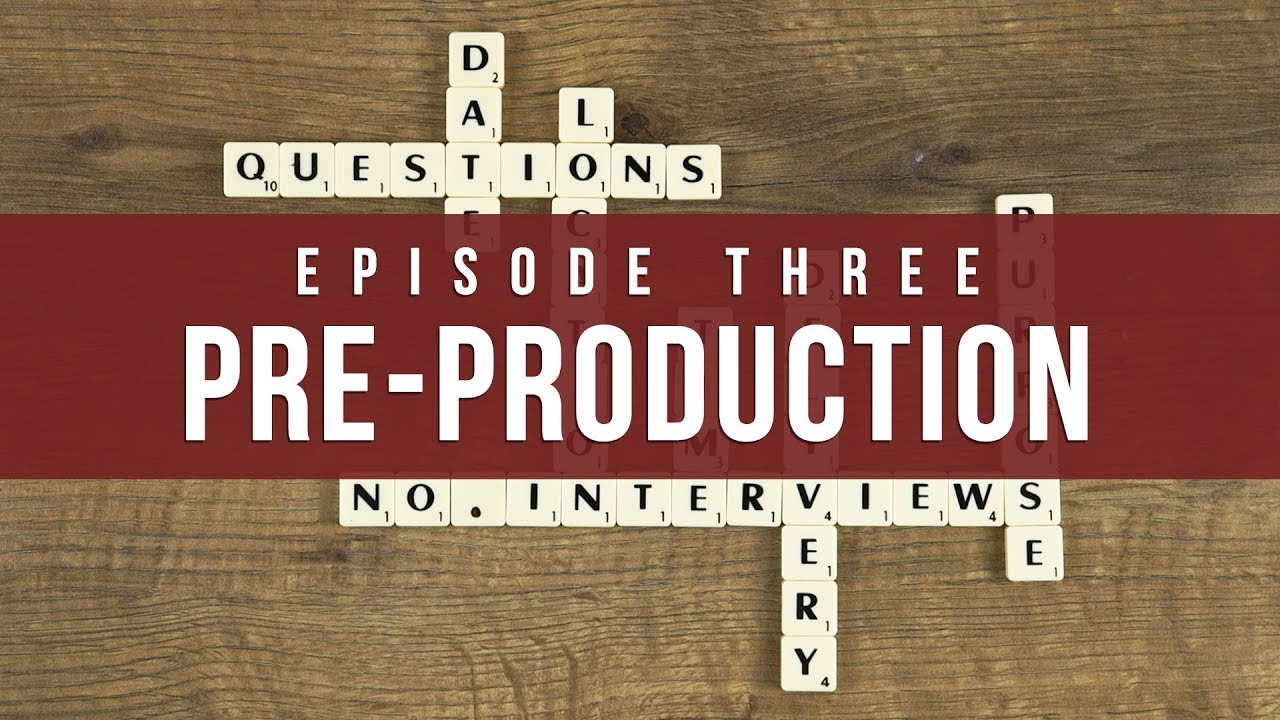
Video Production - Pre-Production.jpg

Preparing for the shoot is just as important as the shoot itself. The more you prepare, the easier your shoot will be.

After you get the job there are a lot of questions you should ask your client before the shoot, such as:

When are you available to shoot the video?

Where is the location?

How many people will be interviewed?

What questions need to be asked?

What time does the event finish?

When do you need the final video delivered?

What do you want the video to achieve?

Video Production - Question to ask.jpg

Some of these questions might seem very simple, but if your client needs the video turned around within a couple of days you need to know that before you shoot.

Ask as many questions as you can and it will reassure your client that you know what you are doing, even if you’re just making up as you go along.

If your client is struggling to express what they want, ask them to send over some examples of other videos they have seen that they like. Taking inspiration from others is perfectly fine, you’re not trying to remake radius of the lost ark.

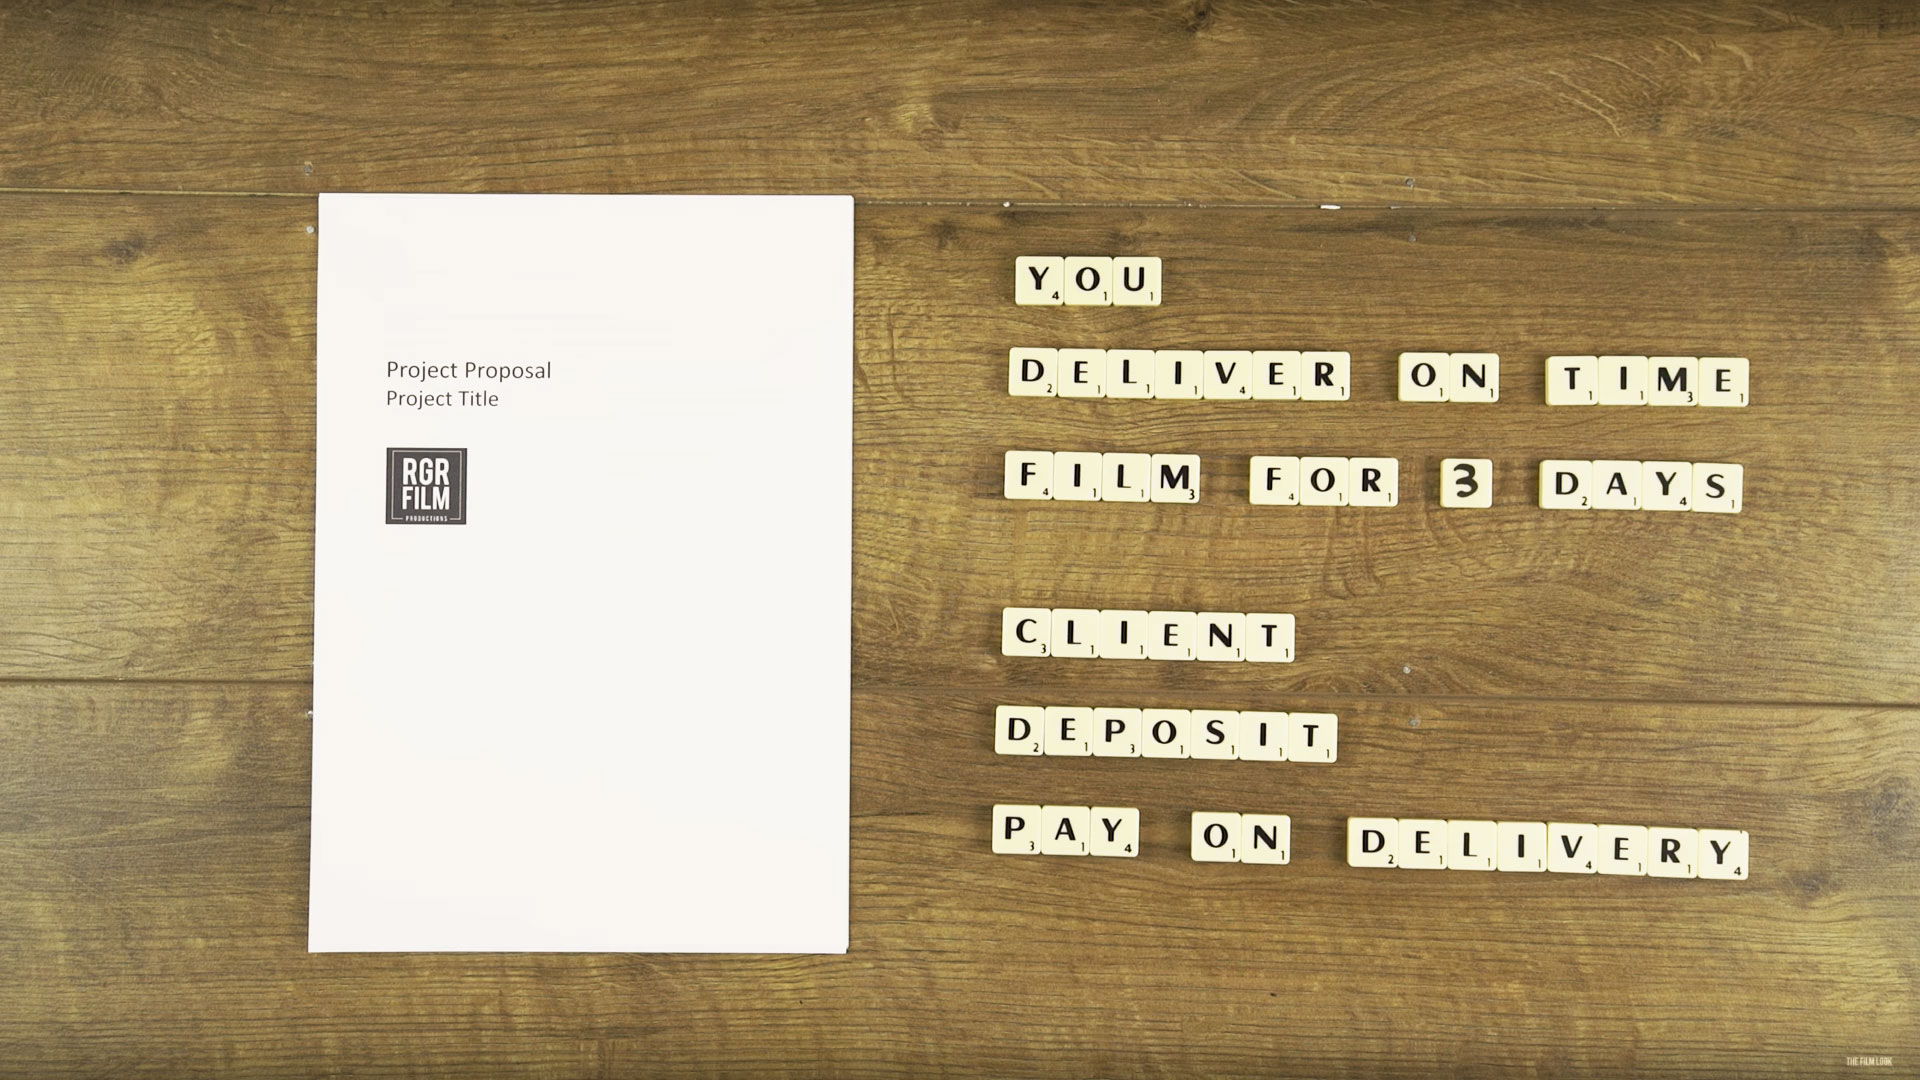
Next you want to write up an agreement contract. This is basically an outline, or some bullet points, of everything you are going to do to make the video, and everything the client will do in order to help you deliver it.

No matter the scope of the project, a written contract is there protect you from any legal outcomes if they should arise, such as a client refusing to pay. It’s uncommon, but it does happen from time to time.

In the description below we have provided a simple contract we use.

Now you have outlined the idea with your client, use this to make a shot list for the shoot. Forgetting to shoot something on the shooting day and having to go back doesn’t look very professional and it is technically reducing your hourly rate. This is your mistake, and you can’t charge extra for something like this.

Client videos that consist of sit down interviews, b-roll, or event footage won’t require a script or storyboards.

The jobs that do are generally the most fun as there is a clear vision put in place and you can treat it like a short film.

We needed storyboards and a script for a shoot with an actor who was interacting with a prop in a particular order. Having a script allowed the actor to know what was required from them and it allowed us to clearly know what we needed to shoot before we got there.

Kit

Video Production - KIT.jpg


Now you have all of the paper work out the way, prepare your kit the day before the shoot. Everyone will have a different camera equipment setup,

and you don’t need a lot of expensive camera equipment, a DSLR, Lens, tripod, and microphone is a good starting point to shoot most things.

What ever equipment you have, make sure all of your batteries are fully charged, and remember to bring a few extra spares. If you are going to use lights that need mains power, take a 10 meter extension lead; you never know how far the nearest socket will be.

Before you leave, make sure you have all of the production documents and kit. Dress smart/casual; you want to be comfortable whilst working, but don’t want to look like a slob. And remember, don’t be late!


The Video Production Guide is a step by step series teaching you the basics of shooting videos for clients.

Episodes released Weekly:

Want to make videos for a client: https://youtu.be/bBkQpobfAjU

How to get the job: https://youtu.be/A1-09ESSZew

How much to charge: https://youtu.be/3Djuh-xTL6Y

Preparing for a client shoot: https://youtu.be/sDbbKaaPjc4

How to shoot an interview: https://youtu.be/8TRdmj0Ao4k

Shooting b-roll: https://youtu.be/RYc2y_dsexI

Editing and Feedback: https://youtu.be/ipMmMp-241o

The Client Video: https://youtu.be/X9VZTuxvT9w


This video was Sponsored By

http://bit.ly/track-winner-takes-it-all - Thanks to PremiumBeat for providing the music for this week's episode. Check out Premiumbeat.com to discover a huge range of exclusive royalty free music!


Equipment Links

🎥 This episode's kit/gear/equipment:

US links

Rode Video Microphone - http://amzn.to/2zDp4mS

Rode NGT 2 - http://amzn.to/2yK4dkR

Rode Link Clip Mic - http://amzn.to/2zBSK3G

Aputure LED HR672C - http://amzn.to/2y2U9Uv

UK links

Rode Video Microphone - http://amzn.to/2lcKOmU

Rode NGT 2 - http://amzn.to/2i3xOeN

Rode Link Clip Mic - http://amzn.to/2yKjUso

Aputure LED HR672C - http://amzn.to/2i35qt7


Preparing for a client shoot - Video Production Guide
Video-Production-Proposal

DISCLAIMERS:

Some of these links are affiliate links, if you purchase gear via these links The Film Look will receive a small commission, but there will be no additional cost to you. Thank you!

The Client Video | Video Production Guide

For the video production guide we created a client video for Pamplemousse Recording Studio. We did this to show the types of videos you can create for small business.

The Video Production Guide is a step by step series teaching you the basics of shooting videos for clients.

Episodes released Weekly:

Want to make videos for a client: https://youtu.be/bBkQpobfAjU

How to get the job: https://youtu.be/A1-09ESSZew

How much to charge: https://youtu.be/3Djuh-xTL6Y

Preparing for a client shoot: https://youtu.be/sDbbKaaPjc4

How to shoot an interview: https://youtu.be/8TRdmj0Ao4k

Shooting b-roll: https://youtu.be/RYc2y_dsexI

Editing and Feedback: https://youtu.be/ipMmMp-241o

The Client Video: https://youtu.be/X9VZTuxvT9w


This video was Sponsored By

http://bit.ly/track-march-of-desire & http://bit.ly/track-fulton-and-grand - Click here to download this episode's track. Check out Premiumbeat.com to discover a huge range of exclusive royalty free music!


The Client Video - Video Production Guide

DISCLAIMERS:

Some of these links are affiliate links, if you purchase gear via these links The Film Look will receive a small commission, but there will be no additional cost to you. Thank you!

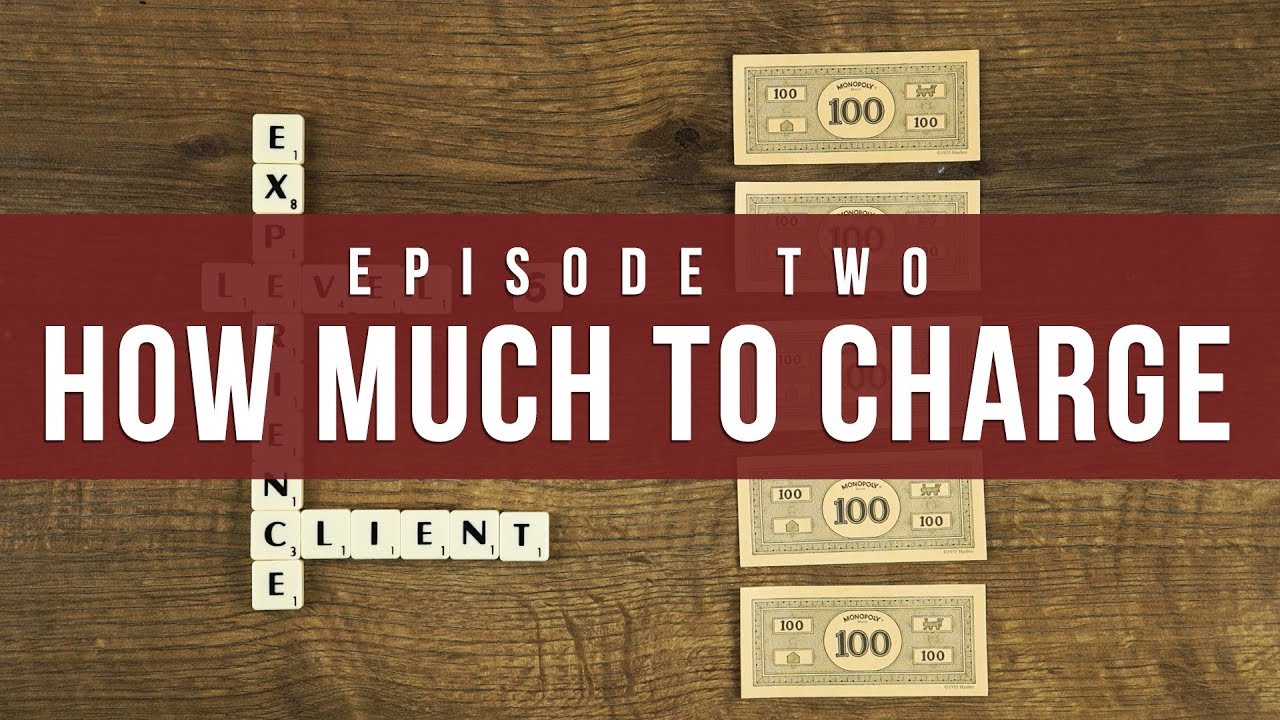
How much to charge | Episode 2: Video Production Guide

If someone comes along and asks you to make a video for them, knowing what to charge can be tricky to work out.

In this video we are going to give you some tips on how to work this out.

Welcome to The Film Look and Episode 2 of the Video Production Guide.

Video Production - How Much to charge.jpg

First I want to talk about working for free. This is something we all have to do to gain experience, and get footage for our showreels.

We have a video where we talk all about working for no pay on our channel if you want check it out.

If the first videos you make for someone are for free, it’s a great time to learn the process and work out how long it takes to make a video for someone.

Even if you are getting paid for the work this is a good practice as you’ll start to work out what to charge for different jobs, as some will take longer to shoot or edit then others.

Video Production - Days Worked.jpg

When you price for the job, tell your client how many days you are charging for pre production, production and post production. It’s good to do this is because your client might look at the price and assume it’s simply for the shooting day. Your client may only see you for the time when you are shooting, but remember this is not just the only time you have worked. You might have spent 1 day planning the shoot, and it’s going to take you 2 days to edit the video.

If you’re struggling to work out what price to charge, don’t be afraid to ask what their budget is as it might be a lot more than you were expecting.

It also might be a lot less than what you were going to offer; yes your hourly rate will be low but you're still getting paid for making videos, and at the start any pay is good pay. [Timelapse of the shoot]

Now you have this information, what is your time worth? That’s what this video is all about after all. I can’t tell you what you should charge as there are many different factors to consider.

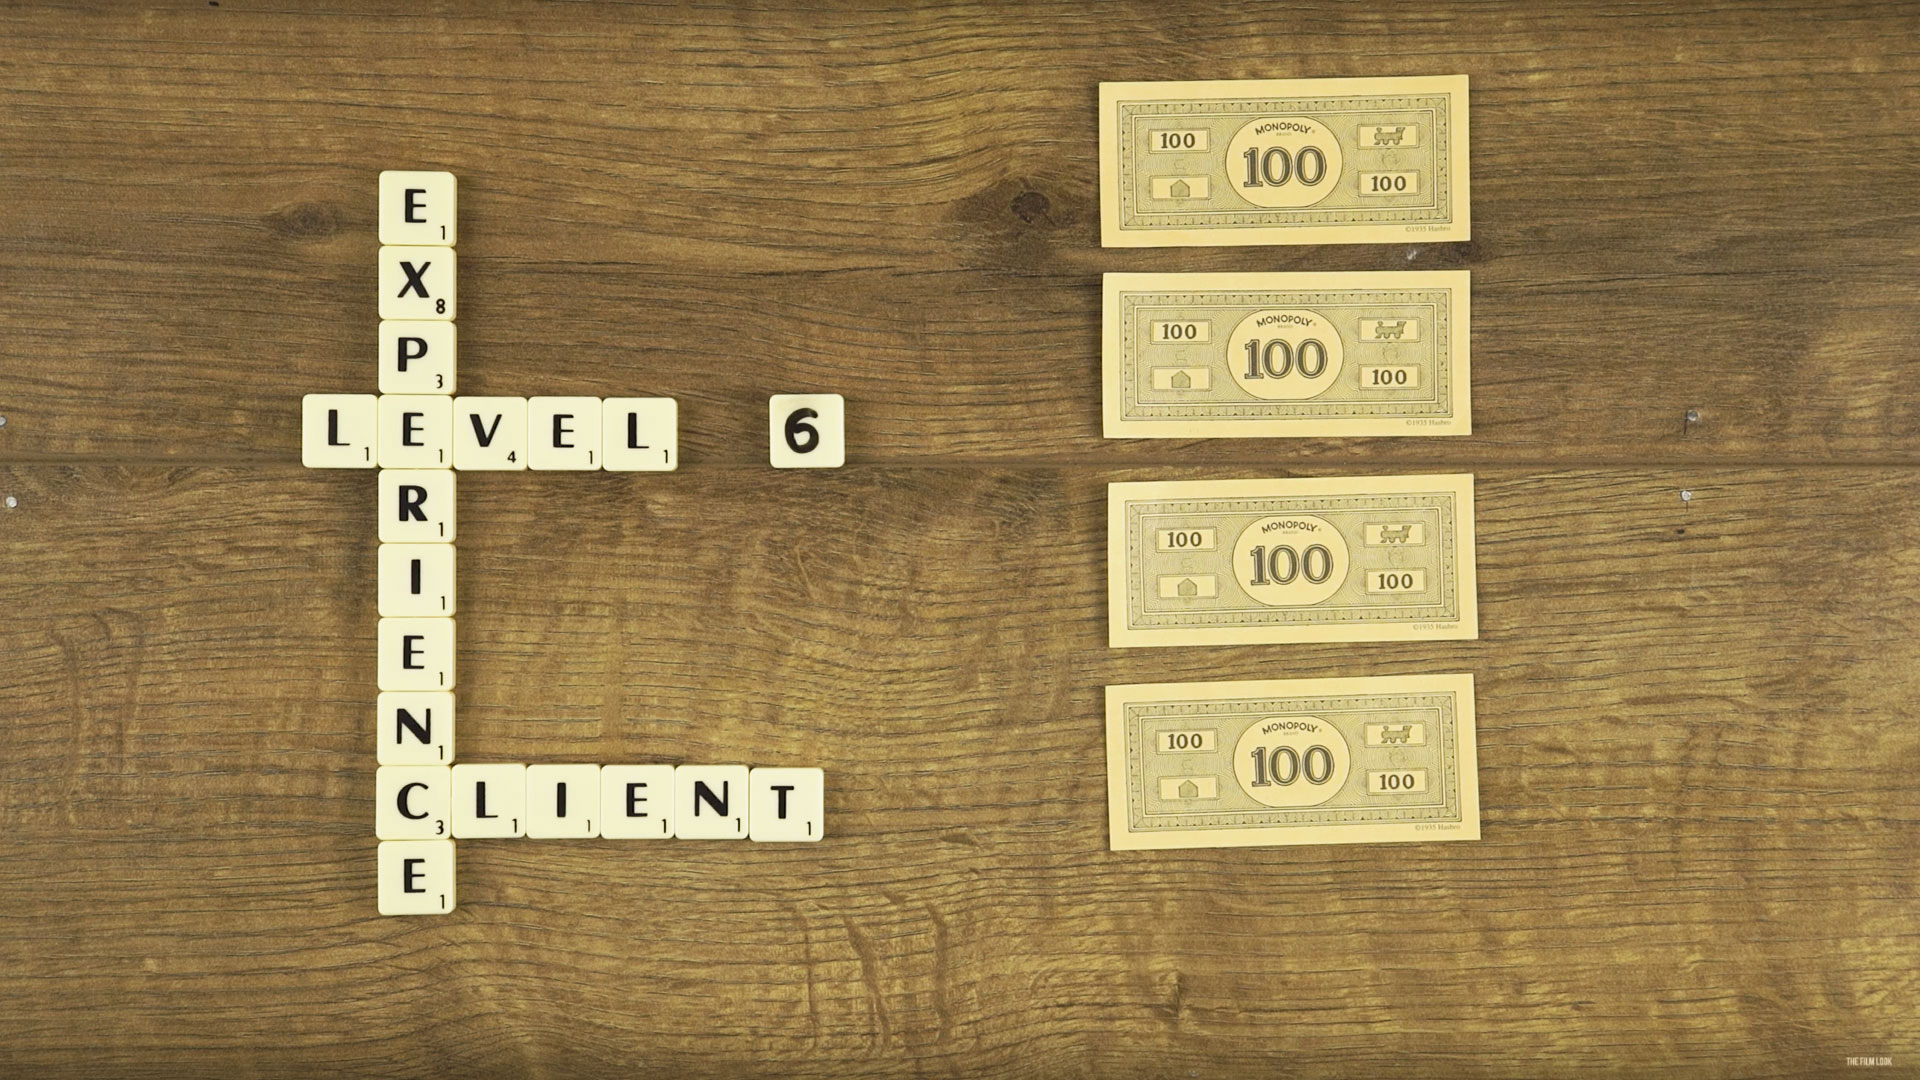
First there is your level of experience, the more experience you have the bigger and better jobs you can get which you can charge more.

Who is your client? With some clients you can charge more for your services. Don’t expect every client to be able to pay you the same hourly/daily rate.

Video-Production-How-much-to-charge

A locally run coffee shop does not have the same marketing budget as starbucks.

Your location is important as well. In some city’s like London or New York you can charge more simply because everything has inflated pricing, but if you live in a small city or town there will be a price cap for video production.

Video Production - Location.jpg

Finally, every project will be different in terms of how long it will take to plan, shoot and edit. 

A little piece of advice; in the film industry there is no such thing as a half days pay, so if the shoot is only 2 or 3 hours, you need to charge for a full day as you can’t really do anything else during that day when you are waiting to go to the shoot.

Video Production - Shooting Hours.jpg

Whatever you charge make sure you are always delivering the highest quality of video and service you can. It doesn’t matter if they are offering pennies, give them a video you think is worth hundreds if not thousands. You never know when they may need more work in the future, or when someone asks them if they know any good video people.


The Video Production Guide is a step by step series teaching you the basics of shooting videos for clients.

Episodes released Weekly:

Want to make videos for a client: https://youtu.be/bBkQpobfAjU

How to get the job: https://youtu.be/A1-09ESSZew

How much to charge: https://youtu.be/3Djuh-xTL6Y

Preparing for a client shoot: https://youtu.be/sDbbKaaPjc4

How to shoot an interview: https://youtu.be/8TRdmj0Ao4k

Shooting b-roll: https://youtu.be/RYc2y_dsexI

Editing and Feedback: https://youtu.be/ipMmMp-241o

The Client Video: https://youtu.be/X9VZTuxvT9w


This video was Sponsored By

http://bit.ly/synergy-pack - Get professional assets for your video from RocketStock.com. Their "Synergy" video pack is perfect for video editors and animators looking for versatile elements for any type of project.

http://bit.ly/track-the-funk - Click here to download this episode's track. Check out Premiumbeat.com to discover a huge range of exclusive royalty free music!


How much to charge - Video Production Guide

DISCLAIMERS:

Some of these links are affiliate links, if you purchase gear via these links The Film Look will receive a small commission, but there will be no additional cost to you. Thank you!

Popcorn Sunday #04

If you want us to watch your short film simply leave it in the comments with a quick line about the film. We can't put them all in the videos but we comment on every single one with some constructive feedback!

Links to the short film can be found below - 

Collect by Elvis D’Silva: https://vimeo.com/90834634

I Did by James Watts: https://vimeo.com/188674032


DISCLAIMERS:

Some of these links are affiliate links, if you purchase gear via these links The Film Look will receive a small commission, but there will be no additional cost to you. Thank you!

How to get the job | Episode 1: Video Production Guide

Living in the digital age; a multitude of businesses, companies, and individuals are looking for videos for a range of different needs. They are also willing to pay for them!

That’s where a filmmaker comes in. But, how do you find the work, and how do you secure a video production job?

Welcome to The Film Look and episode 1 of the Video Production Guide.

Video Production - How to get the job.jpg

So you’re an aspiring filmmaker, you have a DSLR, a microphone, some lights, and you want to earn some cash by using your skills and equipment to make videos for clients. How do you start?

At first you may have to work for free to gain experience before people will pay you. We had to do this at the start and we would advise to treat this time as a testing ground to see if making videos for other people is a career path you want to go down.

Everyone needs videos making, so contact local museums, artists, events, people getting married, vets, dentists, hairdressers, even make a video about your Gran’s sewing group if you have to!

Showreel

Video Production - Showreel.jpg

Once you have a few projects under your belt you can create a showreel to showcase your work. Trea t your showreel the same way you would a CV or resume; show the best shots and don’t make it longer than 1 minute. You want it to be entertaining and it’s better to have a snappy 1 minute video than a boring 3 minute one.

Your Business

I’m not going to go into the specifics of setting up a business, that's a whole guide in itself. Instead we are going to talk about some of the specifics of setting up a production company.

First you need to pick a name that you will trade under. Our production company is called RGR Film Productions.

Choose a title which is self explanatory. RGR Film Productions is pretty clear that we produce films, RGR Visual Design could be any sort of creative design business; it’s a bit wishy-washy and vague, so pick something with video or film in the title so a client will know exactly what you do.

And spend some time choosing your name too - it’s going to be with you for a long time.

Once you have a name chosen, you should create a Facebook page for the business and eventually a website. This will help people find you and it’s a place to showcase your work. Get Instagram and twitter aswell, but only if you are going to use them.

Seeing dormant twitter feeds that have not been used in 6 months is a lot worse than not having one.

There are lots of inexpensive ways to build your website so don’t stress about it. Wordpress and Squarespace will allow you to create something visual really easy, which is what you should be aiming for. And some advice don’t have a lot of text on your website - your work is visual so show it off.

We are not sponsored by Squarespace, but there are loads of other channels that are and they offer discount codes for the site.

Keep your branding consistent on your website, social media pages and even your business cards. If you have no experience in graphic design there are lots of people out there that can help, some just starting out like you. Trade services if you can.

Business cards are a dime a dozen.  A great way to stand out is to have something that’s different from the norm. These were my first set of business cards and they worked, but after a few years I changed them to these. They are a lot more visual and they give a good first impression of what you do.

Video Production - Business Cards 1.jpg
Video Production - Business Cards 2.jpg

How to approach businesses

Whilst you are setting up your business you need to be out there finding work, as no one will come to you especially at the start.

Emailing people can work, but you need to make sure you are emailing the right person. Don’t use the first email address that you find on a company's website, info@company.com, you need to be speaking to someone who works in the marketing or advertising departments, these are the people who deal with the people just like you. An easy search on Google like this - Company.com Marketing department will give you the names of the people who work in that department. Karen@company.com

This is a little different for people and businesses who are just one or two man teams. A great way to contact them directly is by messaging them via their Facebook business pages - write this message in the same professional manner you would an email.

Don’t be disheartened if you send 100 emails and only get 10 back, 10 is good. But if you only get 1 email back of someone who is interested, the next step is to meet with them and see how you can work with each other.

Even if this is an unpaid job treat this as a job interview; go  smart, be prepared, and listen to what they want.

And most of all, be honest! Don’t pretend to know something you don’t, nobody becomes David Fincher overnight, and you shouldn’t pretend to be.

Other than that, it is all up to you to turn that into a sale.

The more people you speak to, the more work you will get, so get to know people! Referrals are how you are going to get 50% if not more of your work. This means networking, and telling people them what you do.

I hate networking, but it’s necessary. The trick is to really listen to people; who they are and what they do. Don’t try to sell your business yet as they might not need your services, but they might know someone that does.

Last piece of advice will depend on where you live; if there are a lot of art groups, community meeting and talks, go to them and introduce yourself. You will meet people who are very like minded, creative, and someone there will be organising some form of event or workshop...and this is when you can offer to film it for them...it’s a start!

Who needs videos making?

So who needs videos making? Well the short answer is everyone. For this guide we have made two different types of client videos to use as examples.

One was for Sian Jordan Designs, a watercolour artist, and we made a video that explains who she is and what her business does. We call these type of videos ‘Business Stories’.

The second video we made was for Pamplemousse Recording Studio that advertised the services they sell. This is a classic promotional video.

The two videos were created for Pamplemousse Recording Studios. The first one was a 20 second advertisement about the services they offer. The second video was 2 minutes long, and goes into more detail about Jordan the owner of Pamplemousse Recording Studios, we call this type of videos Business Stories.

Recording Studios are just one example of the type of companies you could contact, but there are loads more so let’s talk about them.

These are just two examples of the type of companies you could contact who need videos. There are loads of others so let's talk about them.

Museums

Video Production - Museums.jpg

Our first client job was working for a museum filming artists creating art out of glass then interviewing them about their work. These jobs taught us how to work with a client, finding out what they need, how to shoot interviews with many different types of people, and turn videos around quickly.

Corporate Videos

Video Production - Corporate Videos.jpg

Corporate videos come in many different shapes and sizes. We have already spoken about Business Stories and service based promotional videos, but you also have fundraising videos, factory tours, and high concept videos which have a short film structure and tone to them.

Music Videos

Video Production - Music Videos.jpg

From my experience if you want to make music videos, just advertise that you only make music videos. It’s easier for local bands to find you as they don't have to look through all of the other work you have created. Music videos are a great way to just concentrate on the visual story as the sound has already been recorded for you.

Events

Event videos come under many different categories like locally organised events, music festivals, night clubs videos, and corporate conference events that are not the most interesting but can be turned around quickly.

Weddings

Video Production - Weddings.jpg

Filming weddings can pay well and it’s a good way to get used working fast and thinking on your feet (which will hurt as the shooting days will be long and the editing days will be even longer). Just music videos, if you’re going to shoot weddings it might be best to separate your main production company from the wedding side. A bride doesn't need to see how well you can shoot a corporate video, they need to see how well you can capture their special day.

Proposals and Pitching

Video-production---How-to-get-a-job.jpg

If a business comes along and says ‘yes they would like a video making’ even if it is for free, or you find out there is an opportunity to apply for a video contract, you will have to write something called a proposal.

A proposal is a formal document that outlines the approach of how you will make the video for them. In the document you will outline about the concept, visual style of the video, the schedule, and cost of the project. In the description below you can find a word template we use to write our proposals, with some examples of what might be written in each section.

After you have spent about a day writing the video production proposal, they may short list you and ask you to go in and pitch the idea. Pitching is like a job interview (which no one likes doing), but my advice is learn your pitch back to front, and be passionate about why you want to use your skills to make them a video.

You will win some jobs and you will lose some, and it sounds daft to say but if you don’t get the job don’t worry about it. Failing to get a job is a learning experience, so send them an email and just be honest about getting feedback to help you learn. They might give you some advice which helps you get the next job.

If you did get the job... congratulations! In the next video we are going to talk about how to prepare for the shoot. 

The last piece of advice I would like to give you is this: most people get into making client videos to help fund their short films. There are a lot of people who lose sight of their original goal and turn more into business people than filmmakers. The money can be good, but never lose sight of why you picked up a camera in the first place, and tell the stories you want to tell with the money you have made telling other people's.

The Video Production Guide is a step by step series teaching you the basics of shooting videos for clients.

Episodes released Weekly:

Want to make videos for a client: https://youtu.be/bBkQpobfAjU

How to get the job: https://youtu.be/A1-09ESSZew

How much to charge: https://youtu.be/3Djuh-xTL6Y

Preparing for a client shoot: https://youtu.be/sDbbKaaPjc4

How to shoot an interview: https://youtu.be/8TRdmj0Ao4k

Shooting b-roll: https://youtu.be/RYc2y_dsexI

Editing and Feedback: https://youtu.be/ipMmMp-241o

The Client Video: https://youtu.be/X9VZTuxvT9w


This video was Sponsored By

http://bit.ly/stanza-pack - If you're looking for stylish transitions for your video, then check out "Stanza" by RocketStock. You’ll be cutting from scene to scene like a pro with this bold pack of 200 plus video transitions.

http://bit.ly/track-phenomenal - Click here to download this episode's track. Check out Premiumbeat.com to discover a huge range of exclusive royalty free music!


How to get the job - Video Production Guide

DISCLAIMERS:

Some of these links are affiliate links, if you purchase gear via these links The Film Look will receive a small commission, but there will be no additional cost to you. Thank you!

Want to make videos for a client? | Episode 0: Video Production Guide

A great way for you to fund your short films is to make client, corporate, and promotional videos for others. If you have a camera, tripod, microphone and some lights, you have the basic equipment you need to make these videos.

We have been doing this for about 5 years now, but making a video for a client is something they don’t teach you in film school and there is a lot that goes into making them than just  shooting good looking video.

Yes a lot of filmmaking techniques are transferable when making these videos, but how do you get a video production job in the first place? How much do you charge? And what are the main steps to deliver a video to your client?

To help you work all of this out we have create two different types of client videos one for a watercolor artist and the other for a recording studio.

To help work all of this out we have create two different types of videos for Pamplemousse Recording Studios.

Then we have broken the process down into a 7 part video guide that talks about how to get a job making a video for a client to delivering that video.

We’ll start of by talking about how working for free will help you gain experience, and help you turn unpaid work into paid work by creating a showreel with the footage you have filmed.

Once you have a showreel you need a place to put it so people can find you, but you also need to be approaching business to offer your services.

We are going to talk about the types of people you can contact who need videos making. Spoiler Alert, it’s everyone.

A difficult question to answer is “how much do you charge a client for a video”? We have broken this down to help you work that out.

Once you have agreed on the price and the type of video your client needs, you need to prepare for the shoot with a script, shot list, and getting your kit ready.

Shooting interviews is a big part of making client videos. There is a lot to learn, and that doesn’t just mean shooting them, but conducting the interview as well.

Once you have shot everything you will need to edit the videos and deliver them to the client. We are going to talk about our editing workflow that we use to help turn videos around faster.

We have spent the last 5 years making videos for others, and we want to help guide you through the process.

Welcome to the Video Production Guide

The Video Production Guide is a step by step series teaching you the basics of shooting videos for clients.

Episodes released Weekly:

Want to make videos for a client: https://youtu.be/bBkQpobfAjU

How to get the job: https://youtu.be/A1-09ESSZew

How much to charge: https://youtu.be/3Djuh-xTL6Y

Preparing for a client shoot: https://youtu.be/sDbbKaaPjc4

How to shoot an interview: https://youtu.be/8TRdmj0Ao4k

Shooting b-roll: https://youtu.be/RYc2y_dsexI

Editing and Feedback: https://youtu.be/ipMmMp-241o

The Client Video: https://youtu.be/X9VZTuxvT9w


This video was Sponsored By

http://bit.ly/track-fulton-and-grand - Click here to download this episode's track. Check out Premiumbeat.com to discover a huge range of exclusive royalty free music!


Want to make videos for a client - Video Production Guide
Video Production Guide

DISCLAIMERS:

Some of these links are affiliate links, if you purchase gear via these links The Film Look will receive a small commission, but there will be no additional cost to you. Thank you!

Story in a Can #9 | "Vape Nation"

In each can there are 20 locations, 20 objects, 20 characters, and 20 scenarios. We pick one from each of the cans and try to come up with a film idea on the spot. Sometimes they are bad, but sometimes we turn the idea into a film.

In Story In a Can #9 Rich and Adam have to make a story about a Character who is a soldier, a location of a Dive Bar, an object of whipped cream, and a scenario of Cinema is closed! What Now?

Watch the video to see what story was made.


DISCLAIMERS:

Some of these links are affiliate links, if you purchase gear via these links The Film Look will receive a small commission, but there will be no additional cost to you. Thank you!

Diffusion in a can!

We have a few different DIY methods to diffuse sunlight from a window. Most of the time we use a frosted shower curtain. It’s easy to pin up and does a solid job.

If the window is in shot we sometimes cut out sheets of greaseproof paper and place them inside the frame. This is handy for exposure correction, diffusion, or if you want to disguise the view from outside.

But what if the window has 17 visible panes? What if you want to diffuse the light and disguise the view outside and simply don’t have time to cut out every single sheet for every single pane?

Let me introduce YOU to Diffusion in a Can.

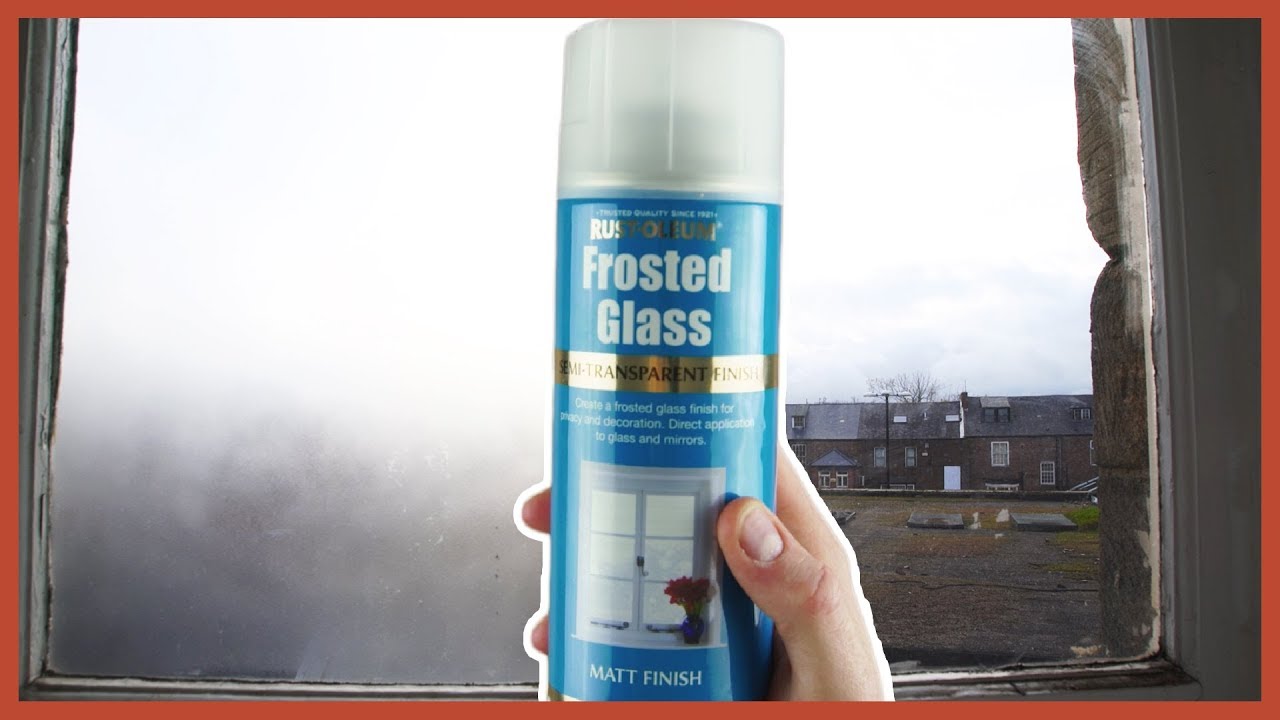
We went shopping for gold spray paint the other day and noticed this, Frosted Glass Spray Paint. Primarily used to give your windows a snowy Christmas feel, we wondered if it could work to diffuse a window from harsh sunlight.

Let’s put it to the test!

To give it a fair test; we blocked out the light in the studio, rigged up a pane of glass, shone an LED light panel through it and recorded a bunch of tests.

We’re going to get a little science-y now with f stops and exposure values. I put a link down below explaining it all if you want to learn more.

NO DIFFUSION is our reference test, and this gives us a light metre reading of f4, 1/48, ISO 200, 24fps, which is essentially same as our settings, so the shot is correctly exposed.

Different Types of Diffusion 1.jpg

Next we added the frosted shower curtain. You see here that it does a good job of diffusing the harsh light. The light metre gives us a change in value from f4 to f2.8 which means that it has halved the amount of light hitting Rob’s face. This is why our shot is a lot darker - we are not changing the camera settings for purpose of the test.

Different Types of Diffusion 2.jpg

Then we swapped the frosted shower curtain for the greaseproof paper. Again, this does a good job of diffusing the light and creating softer shadows. The light metre gives us a reading of f2, reducing the light twice as much as the shower curtain. We currently have a quarter of the light coming in compared to our first shot.

Different Types of Diffusion 3.jpg

The light metre is telling us that in order to expose the image correctly like our very first test shot, we need to add more light; either by changing the settings on the camera, or by adding a brighter light source.

Anyway, let’s see how the frosted glass paint did!

We sprayed several even coats of paint onto the glass and waited around 30 minutes to let it dry.

As you can see, the paint did very little to diffuse this light source. The only difference I can spot is the added roundness of Rob’s shadow. Evidently, the light metre read f4, so it did in fact retain most of the light coming in for our test.

No Diffusion in a Can.jpg
Diffusion in a Can.jpg

But this doesn’t mean it isn’t diffusing the light. So we tested it on a much bigger source!

For our second test, we put the greaseproof paper and the frosted glass paint head to head to see which can seamlessly diffuse the window faster.

Rob uses the roll of greaseproof paper, scissors, and some sticky tack.

And I used the frosted glass paint and some masking tape to protect the paint work.

The greaseproof paper method took 30 minutes and 41 seconds to complete 6 panes.

The paint and masking tape method took 16 minutes and 24 seconds to complete 6 panes - almost half the amount of time.

Rob admitted that to get a completely seamless effect with the paper, he would have been working on the panes for at least another half hour.

Diffusion-in-a-can1

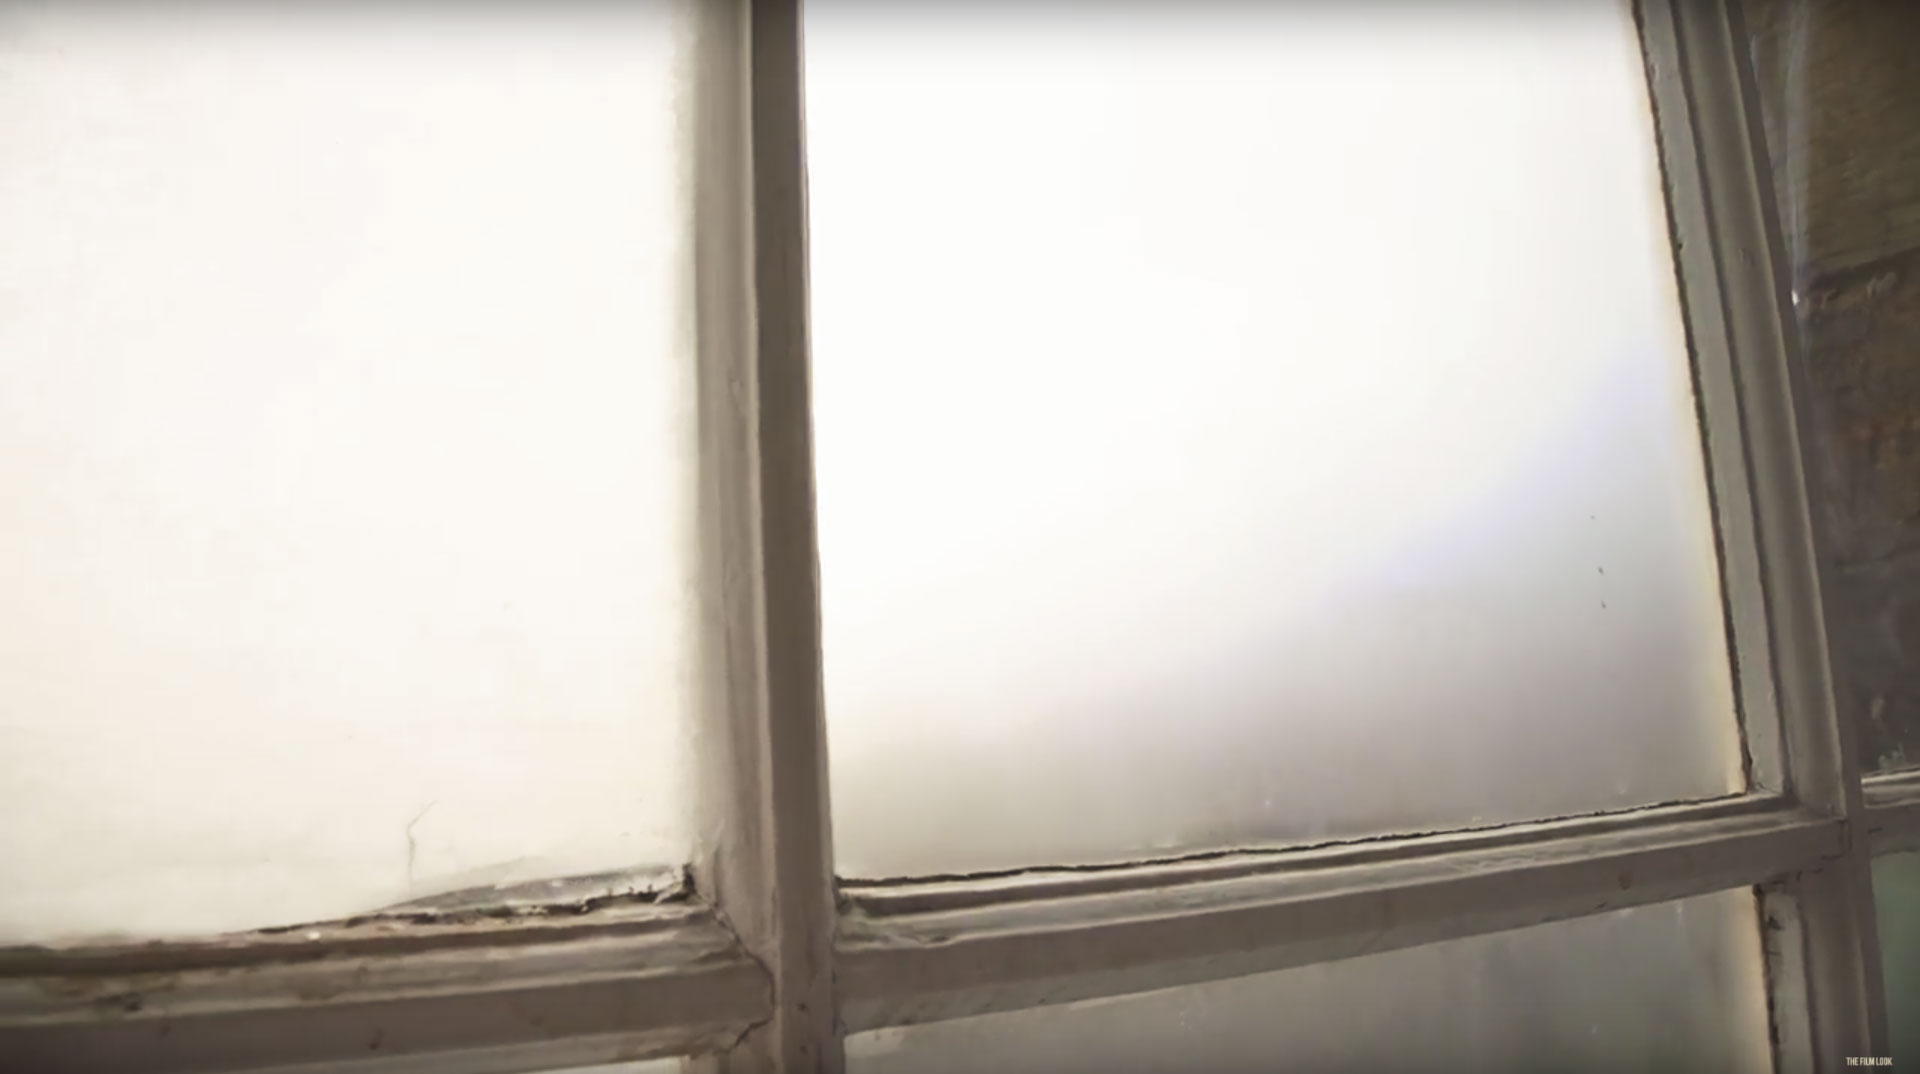
The paint is definitely the quicker option with a more seamless finish. To cap it off, here are some examples of the painted window panes diffusing the direct sunlight. The paint does diffuse pretty well given a large enough surface and a harsh enough light.

Window with No Diffusion.jpg
Window with diffusion in a can.jpg

At this point you might be wondering if frosted glass paint will do harm to your window. Let me show you just how easy it is to remove using a glass scraper and some window cleaner.

Simply spray the pane with a good amount of window cleaner and leave it to soak in for a few minutes. Then take your glass scraper, and with a little pressure, remove the layer of paint. If it’s wet, it should come off like a layer of cellophane. Grab a towel and wipe any residue off - it’s as simple as that.

Diffusion In a can Scrap.jpg

So if YOU need a quick, easy, and fairly cheap way to diffuse and hide the view of a window which is in shot, grab yourself some diffusion in a can.

You can find links to the frosted paint and the glass scraper we used in the description below.


This video was Sponsored By

http://bit.ly/corruption-pack - With glitchy overlays, distorted logo reveals and more, RocketStock’s "Corruption" is an ideal way to give your project a dramatic edge.

http://bit.ly/track-blue-blood - Thanks to PremiumBeat for providing the music for this week's episode. Check out Premiumbeat.com to discover a huge range of exclusive royalty free music!


Equipment Links

🎥 This episode's kit/gear/equipment:

US links:

Frosted Glass Paint: http://amzn.to/2gigxl5

Glass Scraper: http://amzn.to/2z7Kb0e

Masking Tape: http://amzn.to/2xFI1DJ


UK links:

Frosted Glass Paint: http://amzn.to/2yjbNTq

Glass Scraper: http://amzn.to/2xGPUOr

Make Tape: http://amzn.to/2xFCz8Z

diffusion-in-a-can

DISCLAIMERS:

Some of these links are affiliate links, if you purchase gear via these links The Film Look will receive a small commission, but there will be no additional cost to you. Thank you!

Popcorn Sunday #03

If you want us to watch your short film simply leave it in the comments with a quick line about the film. We can't put them all in the videos but we comment on every single one with some constructive feedback!

Links to the short film can be found below - 

Empty City by CineCam Media: https://youtu.be/RVn-I0Oe6RY

Wake up by Anthony Bassolino: https://youtu.be/ZWwqiuHBAU4


DISCLAIMERS:

Some of these links are affiliate links, if you purchase gear via these links The Film Look will receive a small commission, but there will be no additional cost to you. Thank you!

Light up your Camera Bag for less than $16 (or £16)

Today I’m going to show YOU a really cheap and simple way to add LED strip lighting to your camera bag without glue, tape, or nasty adhesives.

Instead we are going old school - we are going to grab a needle, some thread, and hand sew the lighting strip into place!

Finding equipment in your camera bag at night or in a dark environment can be difficult - especially considering everything is pretty much painted black. We’ve toyed with spray painting things bright colours in the past, such as our infamous orange lens caps.

But when you’re on a night shoot, something even as bright as this can get lost in your bag. So what can we do? It’s time to customise.

Lights-for-your-camera-bag-With-LED-lights.jpg

You can pick up a battery powered LED strip light on amazon for £7 (or $7.89 for our american cousins watching). And grab yourself a hand sewing kit while you are at it for 8 quid (or 8 bucks for the yanks). You can find links to the items we used in the description below.

This is all you’ll need to start, now just pick the bag you want to light up!

I’m going to be converting this Porta Brace camera bag as it’s always the bag which seems to create a dark void of oblivion.

First of all, work out where you want to attach the LED strip.

Choose somewhere in your bag where it doesn’t puncture the outer surface, such as an inner ridge or seam where a sewing line is already visible, like this spot here. This will avoid spoiling the outer protective surface of the bag, especially if it is waterproof.

Lights-for-your-camera-bag

I found that sewing 10 loops around the strip at a time, then moving an inch along and repeating the process worked pretty well. It was secure whilst not blocking the light from the LEDs. Find a pocket or sleeve for the battery pack to sit and you are all done!

By sewing the strip in rather than gluing it in place or using something like velcro, it just means you won’t get a horrible residue in your bag. It also means you can simply cut off the thread if you want to remove it.

Now you won’t have to hunt for your torch or use your phone as a light. Simply flick the switch to see inside your bag at night. And if you really want to, you can always activate disco mode.

Lights-for-your-camera-bag-With-LED-lights1.jpg

This video was Sponsored By

http://bit.ly/track-funk-fever - Thanks to PremiumBeat for providing the music for this week's episode. Check out Premiumbeat.com to discover a huge range of exclusive royalty free music!


Equipment Links

🎥 This episode's kit/gear/equipment:

US links:

LED strip: http://amzn.to/2fQ67ZF

Sewing kit: http://amzn.to/2yo1Rbz


UK links:

LED strip: http://amzn.to/2xRGHSq

Sewing kit: http://amzn.to/2fPUlP7


Light up your camera bag

DISCLAIMERS:

Some of these links are affiliate links, if you purchase gear via these links The Film Look will receive a small commission, but there will be no additional cost to you. Thank you!

The Next Short Film | Vlog #38

Another week of the video where we how behind the scenes of our video production guide, we spray paints costume items for our next short film Backstage, and we talk about the process of making a Film Look epsoide 

Links to all do the videos mentioned in the Vlog can be found below.


DISCLAIMERS:

Some of these links are affiliate links, if you purchase gear via these links The Film Look will receive a small commission, but there will be no additional cost to you. Thank you!

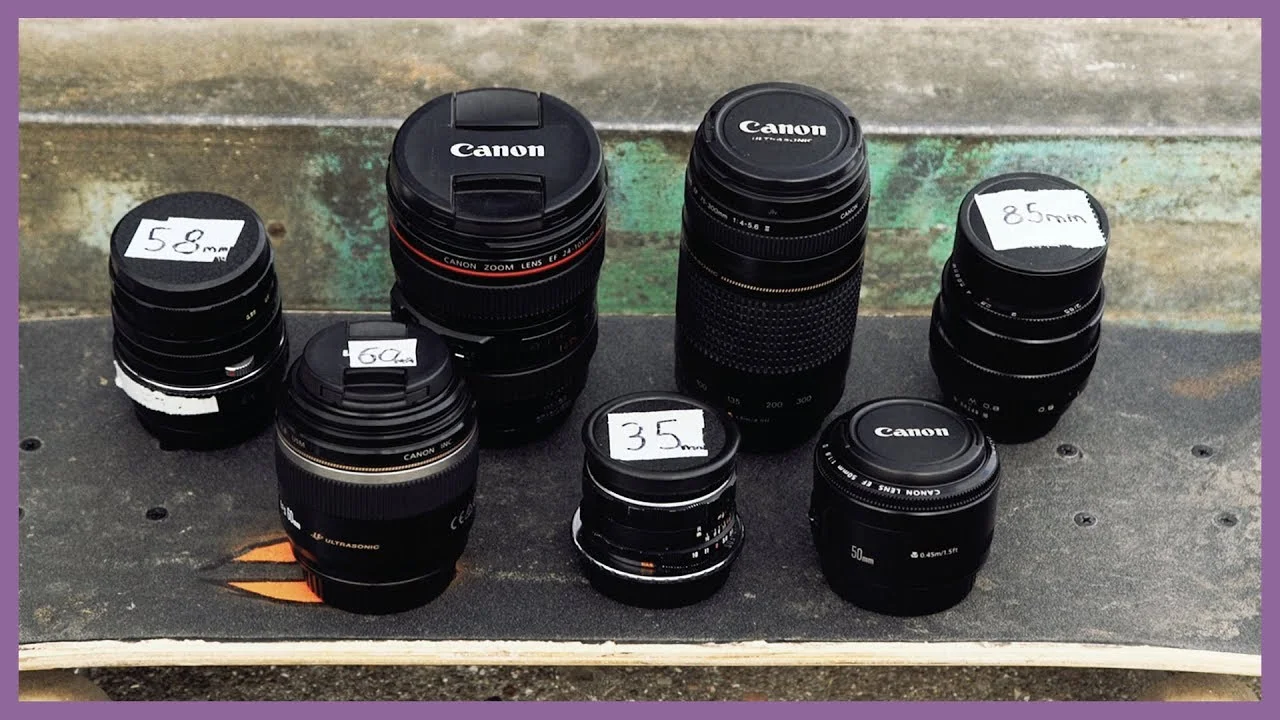
8 Filmmaking Lenses from $50-$500

We’ve built up a small collection of camera lenses over the years. Some are great, some are rubbish, some are cheap, and others more expensive. And they all do something a bit different.

Today we’re going to talk about our camera lenses. 

We have 8 different camera lenses that we use for film projects. Some we use a lot - and some are for very special occasions. We’ve had other lenses in the past, but we sell any lens that we simply don’t use - they can be expensive paper weights after all.

We’ve been purchasing lenses over the past 5 years or so, and the majority of our lenses are 2nd hand. Let's start off with the lens we use the most.

The Canon L series 24-105 @ f4.

[New: £649.99 - Used: £350]

This is the lens we have on the camera the majority of the time. Because of its wide focal range, it’s perfect for run and gun set ups because of it’s ability to go from a wide shot to a close up in a split second.

This lens also includes image stabilization, which means you can use this lens in hand held situations and not suffer from micro jitters. This is a great work horse lens for commercial and promotional video shoots and a quick turnaround film.

You get a very clean sterile look from this lens. It comes with a lens hood to prevent flaring, but if you want to get some sexy lens flares you can always take it off and embrace the flaws.

This lens does only stop down to f4. If you are looking for a low light lens or super shallow depth of field, this isn’t going to cut it. But it does bring me to the next lens in the line up!
The Canon 50mm @ f1.8.

Canon-50mm-F1.8

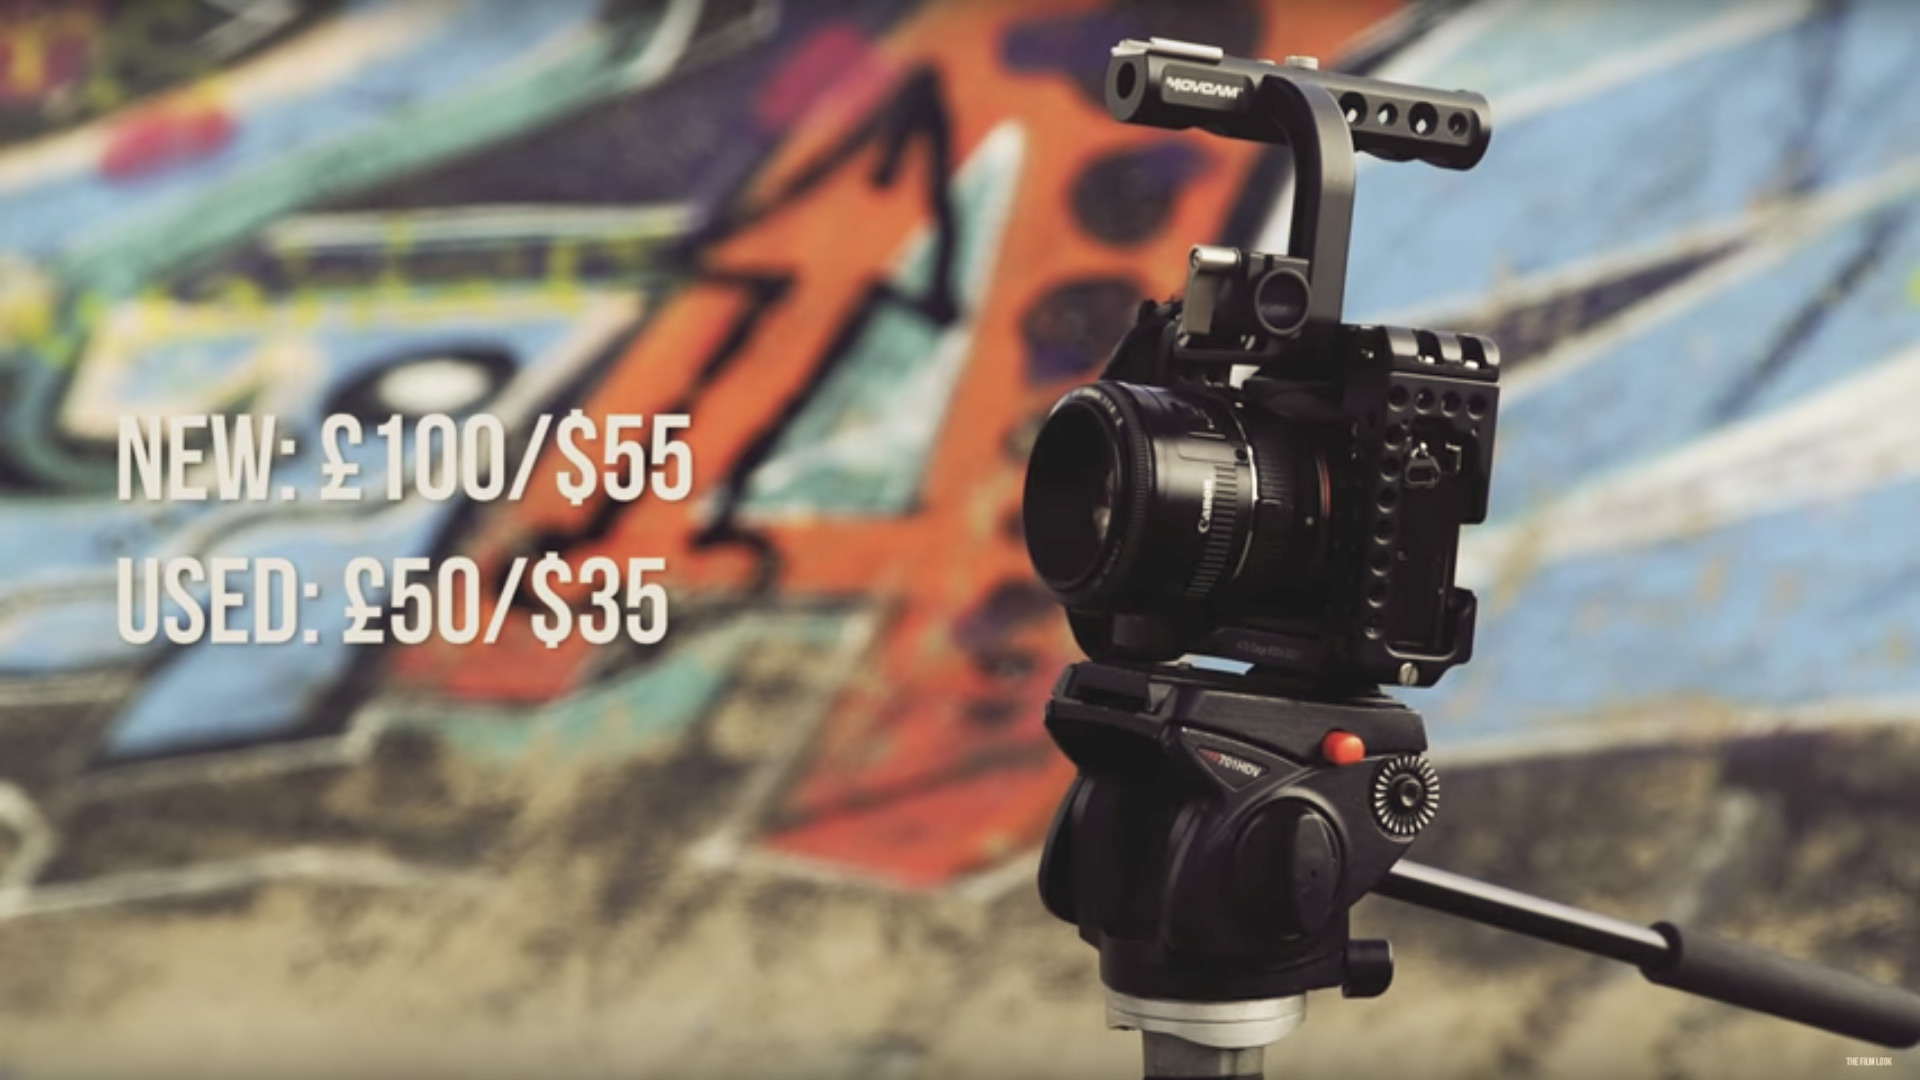
[New: £100 - Used: £50]

Also referred to as the nifty fifty, this is a great 2nd lens to have in your kit bag. It’s a prime lens, which means it can’t zoom in or out, but has incredible low light capabilities. This lens can stop down to f1.8 meaning it can let in a lot more light than other lenses. This feature also gives you an incredibly shallow depth of field which is ideal if you want to shoot something very arty and atmospheric.

At 50mm this lens is very pleasing to the eye. 50 millimetres is considered very close to the perspective of the human eye which helps retain natural sizes and shapes on a subject, especially on the human face. You don’t get a squashed or squirrel face like wide and telephoto focal lengths.

The bad thing about this version in particular is it’s lack of image stabilization. Put this in your hands and it will suffer from micro jitters. So get this locked onto a tripod if you want to avoid shaky footage.

It is also very fragile. The plastic body will mean it won’t last many drops or knocks. The focus ring on this model is also not silky smooth like more premium lenses, so pulling focus on this will be a bit more tricky.

This lens isn’t for every situation. But for it’s cheap price, it’s a great secret weapon if you want to give your shot a bit more style and if you need to shoot in a low light situation. This is also the lens are we using right now!

Next on the list is another Canon.

This time it’s the 60mm Macro @ f2.8.

Canon-60mm-Macro-F2.8.jpg

[New: £450 - Used: £250]

This lens isn’t a workhorse -  it’s definitely for particular situations. Because of it’s incredible macro capabilities, this lens can get super duper close to a subject and stay in focus. You’ll find with most lenses that you will need to keep a significant distance in order to stay in focus, but with this lens you can focus onto the end of a pin, great for shooting phone screens, words on a page, or extreme macro close ups.

This lens also stops down to f2.8 which means it can give you razor thin depth of field and is more than capable of performing well in low light situations.

This version of the lens doesn’t have image stabilization. So, like the nifty fifty, get this on a tripod and lock it down to avoid any micro jitters.

This lens is also made for APS-C sensors, which means it will vignette if you put it on a full frame camera. We combat this by changing the setting of our A7s to APS-C and cropping the image in.

Next is our wide angle lens - the Tokina 11-16mm @ f2.8.

Tokina-11-16mm-@-f2.8.jpg

[New: £280 - Used: £200]

This is technically an APS-C grade lens which means if you put it on a full frame camera like our Sony A7S and zoom it out to 11mm, you will see some major vignetting. The good thing is that if you zoom it into 16mm this will disappear, so just treat it like a prime lens!

We don’t shoot on this lens a lot, but it’s there in case we ever need to get a super wide angle. We have used this in the past on our vlogs so we can get the whole studio in shot, and we love to use this lens when shoot time lapses.

The Tokina also stops down to f2.8 so it lets in a lot of light.

Just be careful when shooting with this lens. We used it to film a segment of our Podcast and because of the perspective, we ended up turning Rob into a Hobbit.

Next we have the first of our vintage lenses. The Takumar 35mm @ f3.5.

Takumar-35mm-@-f3.5.jpg

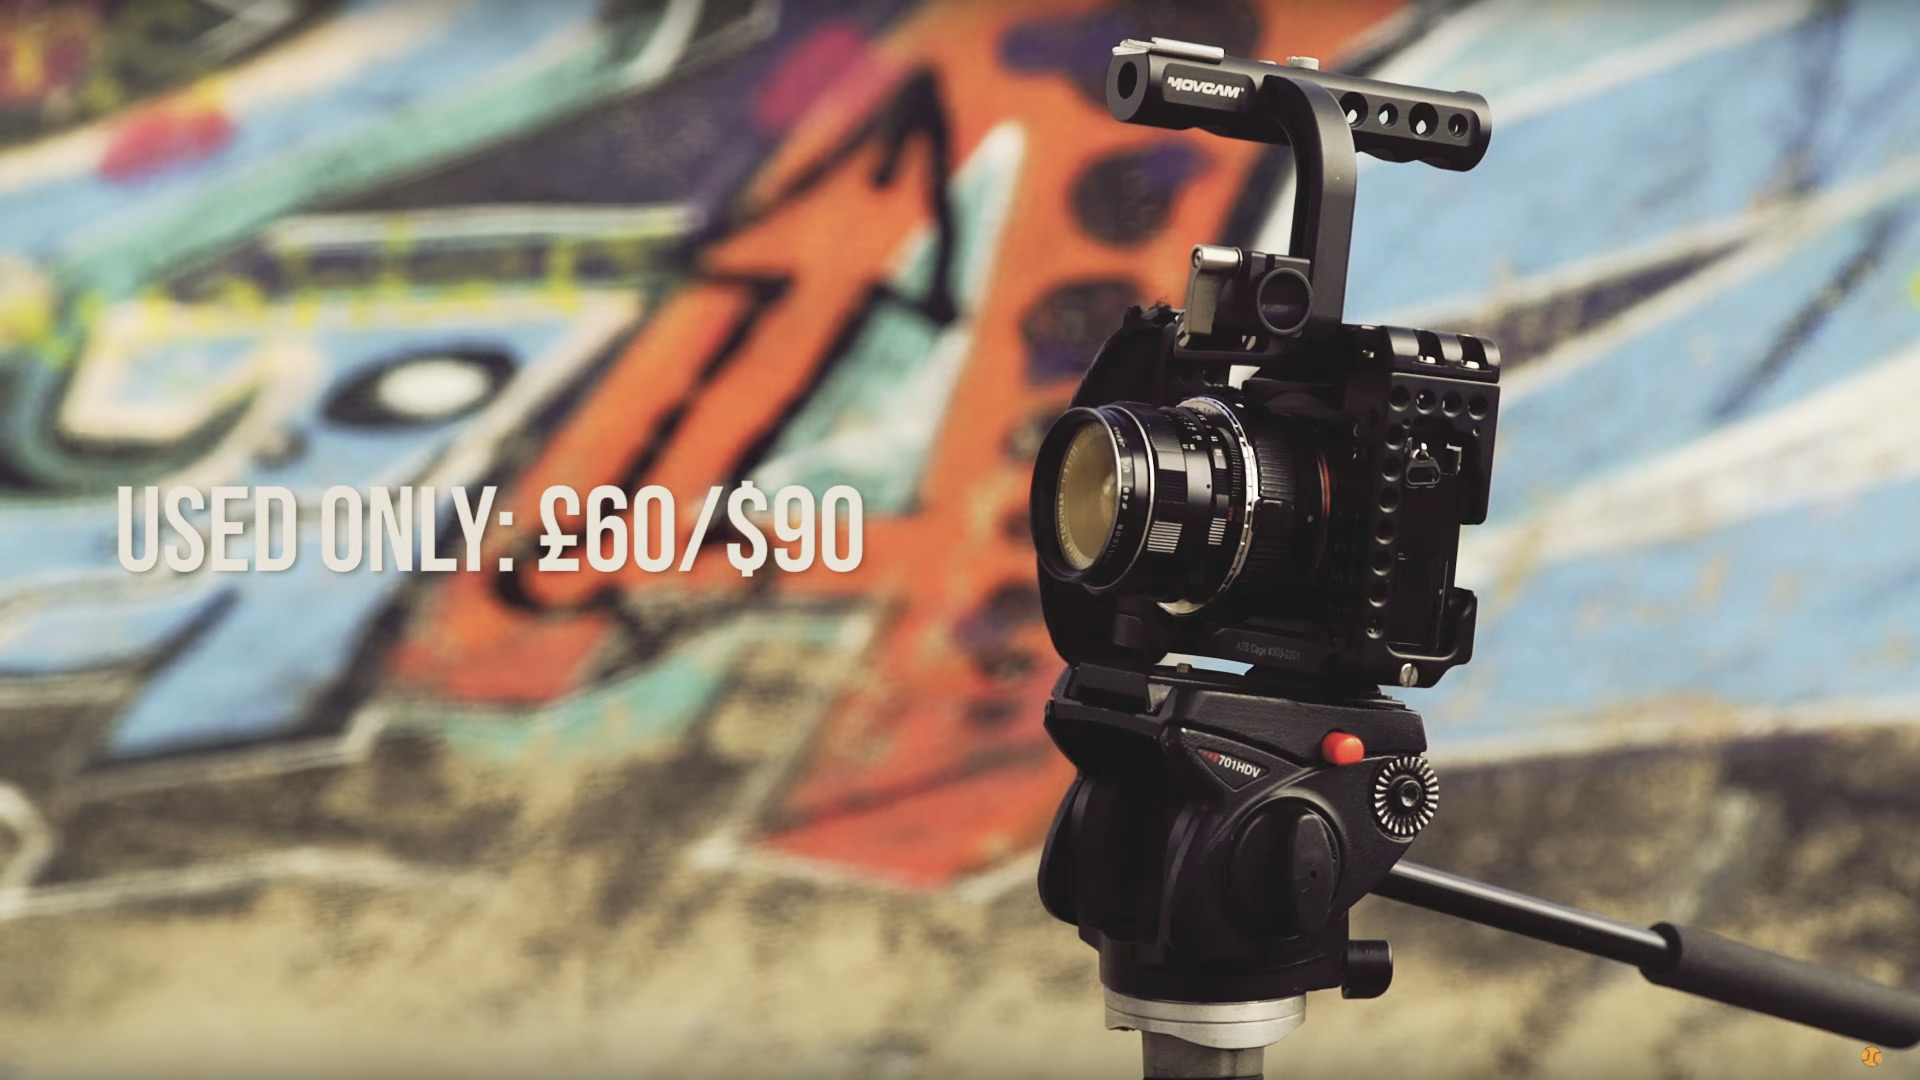
[Used only: £60]

You might be wondering why you’d go for a vintage lens rather than a new lens. We have a video all about vintages lenses here that goes into detail, but basically vintage lenses tend to be sharper, built better, and they usually come with some unique visual flaws which add some real style to your shot.

The Takumar is a fiercely sharp vintage prime. It’s focal length gives a nice wide angle without distortion, and it gives your shot a really nice faded vignette. Vintage lenses tend to offer something a bit more in terms style - they are far from sterile.

Next we have our vintage telephoto prime. The Jupiter Nine 85mm @ f2.

Jupiter-Nine-85mm-@-f2.jpg

[Used only: £120]

With this lens, you’ll either hate it or love it. It’s a vintage lens, which means it’s built really well, the glass is superb, and it’s nice and sharp. It also stops down to f2 so it’s great in a low light situation and gives you really soft shallow depth of field.

But it comes with some flaws which you either have to tackle or embrace. The Jupiter Nine has some serious lens flares, and at lower f stops it does add a slight vignette. If you’re looking for a smooth, dreamy look, this is the lens for you. If you need something that shoots a super clean image, you will have to spend some time learning how to tame this beast.

We purchased a lens hood that reduces most of the major lens flares, but for the best results you will have to place some flags just out of frame like we do in this video here about our “no lights” lighting setup.

This is my favourite lens. It’s got some serious character.

So, we have a wide vintage prime, a telephoto vintage prime, and now we have a mid-range vintage prime. The Helios 44m 58mm @ f2.

Helios-44m-58mm-@-f2.jpg

[Used only: £25]

Like the other vintage lenses we have, you can see straight away that this lens is built a heck of a lot better than something in the similar focal range like nifty fifty but at a fraction of the price. The unique flaw in this lens is it’s famous swirly bokeh. The bokeh balls seem to wrap around a subject when shooting at a low f stop, giving it a very unique look.

Last on the list is our most telephoto lens in the collection. The Canon 75-300mm @ f4-5.6.

Canon-75-300mm-@-f4-5.6.jpg

[Used only: £80]

I’ll talk about the downsides to this lens to begin with, just to get it out of the way. First of all, it’s got a shoddy plastic construction. The zoom and focus ring are a bit loose, and the picture you get out of this is a little bit milky compared to something a bit more expensive.

It features a massive macro distance of 1.5 metres to get in focus, and it doesn’t feature image stabilization so you NEED to lock this lens down onto a tripod. It also features a variable f stop, which means that it will change from f4 when you shoot at 75mm to f5.6 when you shoot at 300mm. This may seem like it isn’t a big deal but it’s definitely something to be aware of.

The one good thing about this lens is simply it’s focal length. At the maximum focal distance of 300mm, the shot you get out of this looks like no other. It’s great for simulating binoculars and giving the shot an “espionage” feel.

All of the lenses have their own character and language. Just remember to choose the right tool for the right job.


This video is sponsored By 

http://bit.ly/pack-emulsion - Make your video look like it was tailor-made for the silver screen with RocketStock’s film grain overlay pack, Emulsion!

http://bit.ly/track-losinggames - Click here to download this episode's track. Check out Premiumbeat.com to discover a huge range of exclusive royalty free music!


Equipment Links

🎥 This episode's kit/gear/equipment:

US links:

Canon 24-105mm: http://amzn.to/2fWen7v

Canon 50mm f/1.8: http://amzn.to/2fVVzoQ

Canon 60mm Macro: http://amzn.to/2ycaGFg

Tokina 11-16mm: http://amzn.to/2fW0aHu

Takumar 35mm: http://amzn.to/2yLjPBU

Jupiter Nine 85mm: http://amzn.to/2xKRDQR

Helios 44m 58mm: http://amzn.to/2x1GKf2

Canon 75-300mm: http://amzn.to/2yMis5R


UK links:

Canon 24-105mm: http://amzn.to/2woCL7F

Canon 50mm f/1.8: http://amzn.to/2wnWK6y

Canon 60mm Macro: http://amzn.to/2xBOxj4

Tokina 11-16mm: http://amzn.to/2fFwt0p

Takumar 35mm: http://amzn.to/2wojkfc

Jupiter Nine 85mm: http://amzn.to/2wokiYS

Helios 44m 58mm: http://amzn.to/2ywzPXm

Canon 75-300mm: http://amzn.to/2woqj89


8 Filmmaking Lenses from $50-$500

DISCLAIMERS:

Some of these links are affiliate links, if you purchase gear via these links The Film Look will receive a small commission, but there will be no additional cost to you. Thank you!